

How to Set up Guru Zoko AI Bot
Learn how to set up the Guru Zoko AI bot, an AI-powered FAQ tool that guides customers and handles technical, general, and niche queries seamlessly.
Share on WhatsApp
.png)
When your customers have questions about your products or niche topics, handling a flood of chat queries can be overwhelming. That's where Guru - The FAQ Bot comes in. It's a Zoko AI-powered tool that you can train to handle these common queries, making customer interactions smoother. Among ChatGPT bots, GURU stands out for its accuracy and speed in providing answers. In this article, I'll walk you through setting up GURU Zoko AI bot for your business.
Before you proceed, ensure that your ChatGPT accounts are integrated to Zoko to enable the bot. If you haven't done so, refer to our article on How to Integrate Your ChatGPT Account
To do this:
1. Go to AI & Automation and click on Zoko AI.
2. Select GURU.

Step 1: Train the Bot
Under Train Me section. You’ll see two options:
- Knowledge Base
- Knowledge Gaps
A) Knowledge Base
The Knowledge Base is where you train the bot so it can learn and respond accurately.
1. Click on Knowledge Base.
2. Click on Add Training Source
3. Choose one of the following options from the dropdown:
- File: Upload PDFs such as brochures, FAQs, or product documents. Guru will analyze the content and use it to answer customer queries.
- Text: With this option, you can input text directly into the bot. You can type out commonly asked questions and their corresponding answers, facilitating the bot's knowledge base.
- Q&A: Create a structured question-and-answer format within the bot. You can input specific questions and their corresponding answers.
In our case, we selected Q&A.
4. Type the question in the field. In our case, we added the question as "How can I pay for my order?"
5. Add more variations of the question to improve matching accuracy:
- Click on the “+” icon
- Add variations such as: “What payment options are available?” and “Do you accept credit cards, PayPal, or other forms of payment?”
- Click Add after each variation.

6. You can also delete the variations that you created by clicking on “×” icon next to it.
7. Type the desired answer in the provided field. In our case, we added answer as "We offer various payment options for your convenience, including major credit cards like Visa, Mastercard, American Express, and Discover. You can also pay securely through PayPal for added flexibility and peace of mind."
8. You can also enhance responses by adding:
- Emojis
- File, Image, or Video.
9. Click on Save.
B) Knowledge Gaps
Knowledge Gaps help you identify unanswered or outdated queries by analyzing ticket patterns and AI content audits.
1. Go to Knowledge Gaps.
2. Turn on AI learning to identify the most impactful questions.
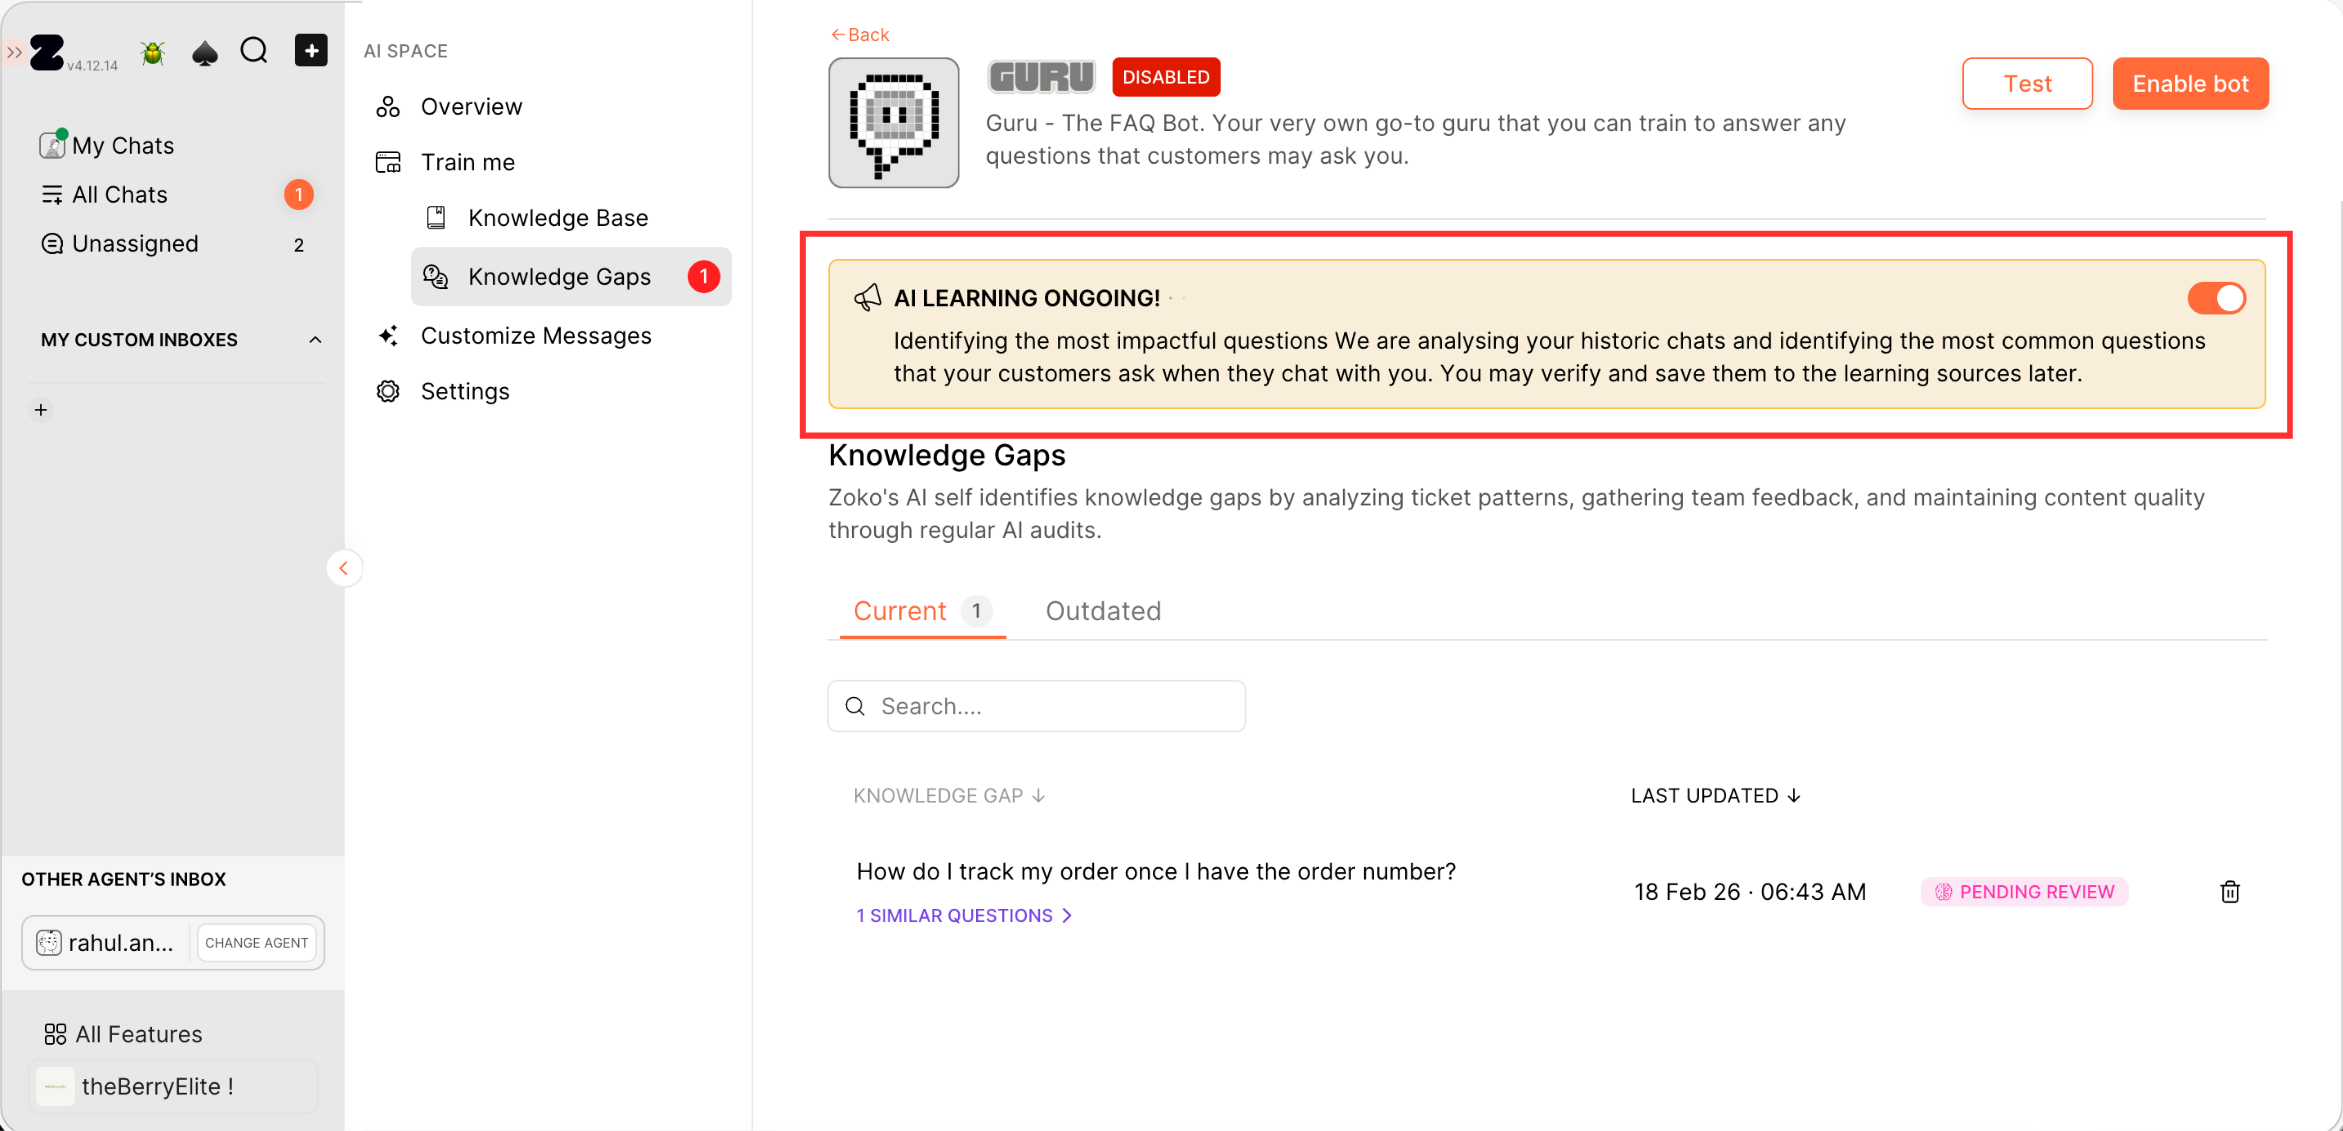
3. You will see two sections - Current and outdated.
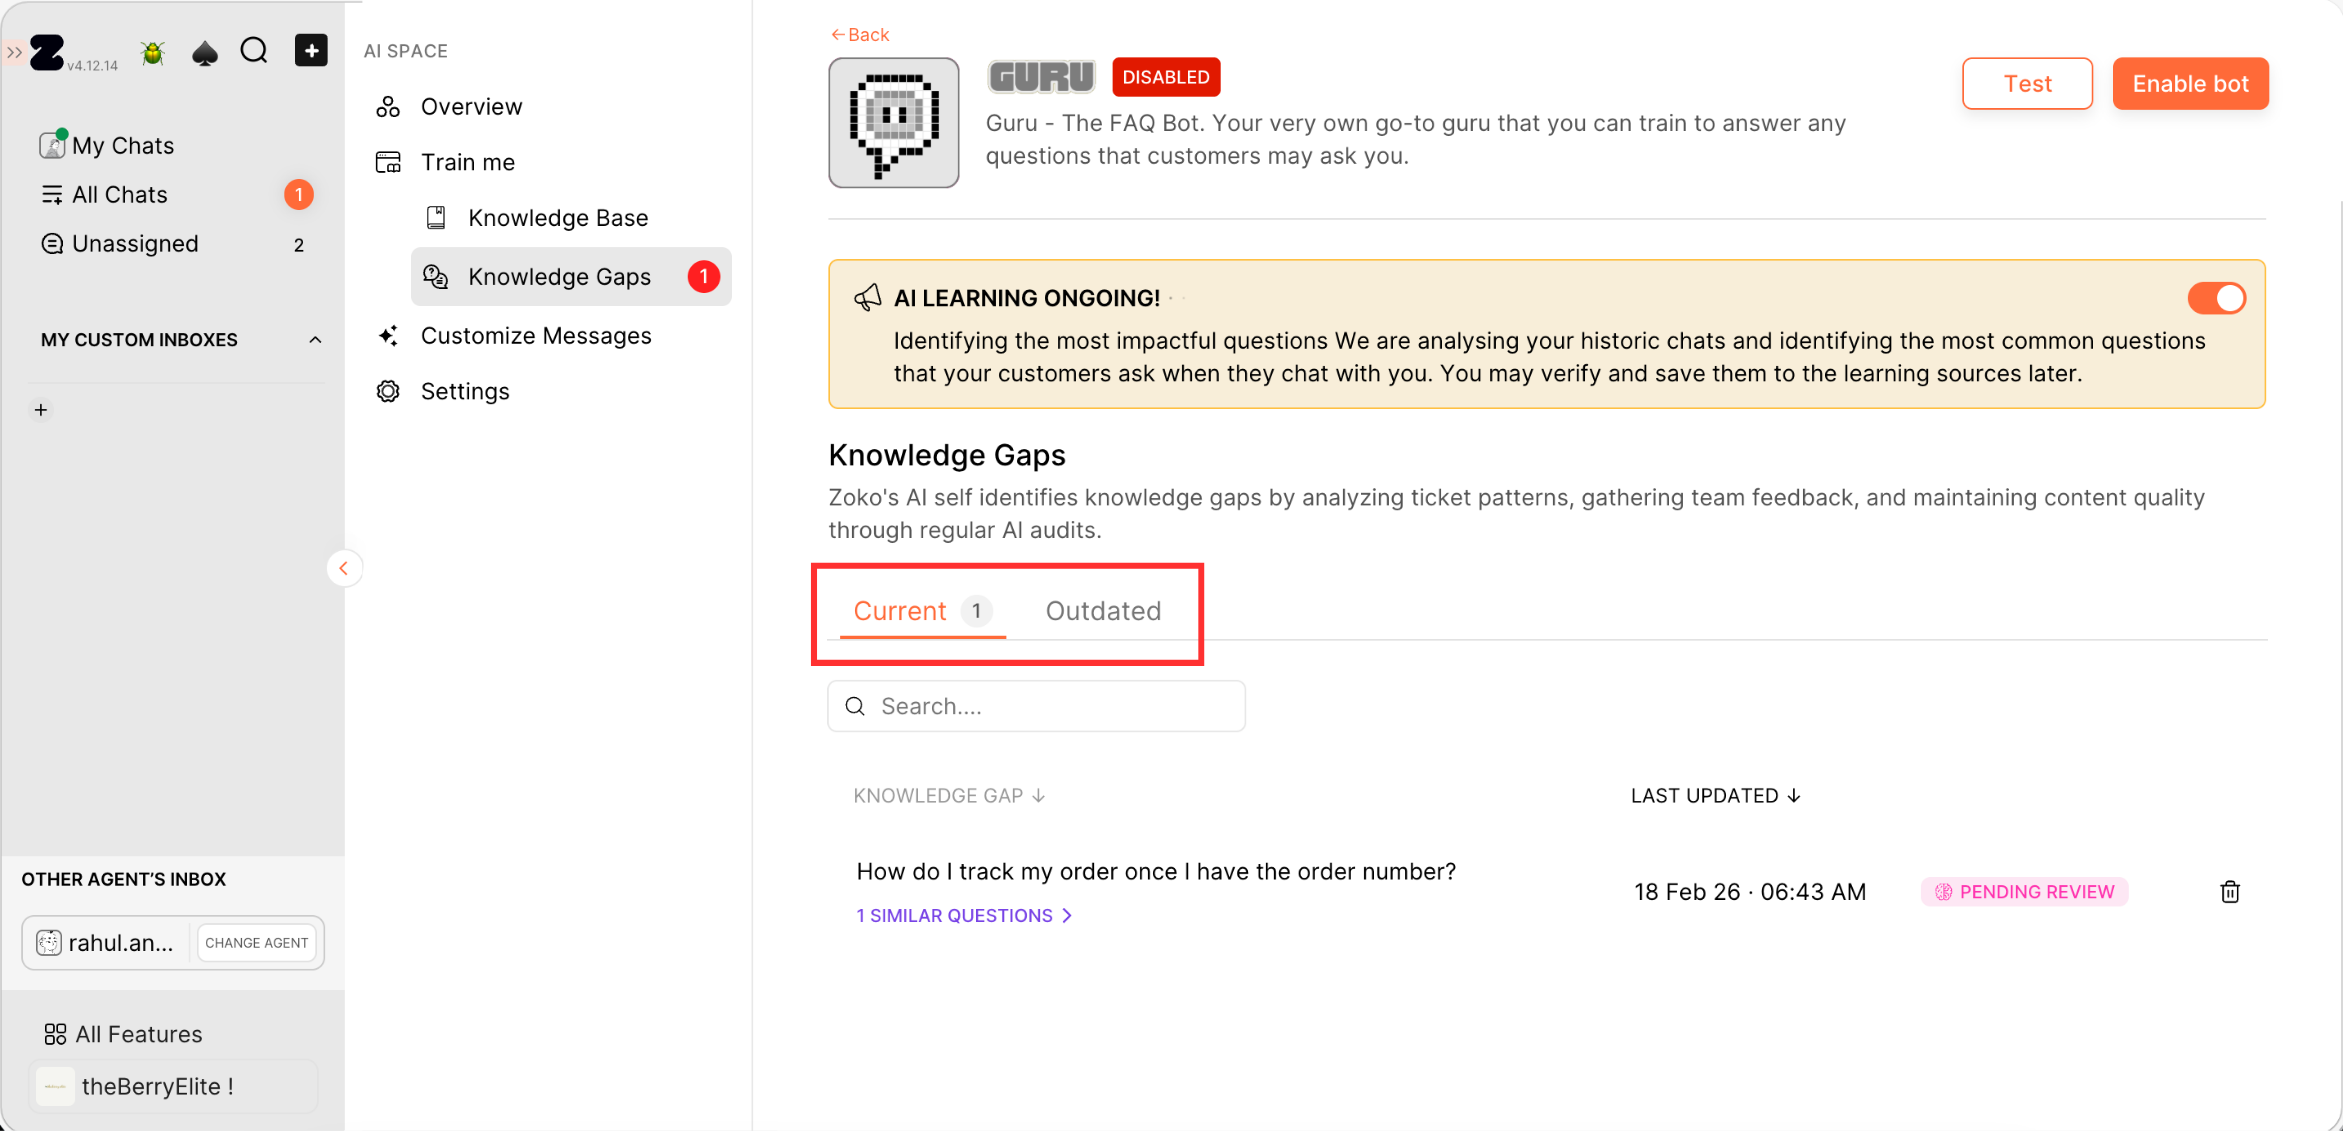
4. Click on any content item to open the pop-up window, review and update the content as needed, and save the changes once done.
Step 2: Customize Bot Messages
1. Go to Customize Messages.
2. Here you can edit default bot messages:
- Select a language from the dropdown.
- Hover over any message and click on it.
- Edit the text in the body field.
- Click Save & Close.
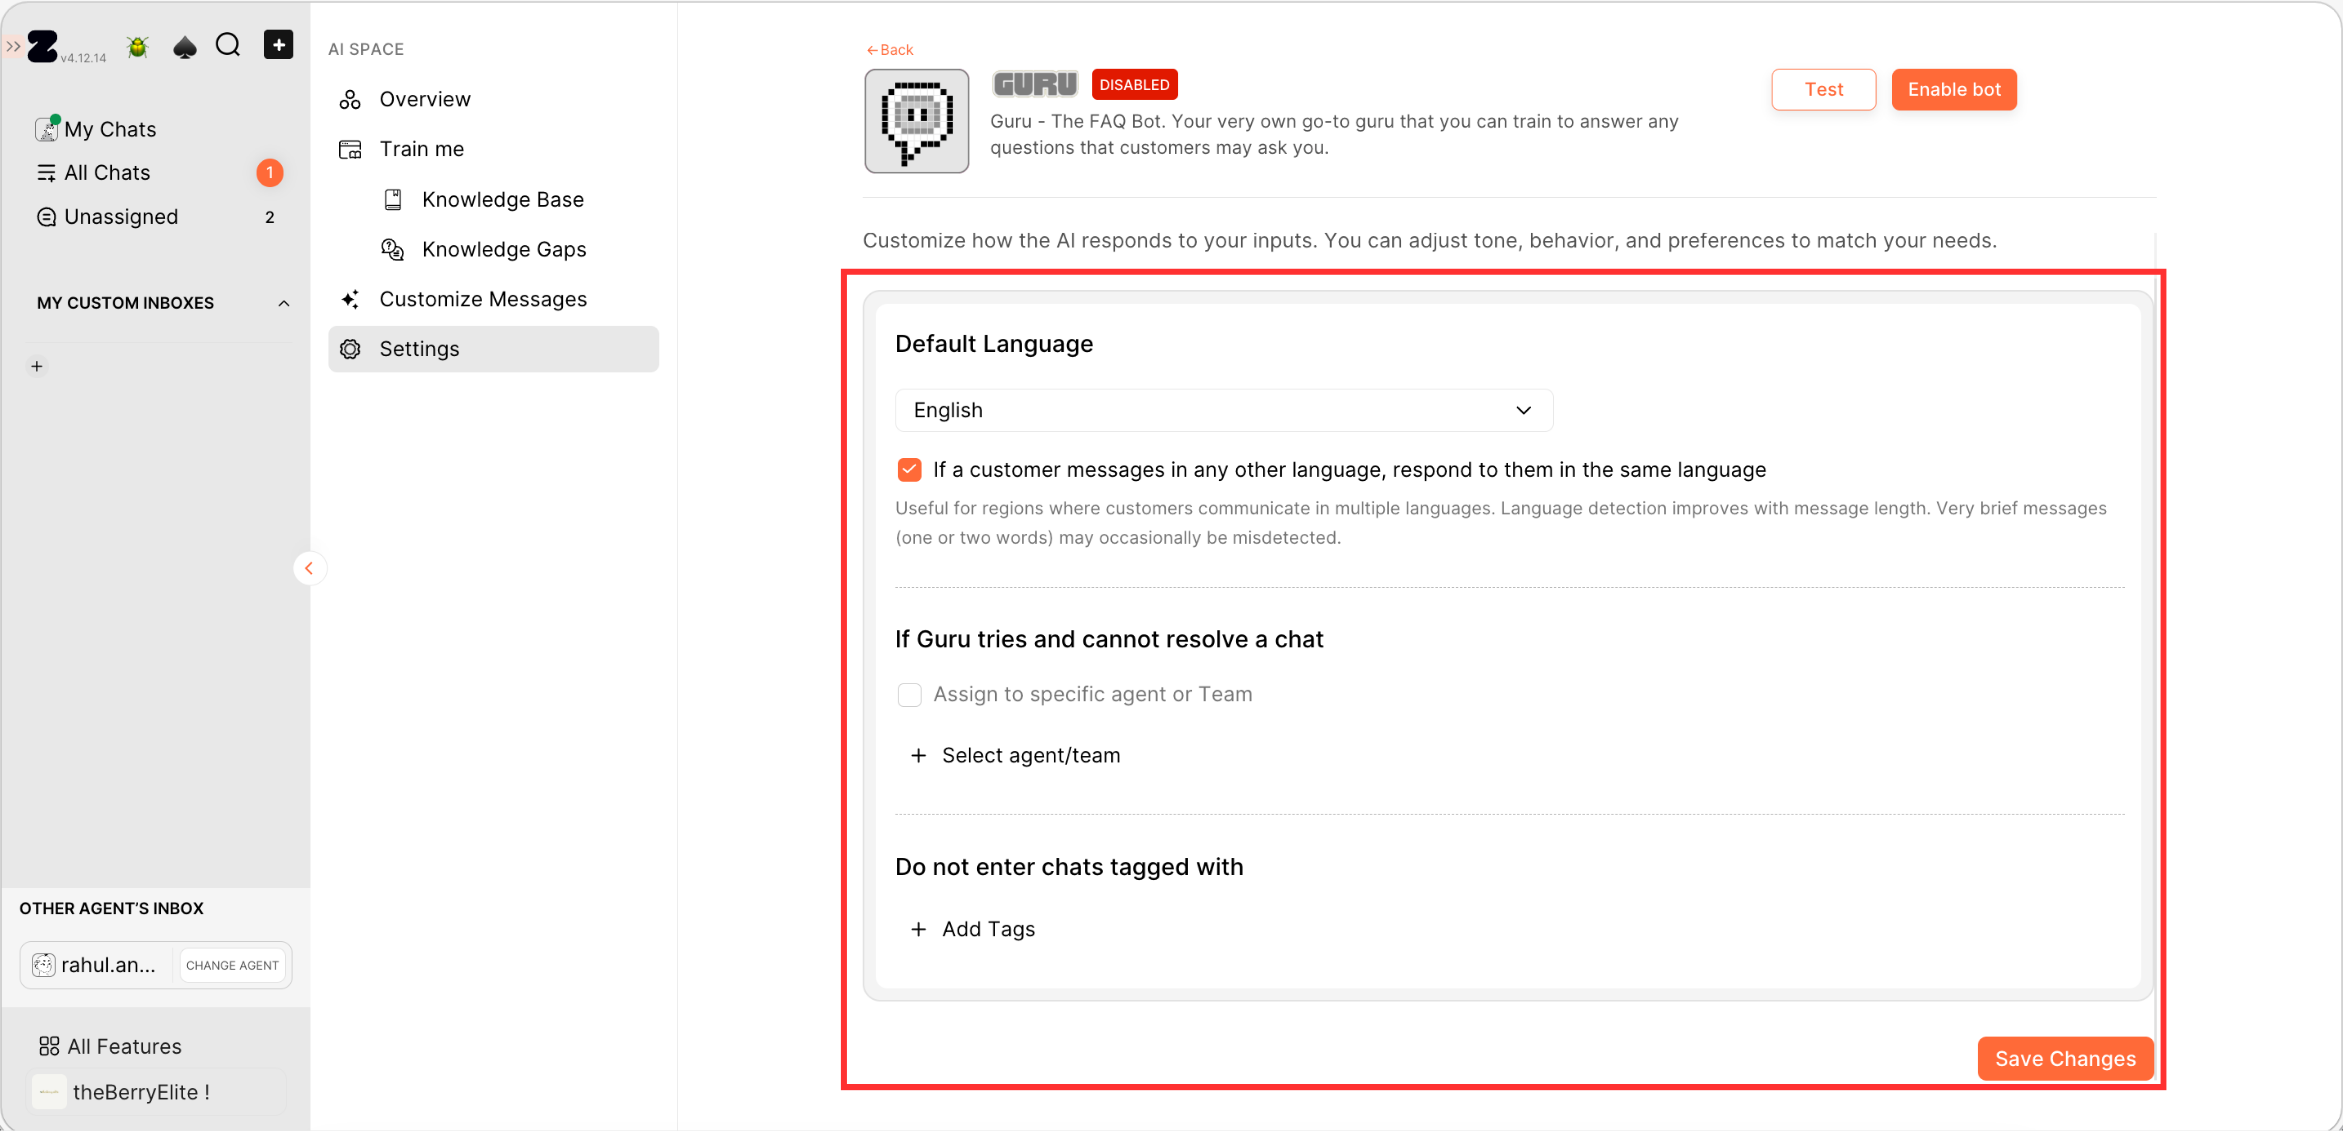
Step 3: Advanced Settings Configuration
1. Go to the Settings.
2. Set up the following options:
Default Language
- Choose the language in which the bot should respond.
Pro tip: Enable the checkbox to allow the bot to reply in the customer’s language automatically.
Assign to Agent if Unresolved
- If Guru can’t resolve a conversation, enable chat assignment.
- Click +, select an agent or team, and save.
Exclude VIP Customers from Bot Replies
- If you don’t want the bot to respond to VIP customers:
- Add the VIP tag under excluded tags.
- Guru will ignore chats with this tag.
Click Save Changes.
3. Go back to the Overview section and click on Test.
Note: Before going live, test the bot:
- Scan the QR code using your phone
- A WhatsApp chat opens with a pre-filled message
- Do not edit the message, just click Send
4. Once satisfied, proceed to enable the bot by clicking on Enable bot.
Step 5: Train Guru & Respond Directly from Chats
1. Alternatively, you can train the Q&A directly from the chat screen. Just open a customer conversation, hover over the customer’s query to find the Train icon, and click on it to view the answer options on the right side.
2. The answer will be automatically generated based on how you’ve trained the bot. If no suitable answer is available, you can easily create or customize one. Just click on the pencil icon, edit the question and answer in the pop-up window, and click Save.
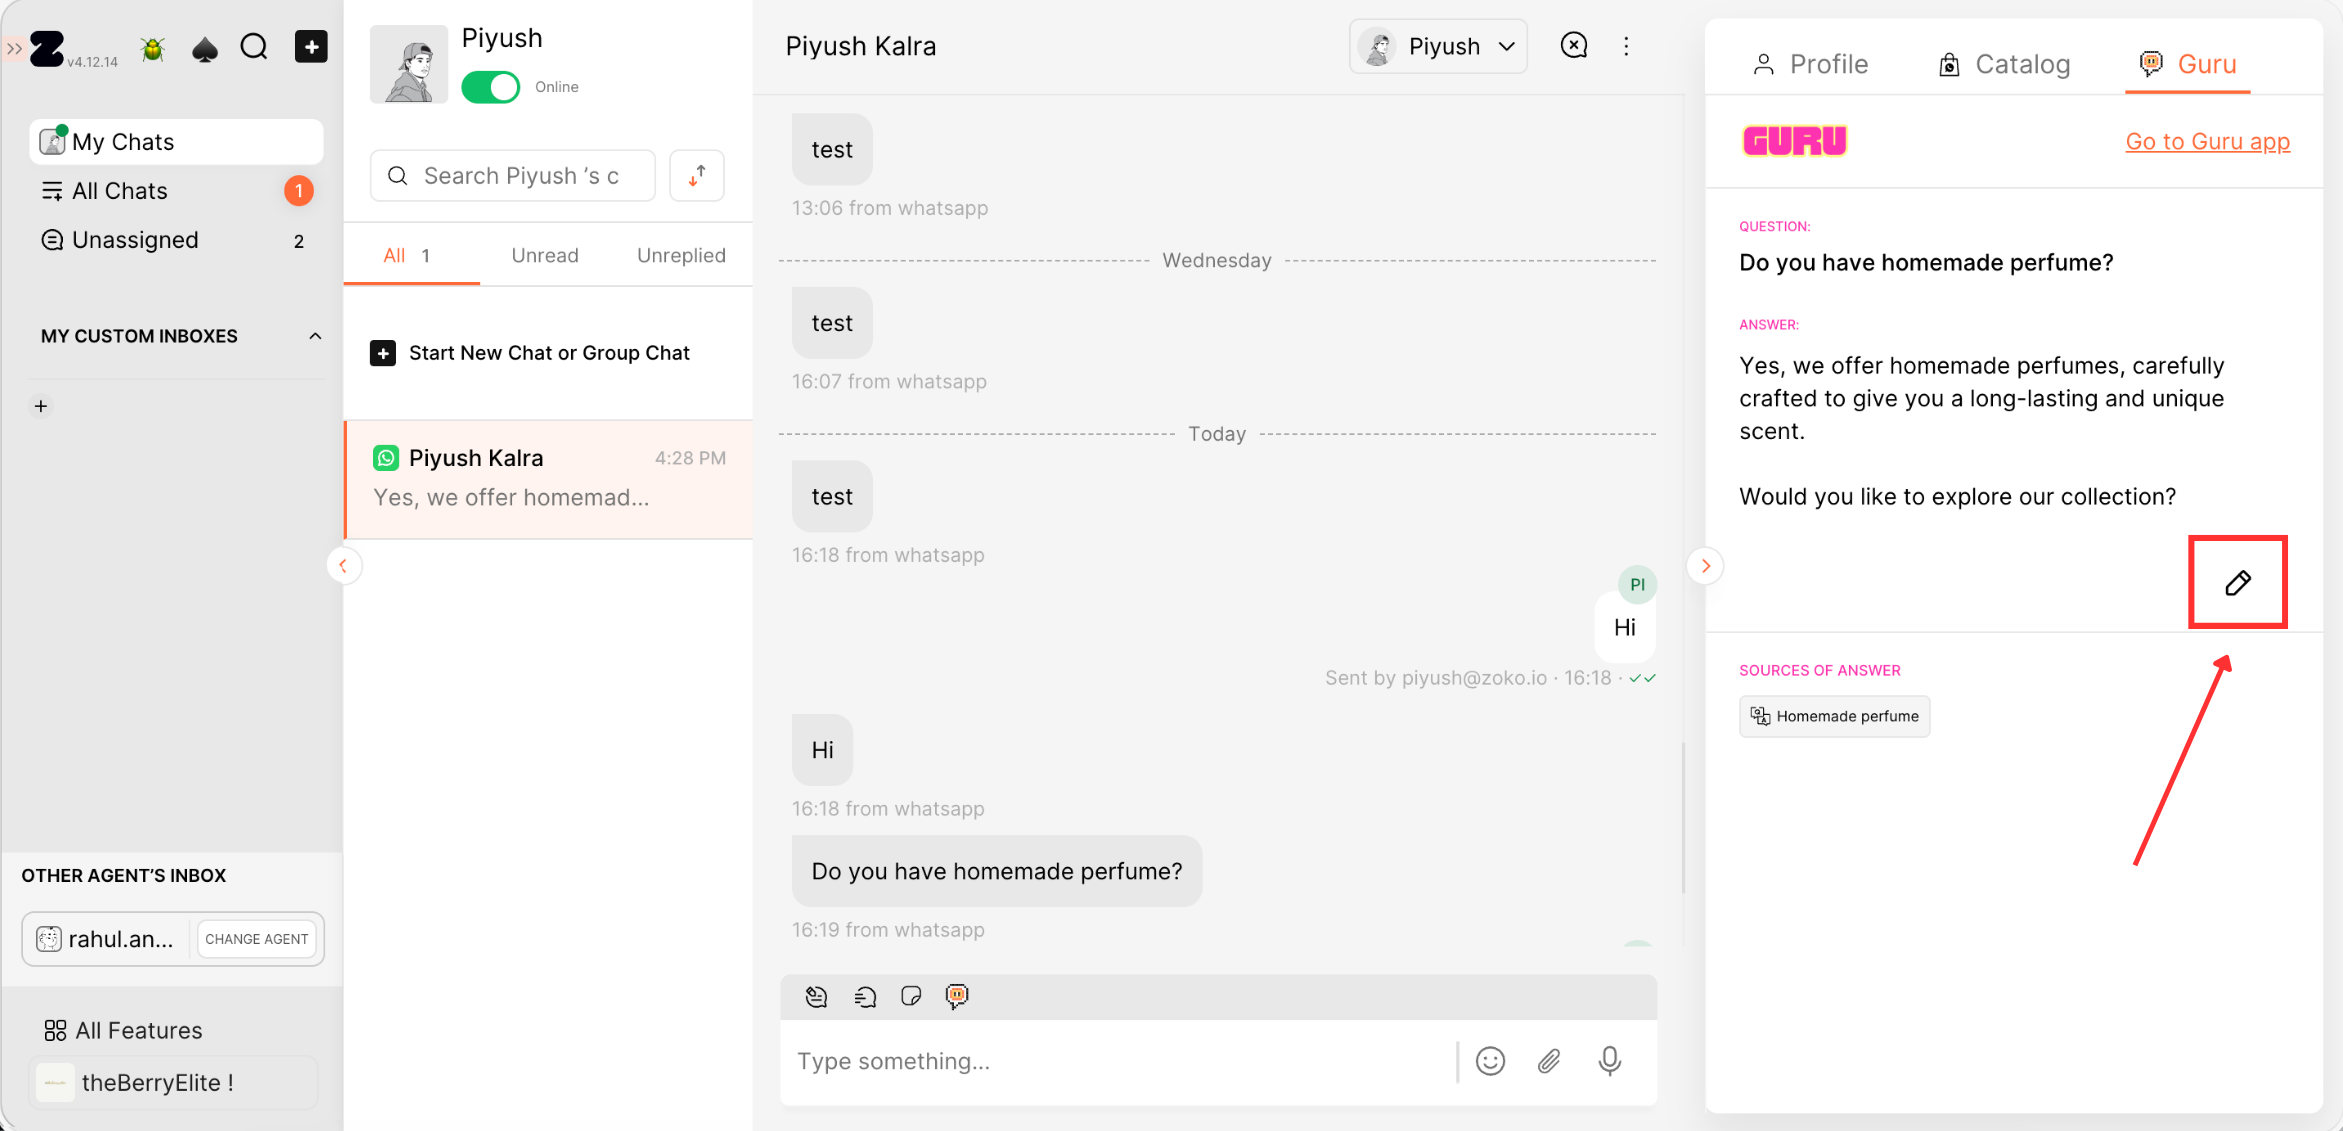
3. You have the option to get an answer to the customer’s question by clicking on the AI Suggested icon. The response will be generated based on how you’ve trained the bot, and you can review and send it instantly.
That's it! You have successfully set up. Now, watch as the bot effortlessly guides your customers through the entire process. Sit back and let Guru work its magic!
Keywords: FAQ, General Questions, ChatGPT, Bot, Automate messages, Conversations, Guru, Q&A, Products.