How to Set Up Zoko Billing on Your Shopify
Learn how to set-up your billing correctly to ensure uninterrupted service.
Before you can start using Zoko to chat with your customers, there’s one quick thing you need to do – set up your billing.
There are two types of billing you’ll need eventually:
- One for Zoko, which covers your subscription to our platform (Details are explained here).
- And one for Meta, which handles charges for your WhatsApp conversations.
In this article, we’re focusing on Zoko Billing. Let’s get started:
1. Go to More section.
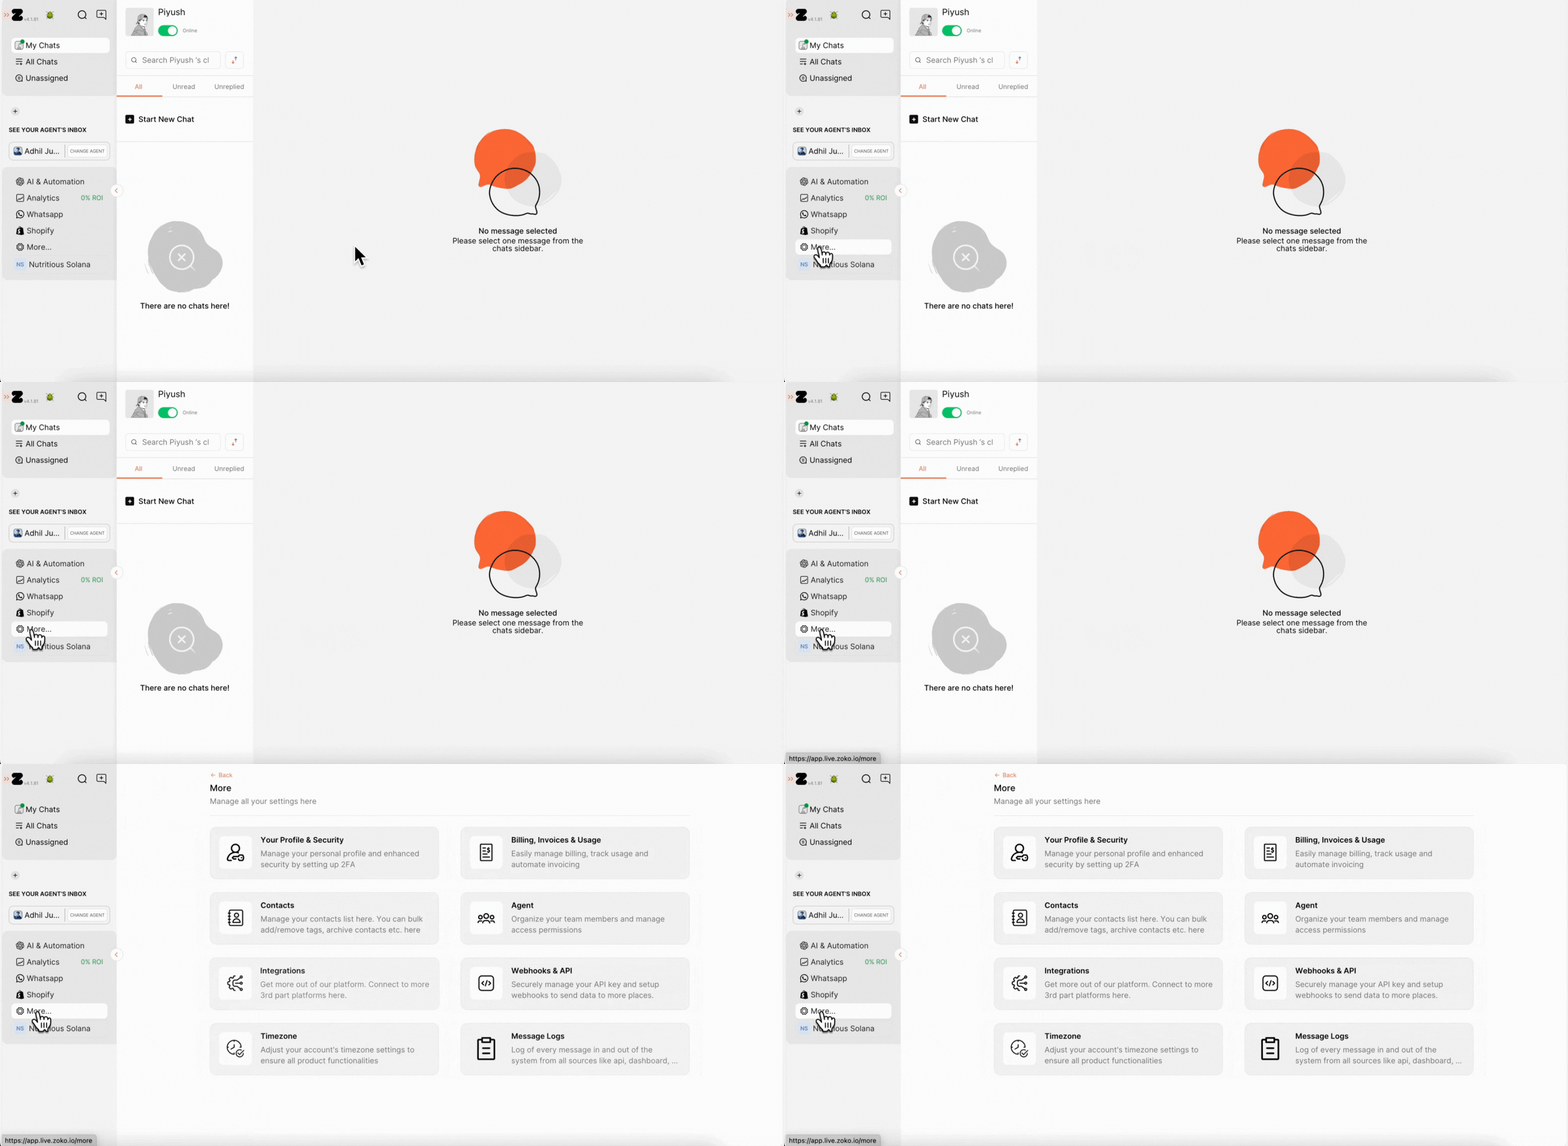
2. Click on Billing, Invoices & Usage.
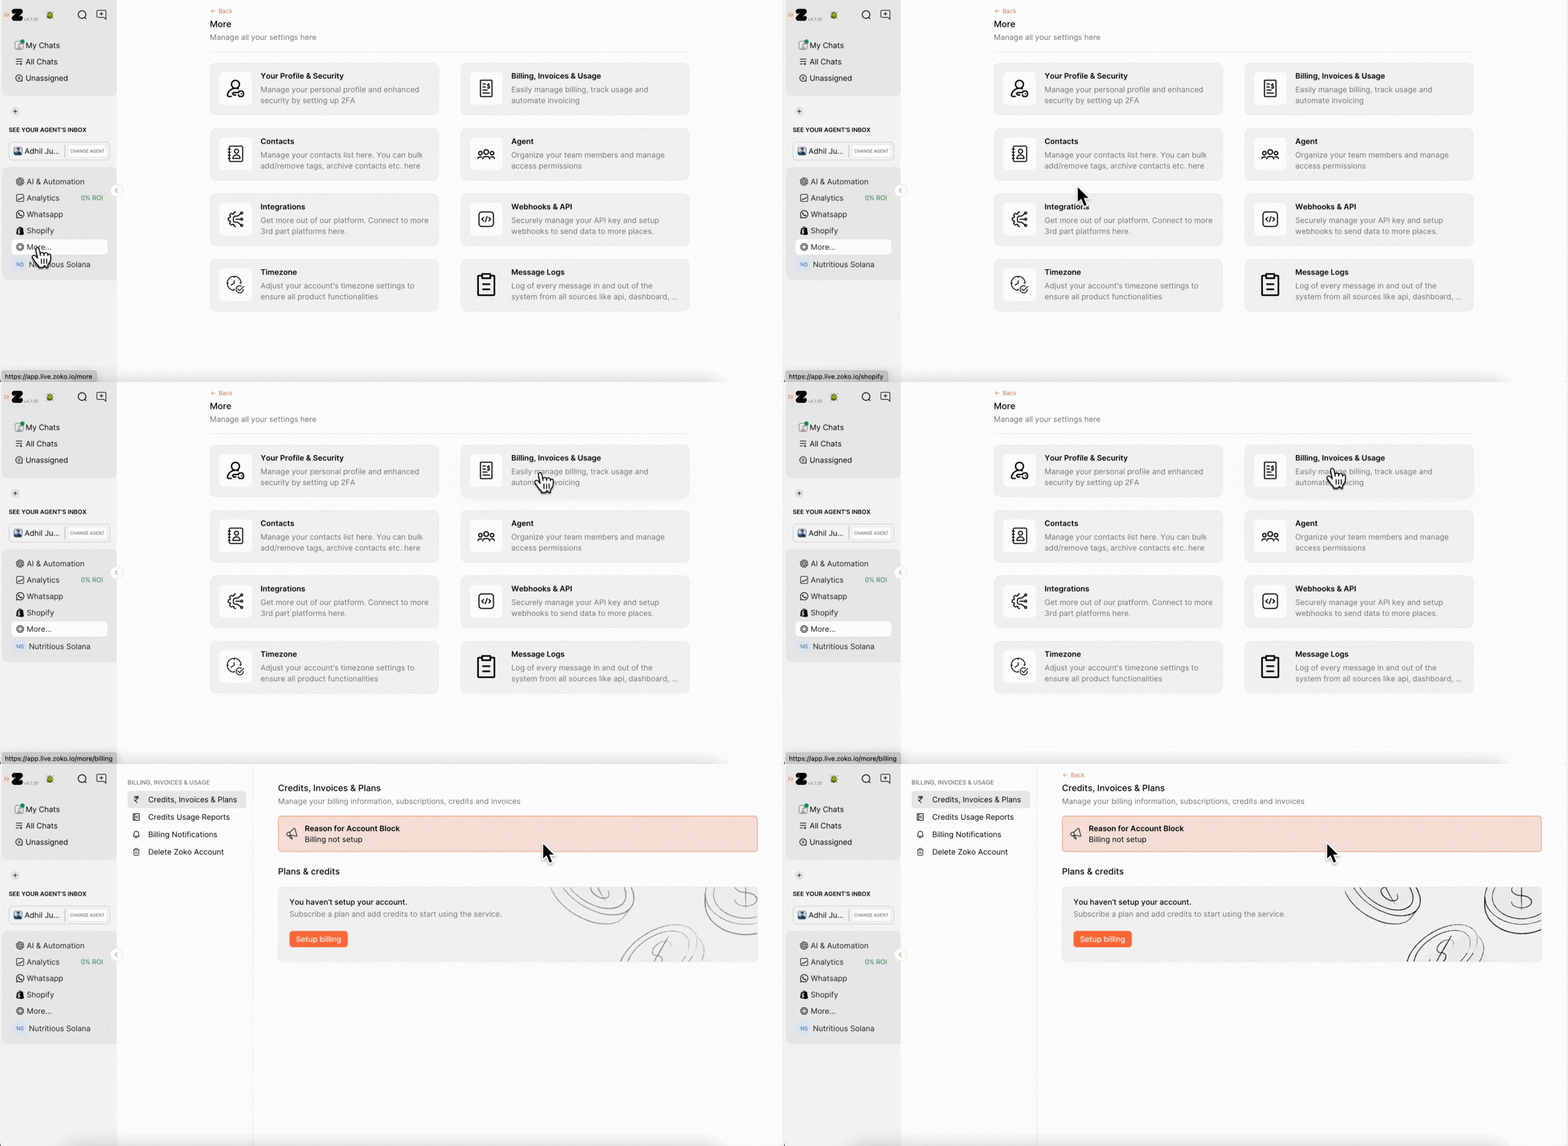
3. Click on Setup billing.
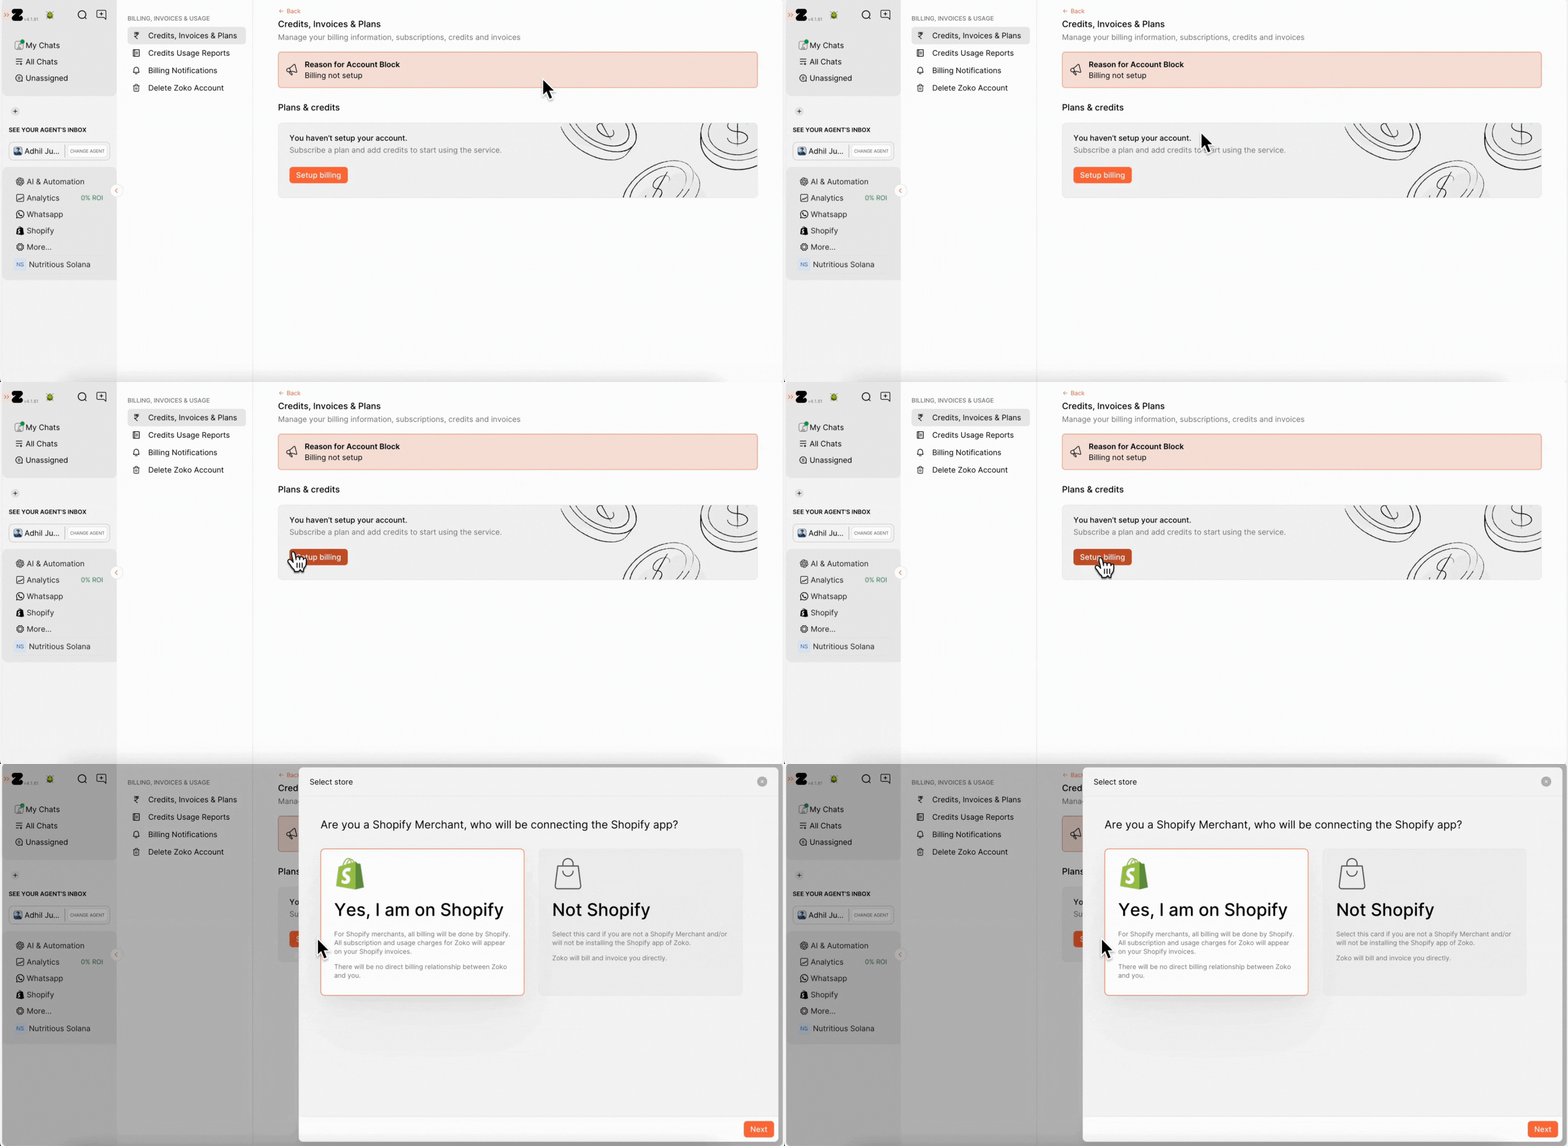
4. A popup will appear asking you to choose your store type:
- If you’re a Shopify merchant – meaning your website runs on Shopify—select “Yes, I am on Shopify.”
- If your site is built on another platform, choose “Not Shopify” instead, and we’ve covered that process in a separate guide.
In this case, we’ll go with the Shopify. Click Next to continue.
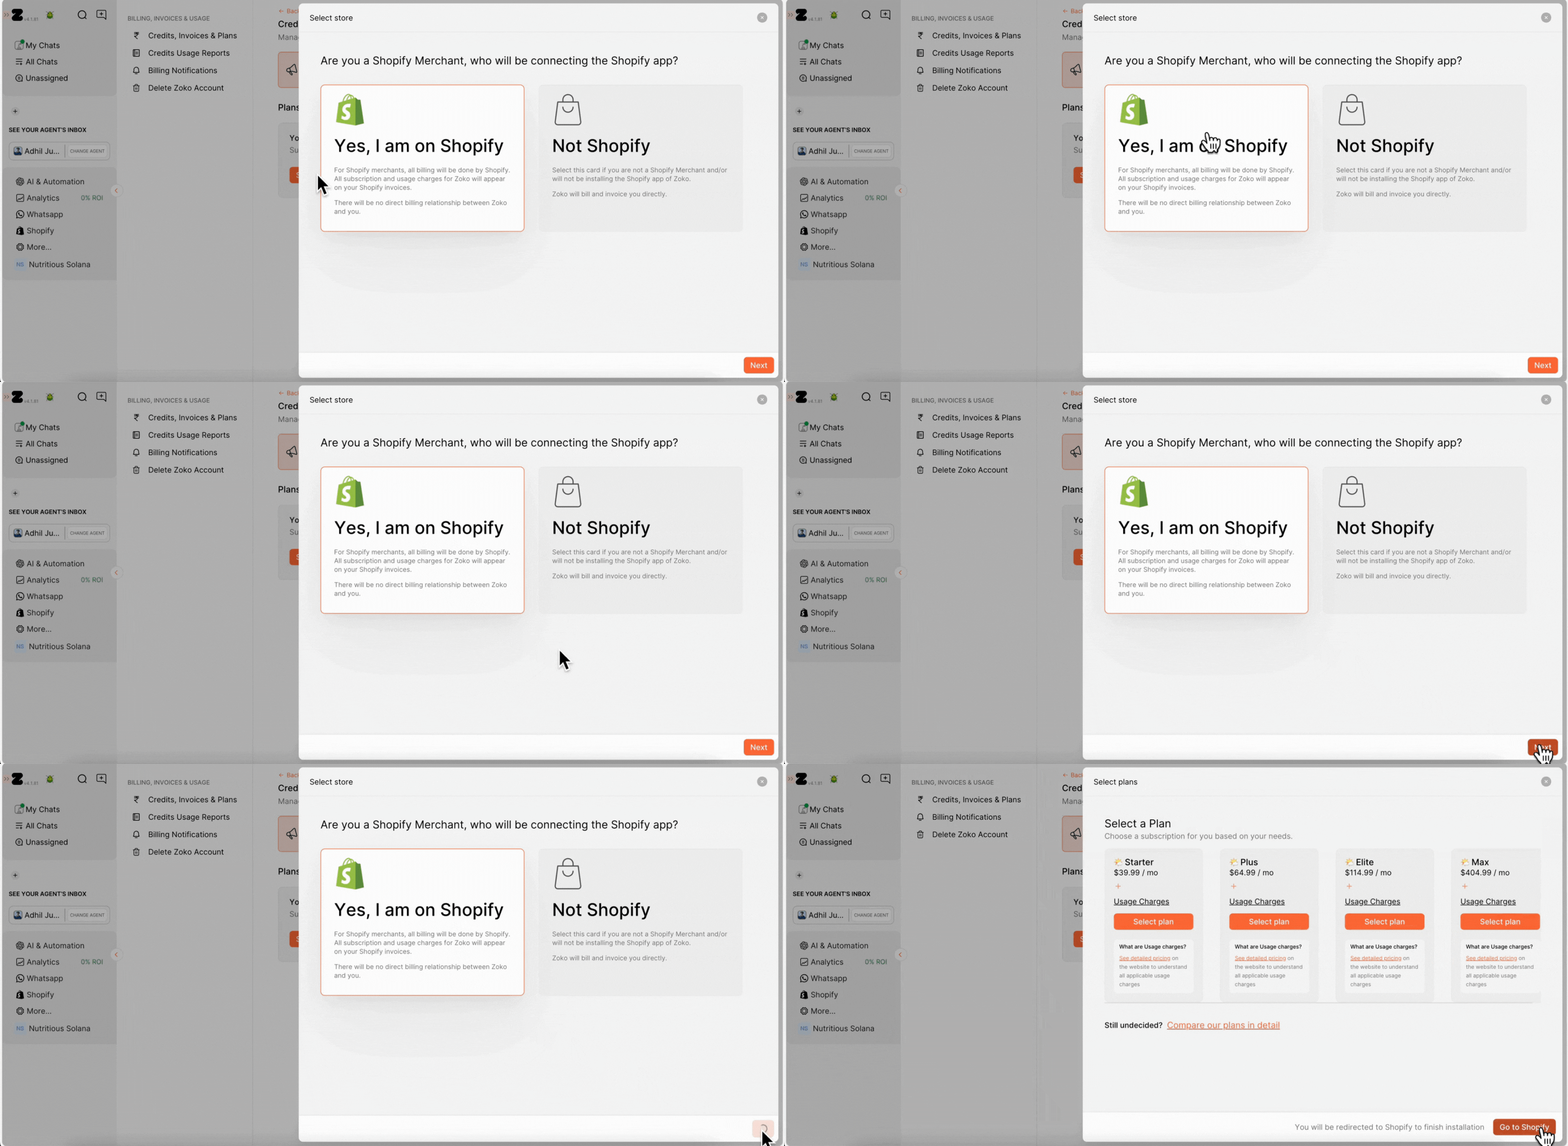
5. Select the subscription plan that best fits your needs. In our case, we’ll go with the Plus Plan and click on Go to Shopify. Refer to our article to understand the pricing better - Zoko Pricing Explained.

6. Click on Install.
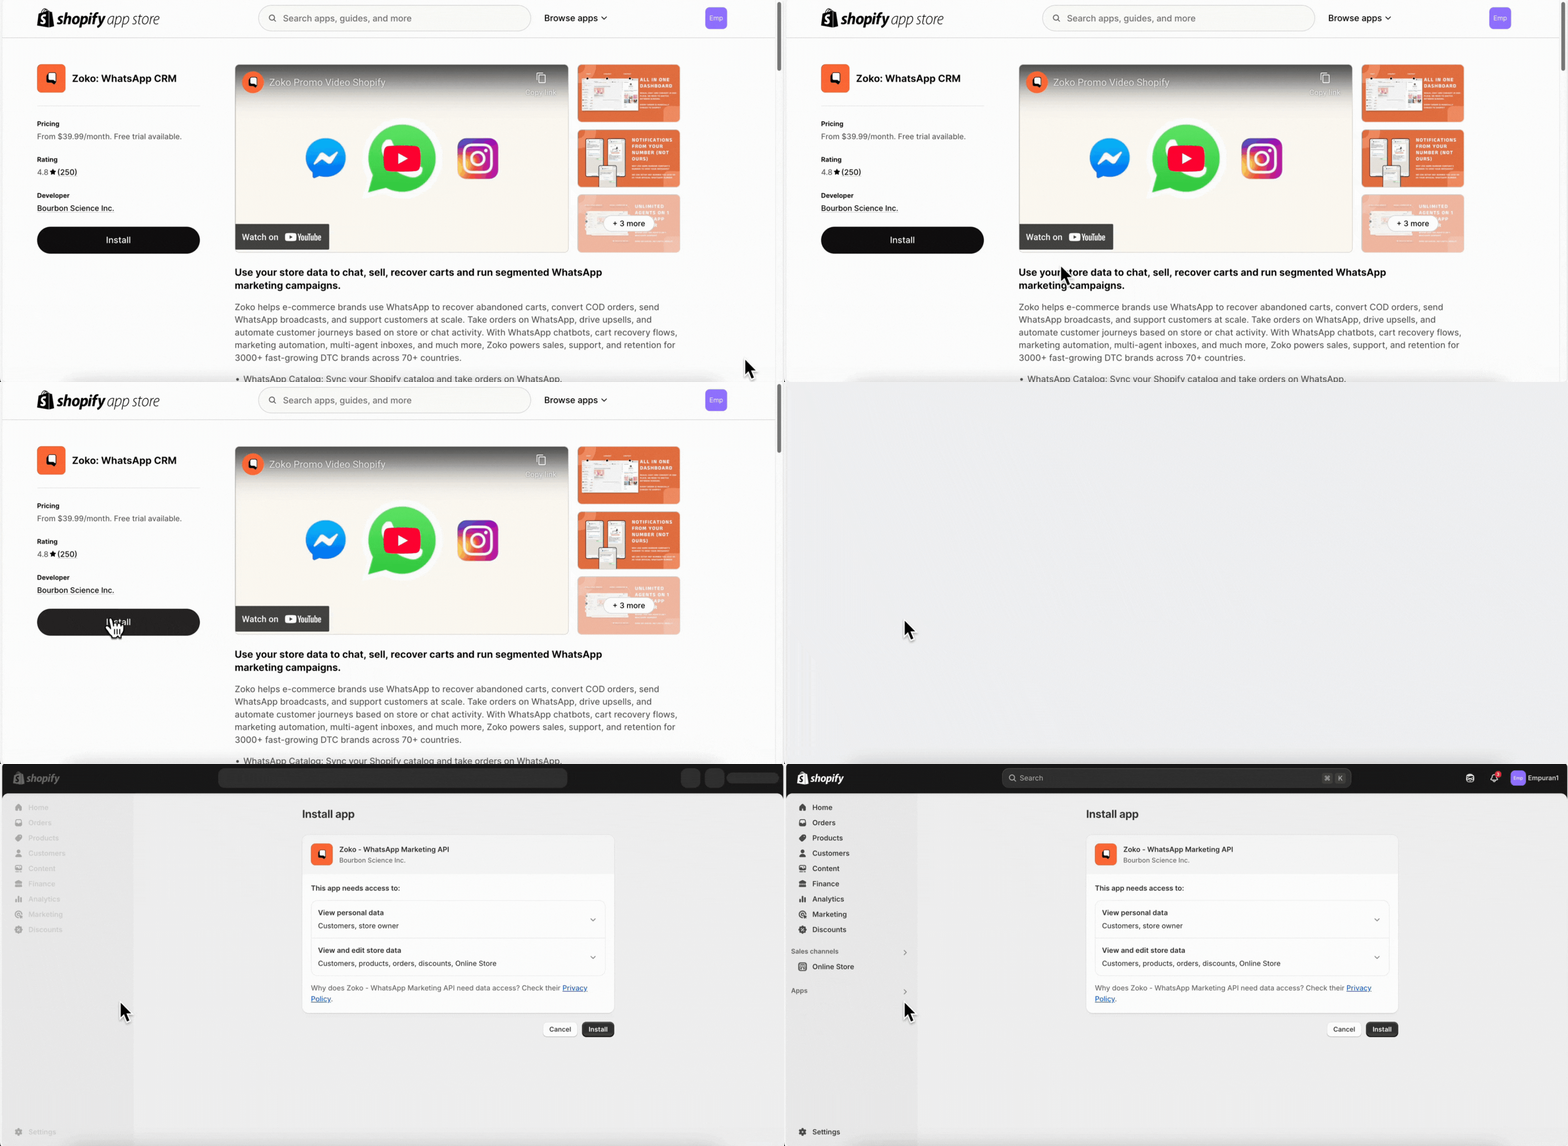
7. You’ll be asked to give permission access to Zoko. Just review the details and click Install again.
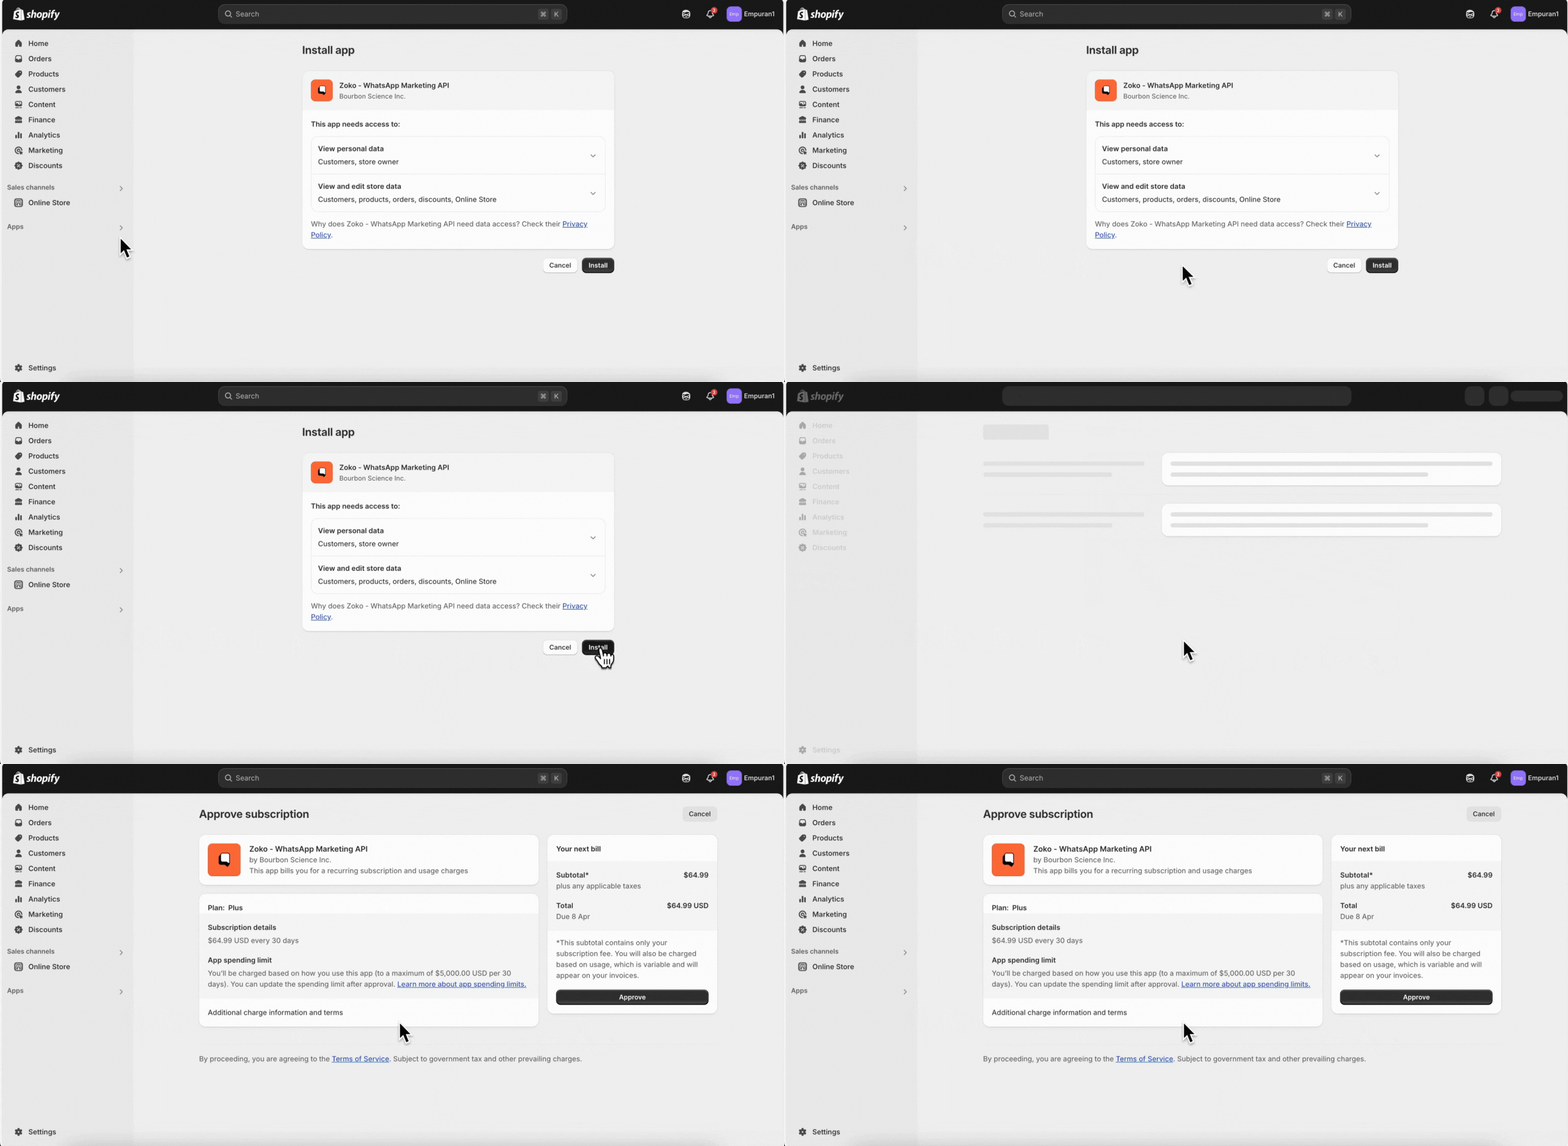
8. You can now see your subscription summary. Review the details to make sure everything looks good, then click on Approve.
Once approved, you'll be redirected to the Zoko billing page where you can view all the details.
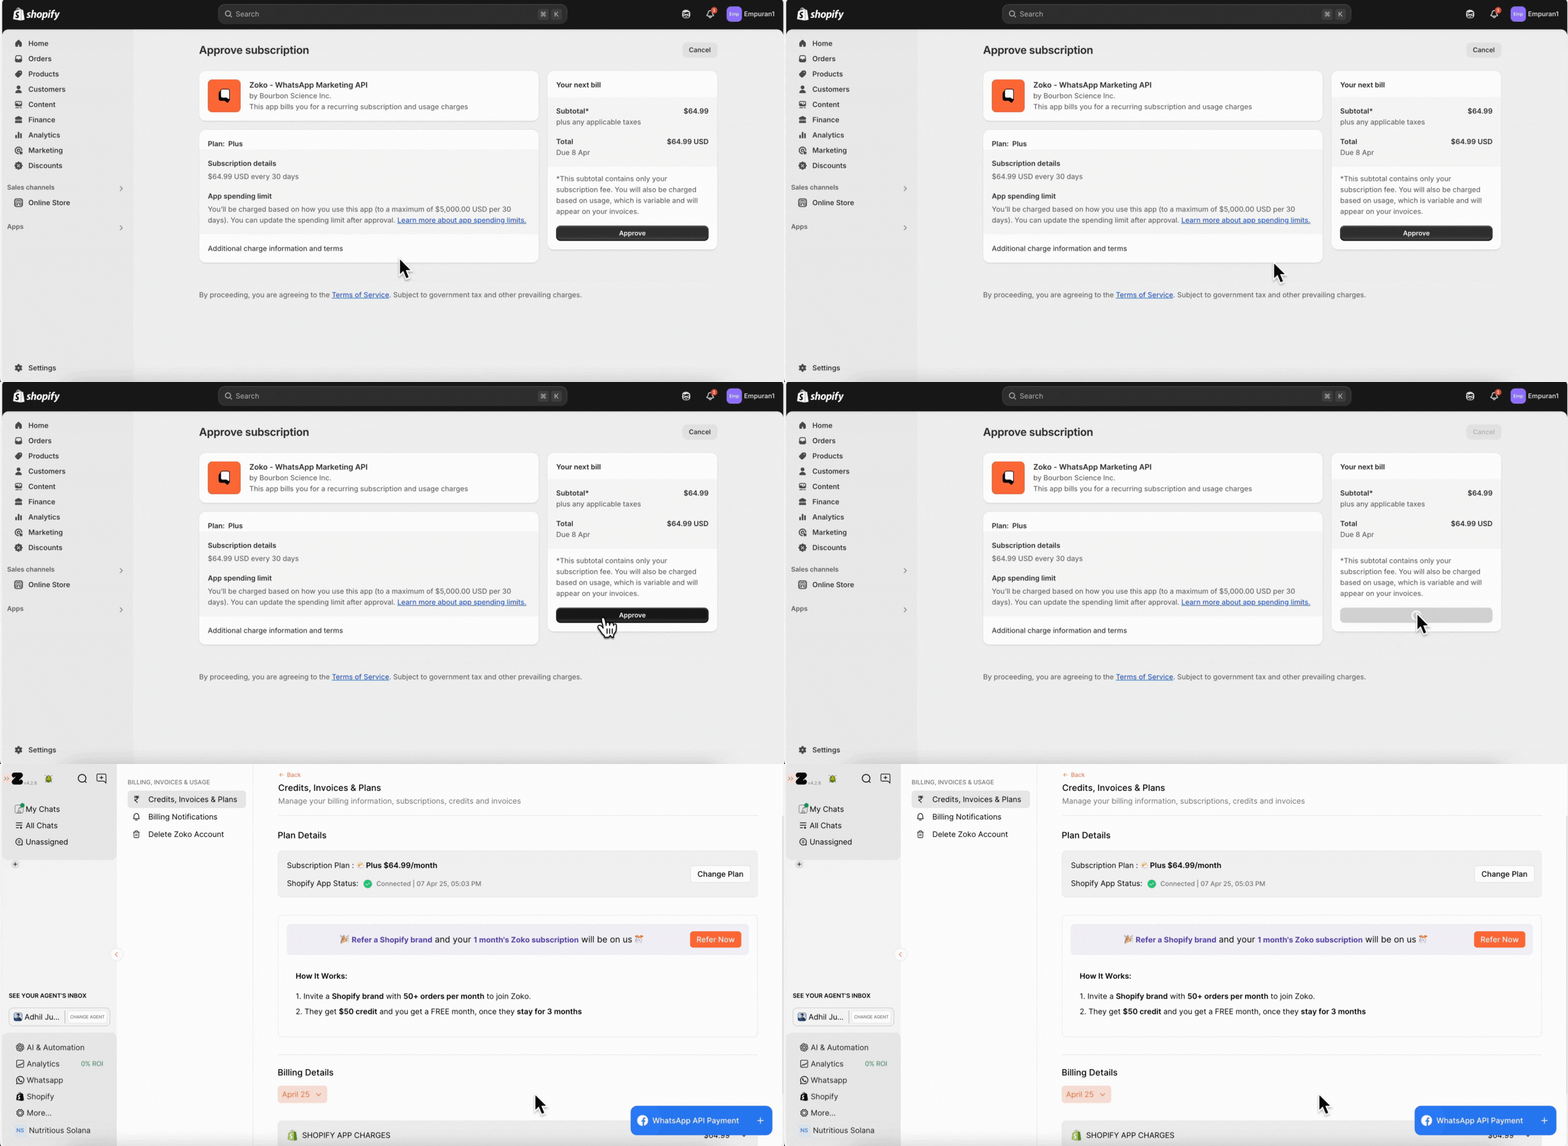
That’s it! You’ve successfully set up a Zoko subscription.
You’re now one step closer to using Zoko.
The final step is to set up Meta Billing, so you can start sending out WhatsApp messages - How to Setup WhatsApp API Payment
If you are unable to set up the billing or if you face any issue, please contact us via email at contact@zoko.io or via Whatsapp at wa.me/919586538447. We will be happy to help you.
Keywords: Setting up billing, Shopify billing, Subscription, Approve payment, Zoko billing.


.png)