

All About the Zoko’s Send Message Node
Understanding Zoko's Send Message Node that you can use in your workflow.
Share on WhatsApp
.png)
A Send Message Node involves sending a message to the user as part of the conversation. This could be a response to the user's input, or it could be an automatic message that is sent at a specific point in the conversation.
For example, for a user who has purchased a product from your store, you would want to send an order confirmation message to the user, which will help the user to know that the order’s confirmed.
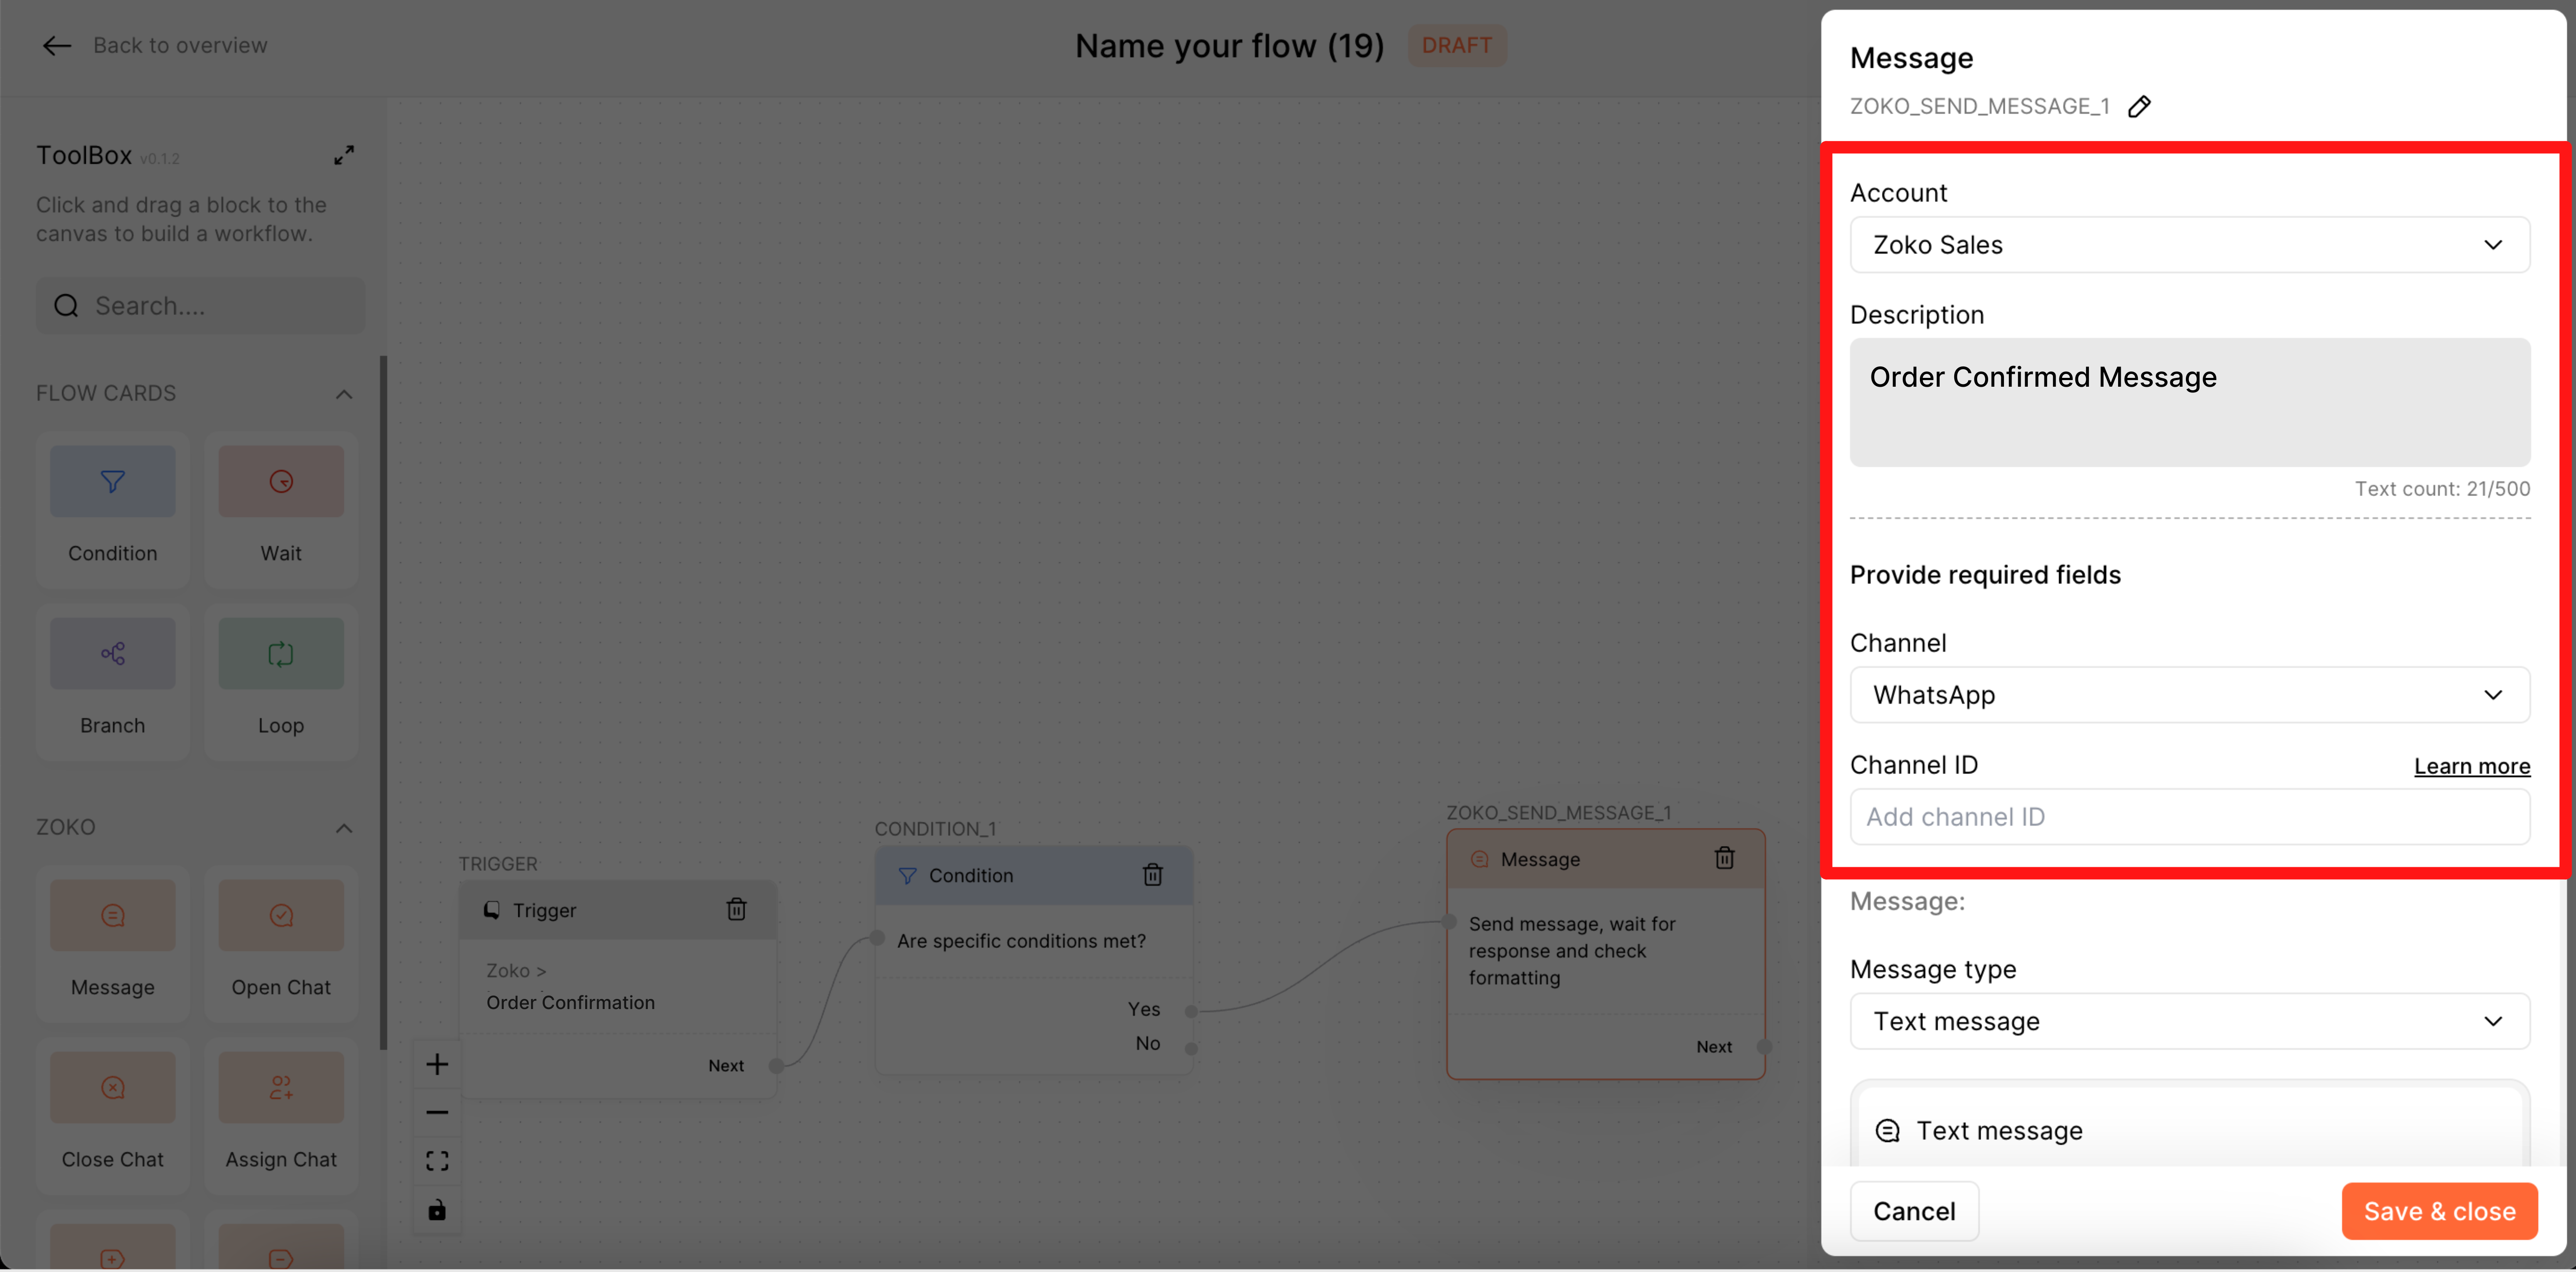
- Account: If you have multiple accounts in ChatPowers, choose the right account to set up the message node.
- Description: Type the message node description here. In our case, we set the description as Order Confirmed Message.
- Channel: Choose the channel that you want to send the messages to. There are three channels - Whatsapp, Instagram, and Facebook.
- Channel Id: The Channel ID is a unique identifier that lets you know where the message came from. Refer to our article to understand the channel id What is Channel ID inside the Message Node.
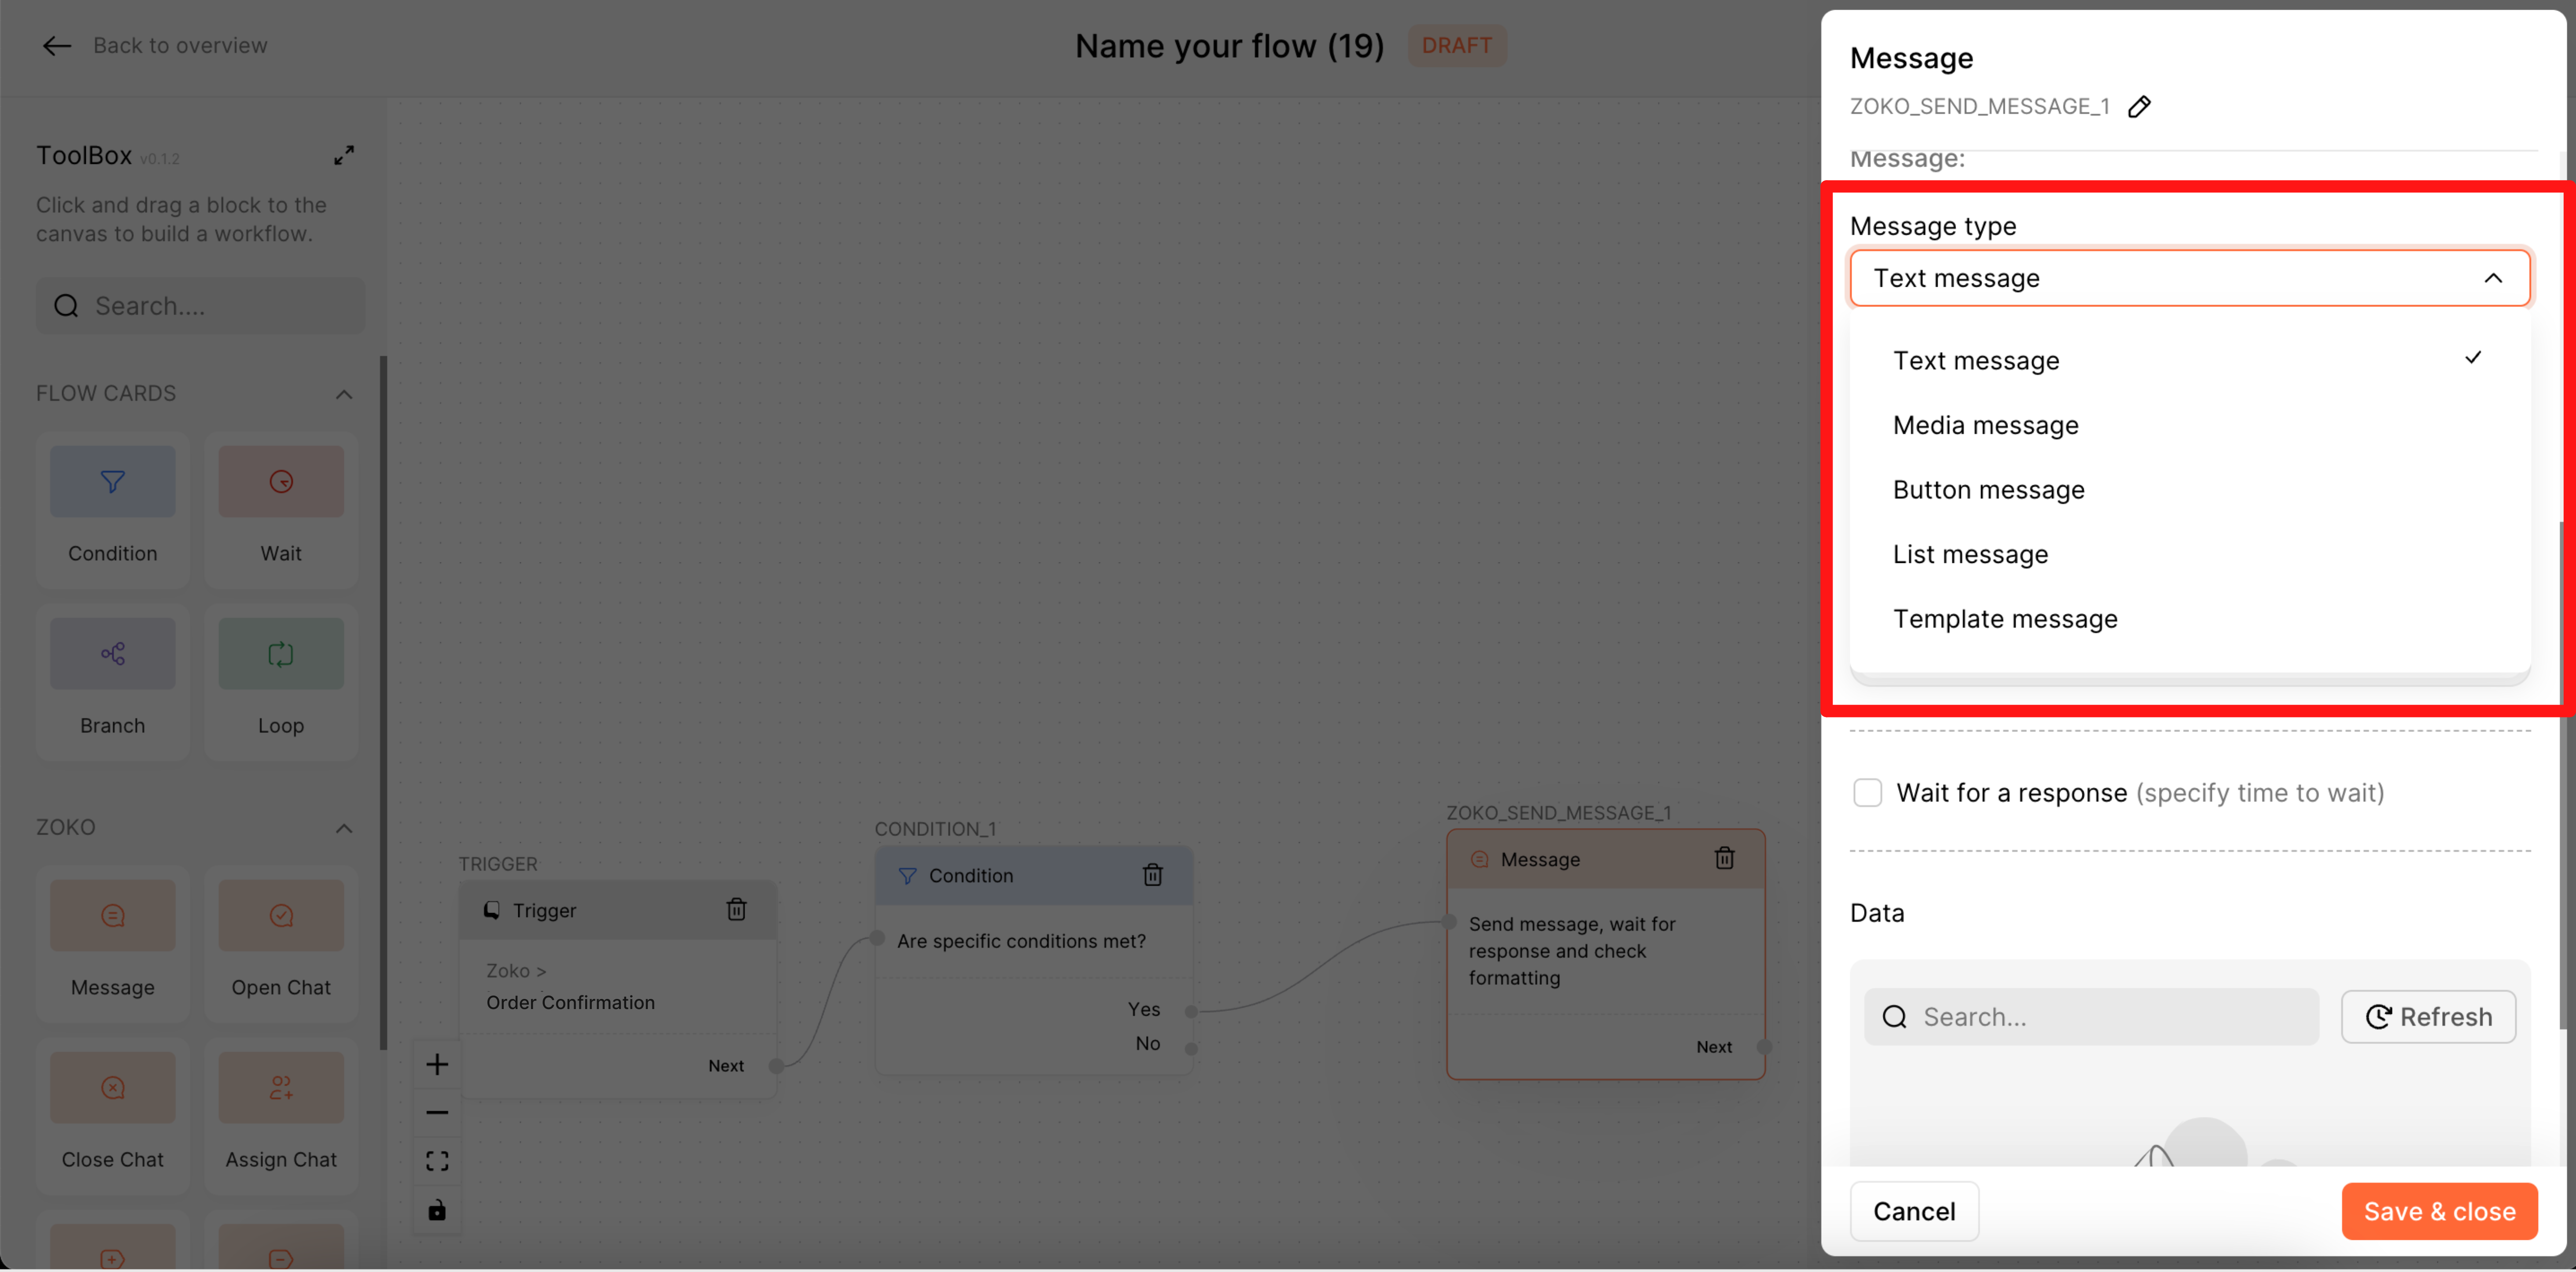
- Message: There are five message types that you can choose from:
(i) Text message: A text message is a simple text that you can use, as part of your bot conversation.
(ii) Media message: Media messages are used for sending an image, video, document, or audio message. They can be used as a way to share creative content with your users. This message type is more effective at creating an emotional bond between you and your customers.
You need to set up the media message by simply selecting the media type, entering the media URL, and typing the media caption.
If you don’t know how to create the media URL, you can simply generate the media URL in Zoko using the Link Creator feature. Refer to our article, Using the Link Creator App.
(iii) Button message: Button messages let you add buttons to your chatbot conversations that users can use to interact with you. They can be used for things like scheduling an appointment or purchasing something online.
You can set up the button message by following these steps. Simply select the header type, add header text, type content in body text, add footer text (which is optional), and under "Button," you can add up to three buttons by clicking on + Add Button and typing the name for each button.
(iv) List message: List messages allow you to create lists for users to choose from. This is useful for things like asking users questions and allowing them to select answers from options provided in a list format. For example, if a customer asks what time your store opens today, and if you have multiple stores in different cities, then this format will help them see all the timings in one message rather than making them scroll down through several messages to find their best choice.
(v) Template message: If you select a template message, the template lists will be visible only if you have interacted with Zoko. You will be able to select a pre-approved template and fill in the variables.

- Wait for a response: When you select Wait For a Response, the node waits until there is a response from the Channel before continuing to the next step in your flow.
- Data: This information is obtained from the Zoko dashboard. If one of your customers messages you on the dashboard, the message data will be displayed here when you click on the refresh button.
Note: When you click on the refresh button, the test message will be sent to the number that shows up in Data.
Keywords: Message node, Automate message, Send message, Template message, FlowHippo.