

Applying for Facebook Business Verification
Understand the step-by-step process for Facebook Buiness Verification
Share on WhatsApp
.png)
If you want to use the WhatsApp API fully, Facebook Business Verification is an important step. It helps Meta confirm that your business is legitmate. Without verification, your account will have llimits on messaging, scaling, and accessing advanced features.
Before starting, make sure you have all the required business documents ready. Refer to this article to see which documents are needed.
To do this:
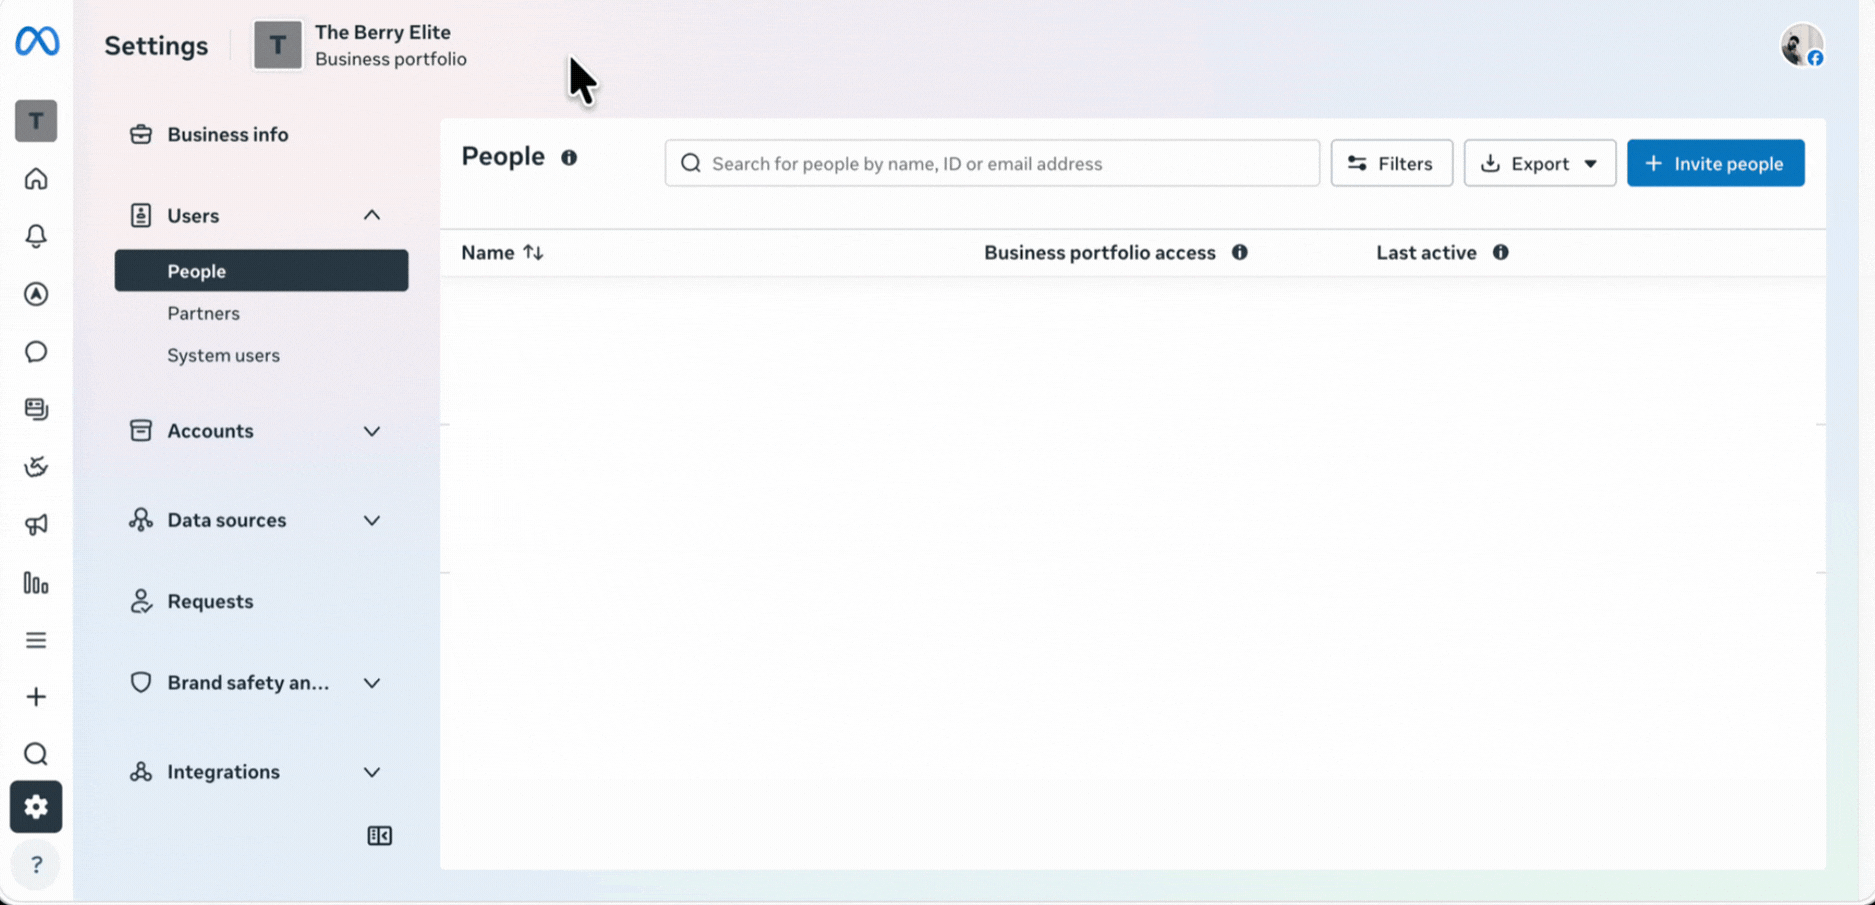
1. Go to the Facebook Business Settings.
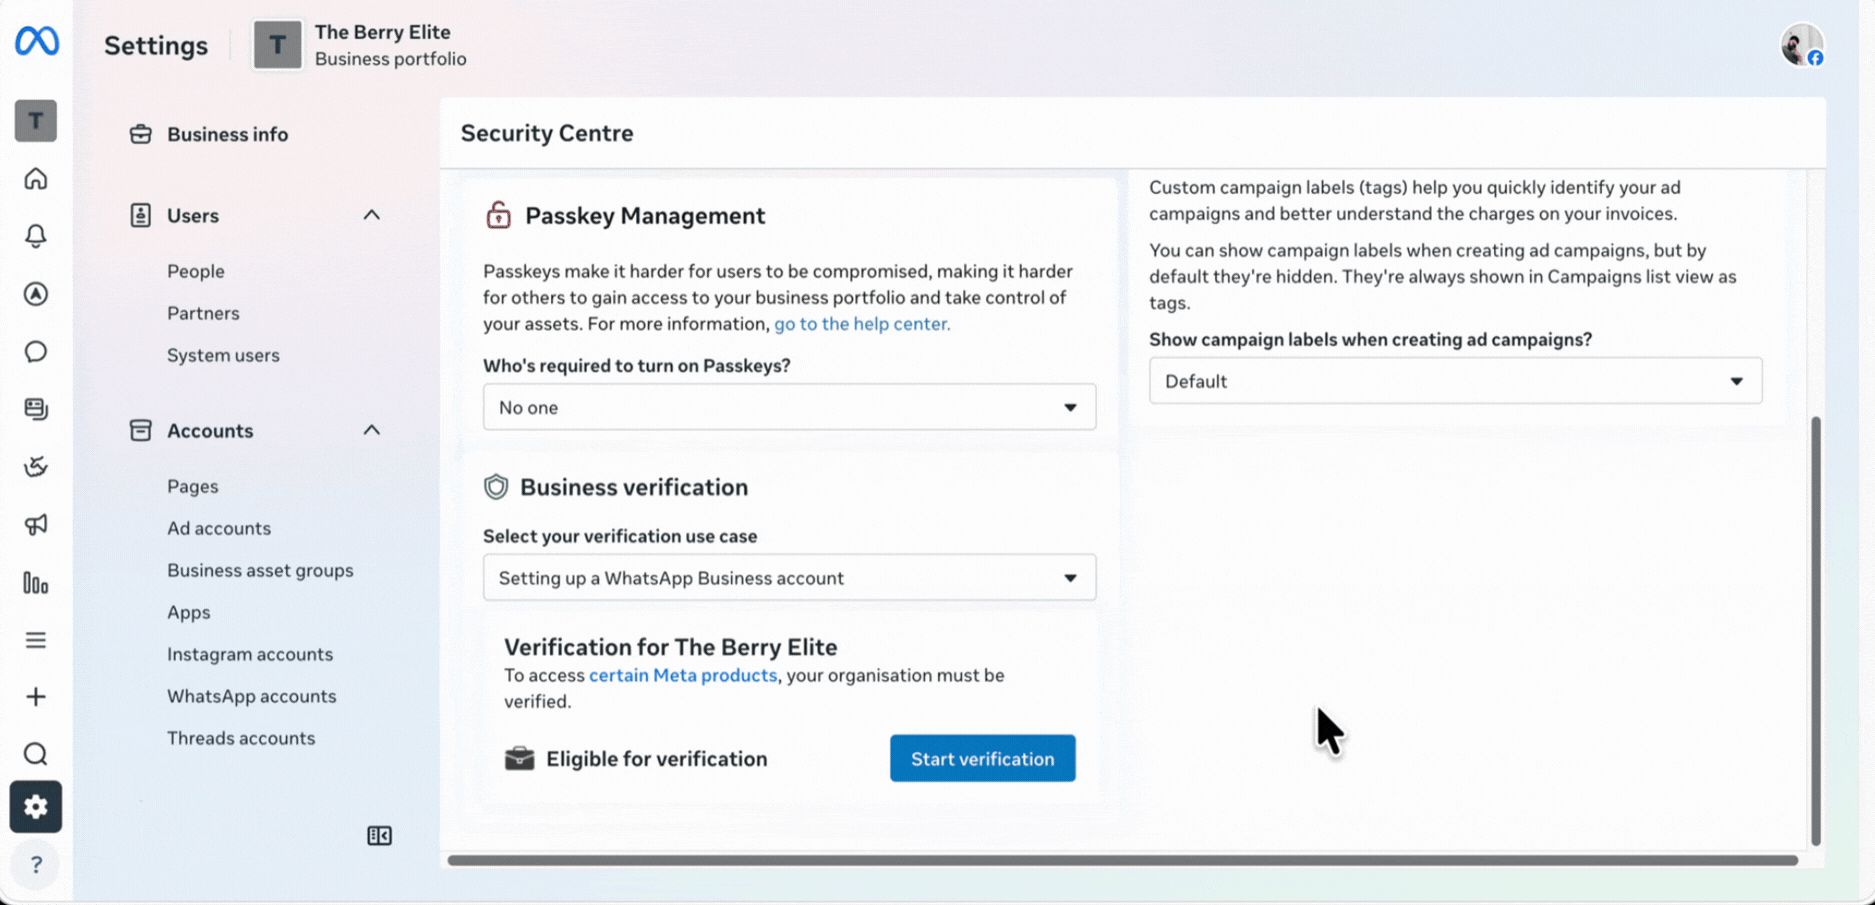
2. Navigate to Security Center.
3. Click on Start Verification.
(Note: If the button is disabled or grayed out, you need to follow this step - Enabling Start Verification Button on the Meta Business Manager)
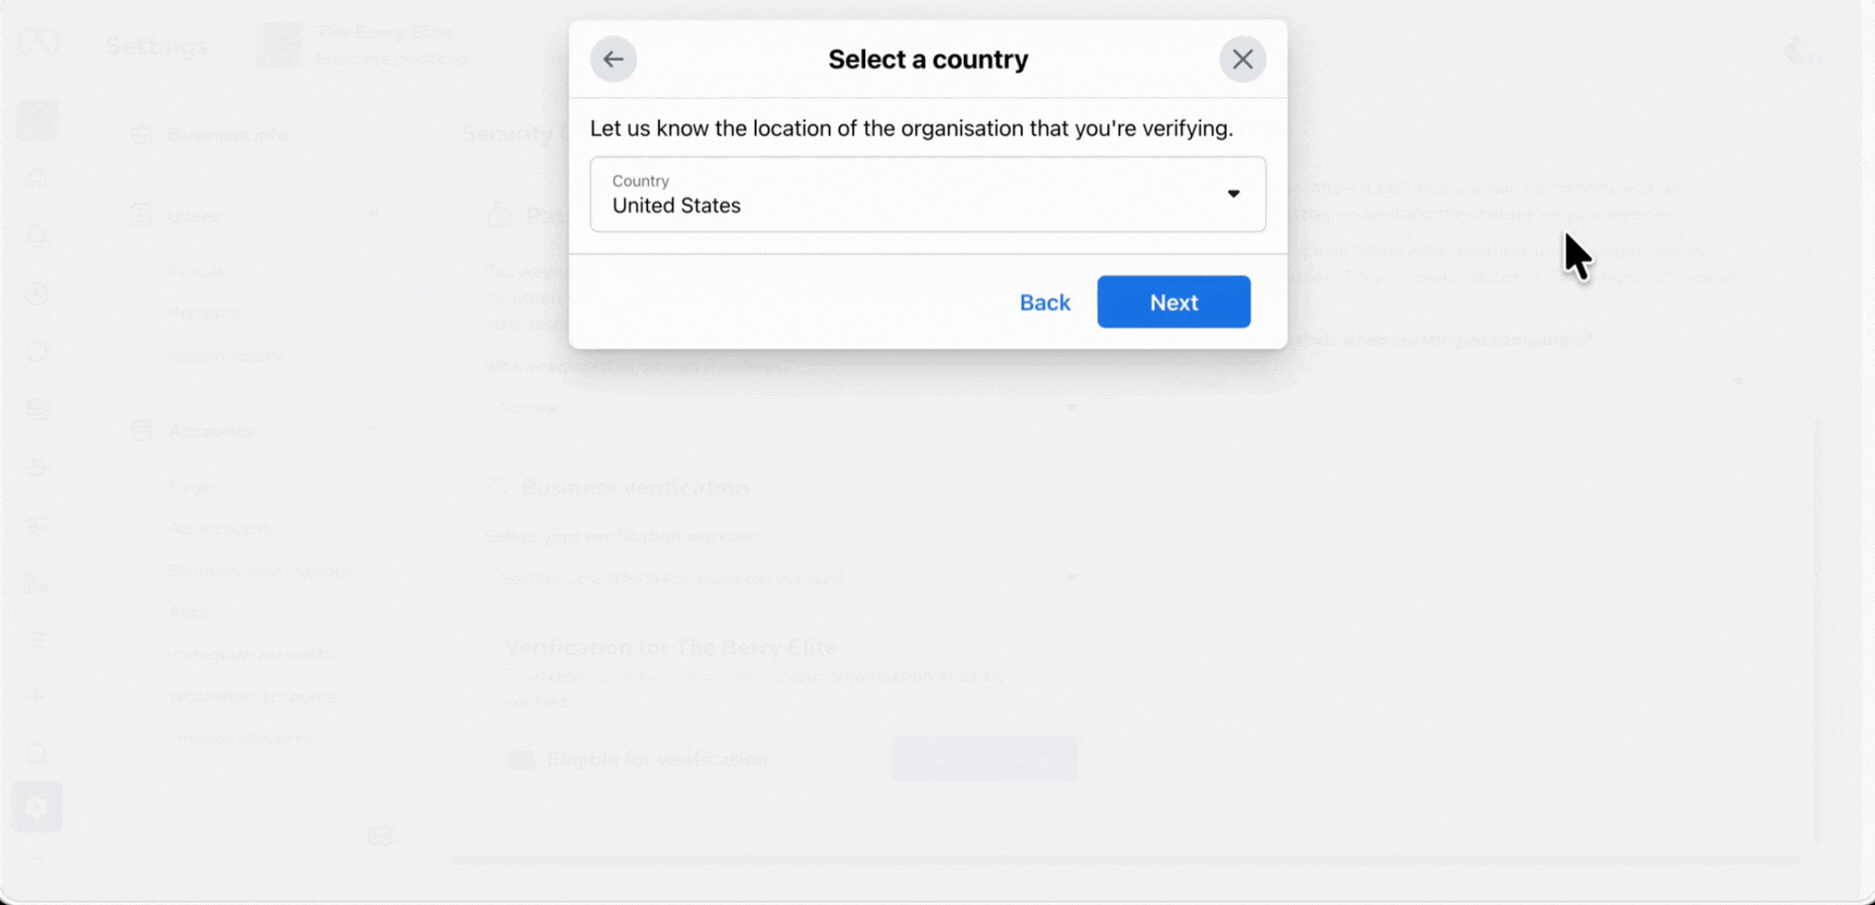
4. Choose your business location from the dropdown and click on Next.
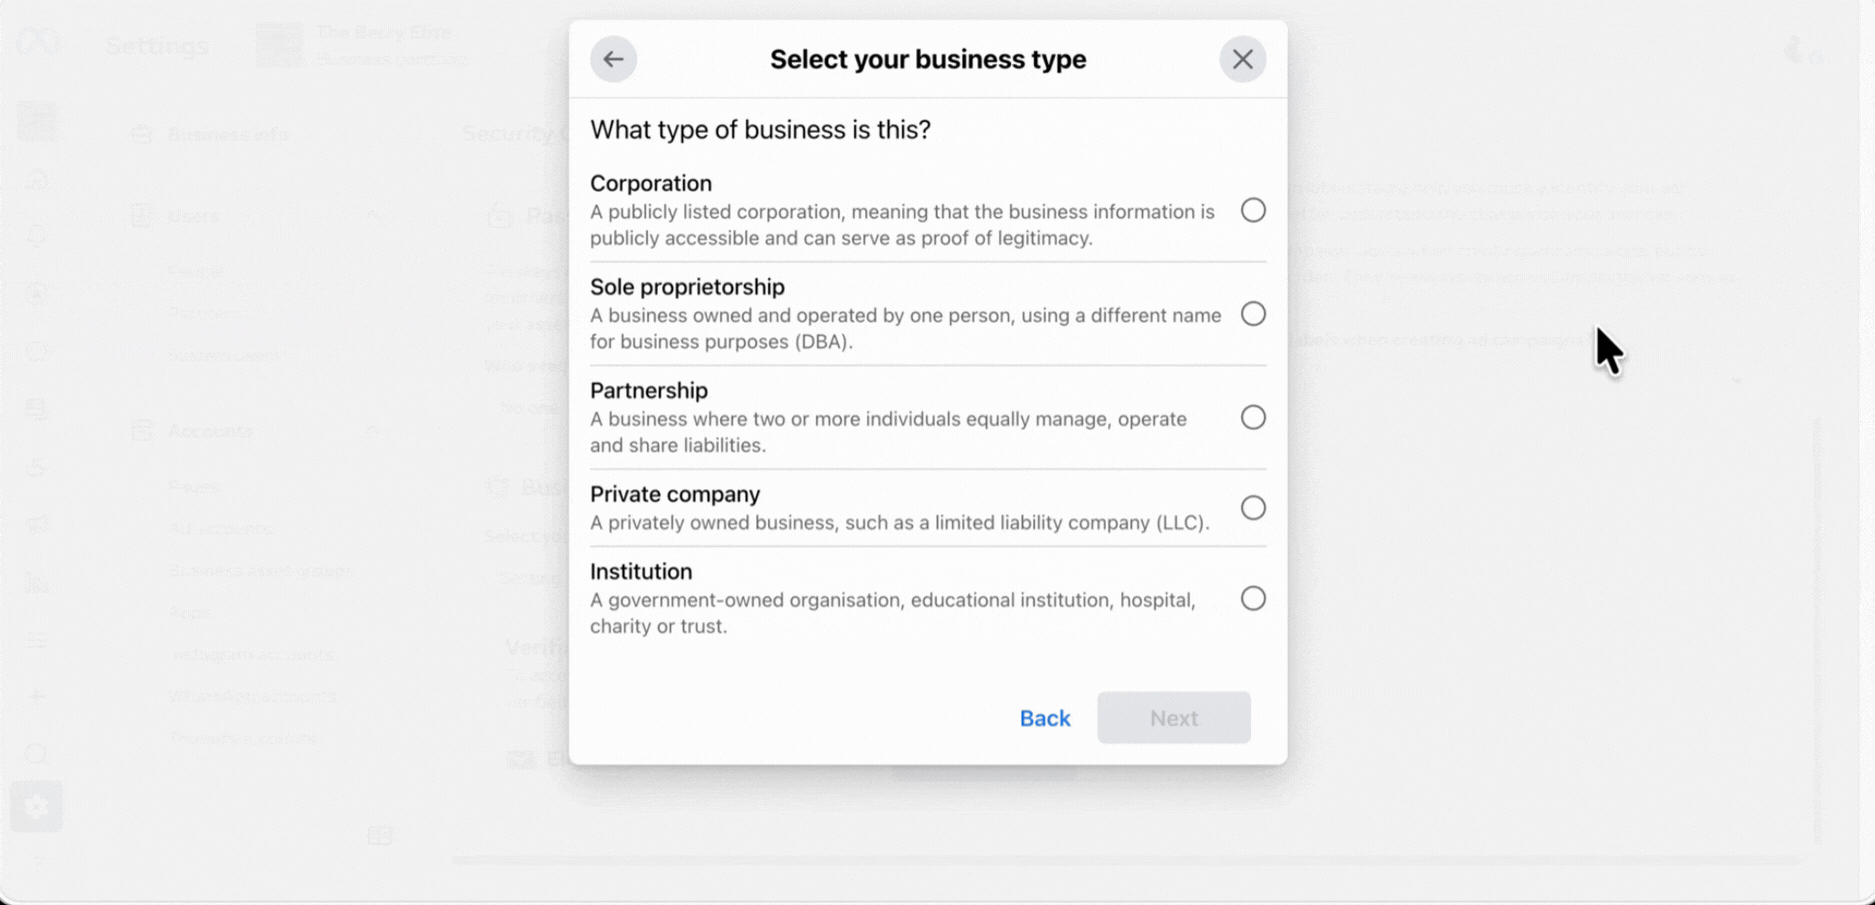
5. Choose your business type and click on Next.
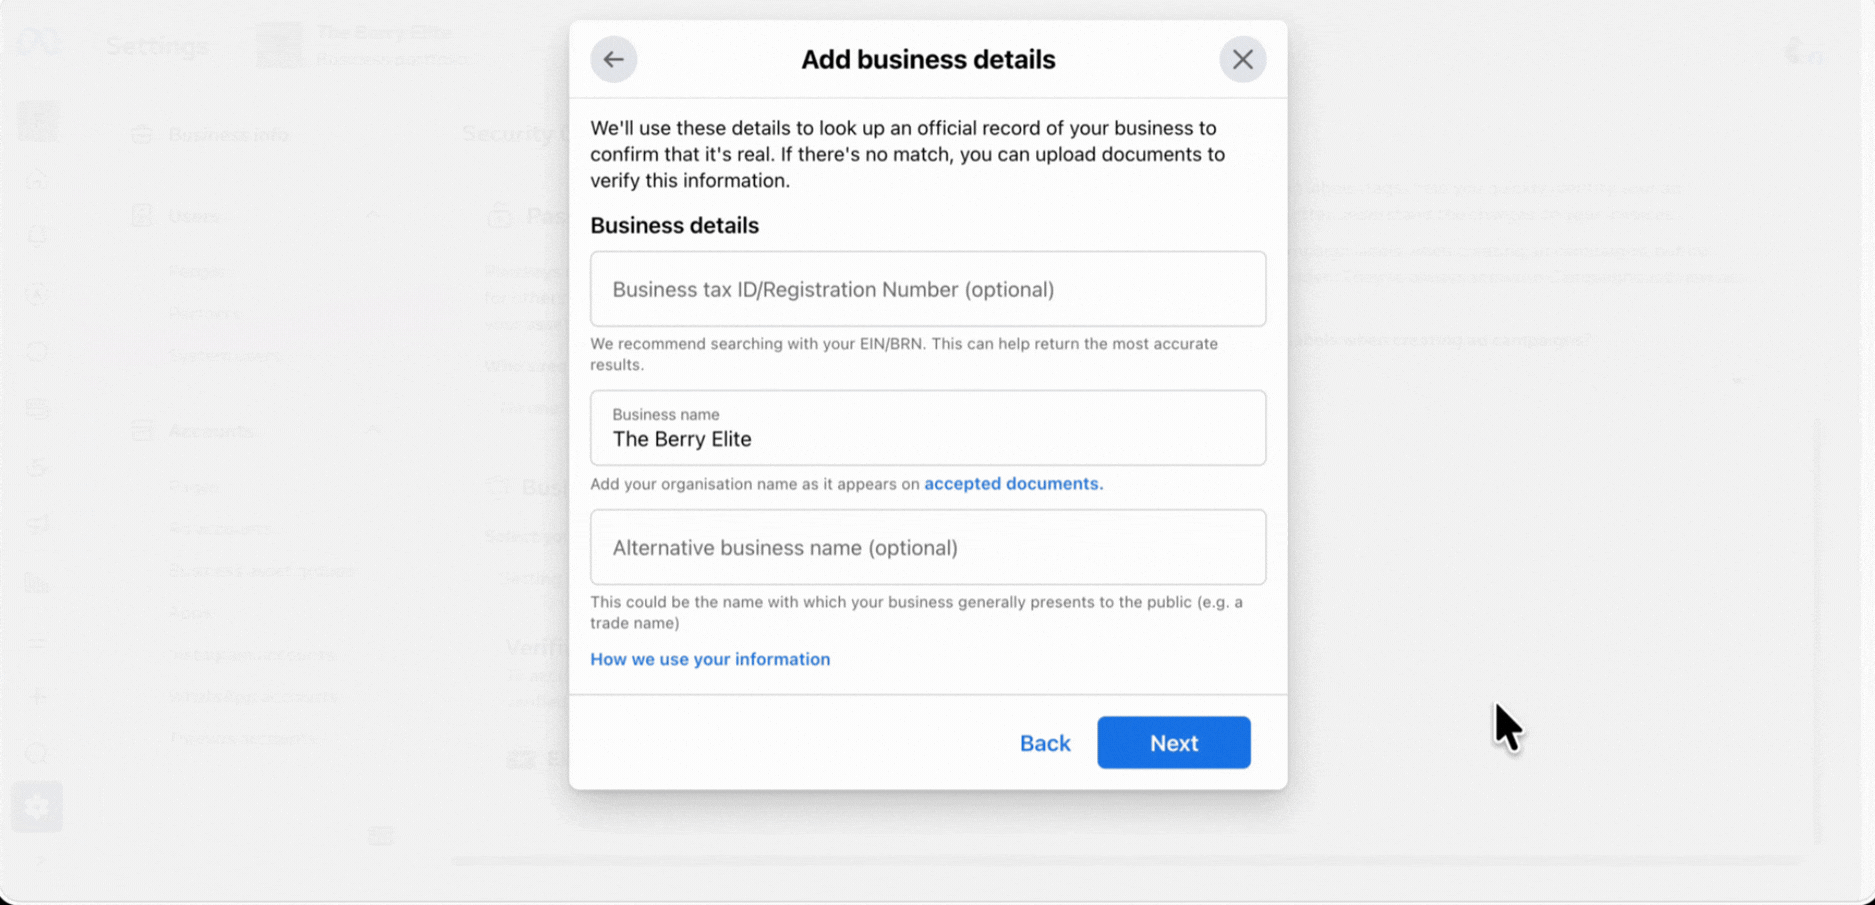
6. Type your business information (or you can skip this step) and click on Next.
Note: For businesses in India, a Business Tax ID or Registration Number is required.
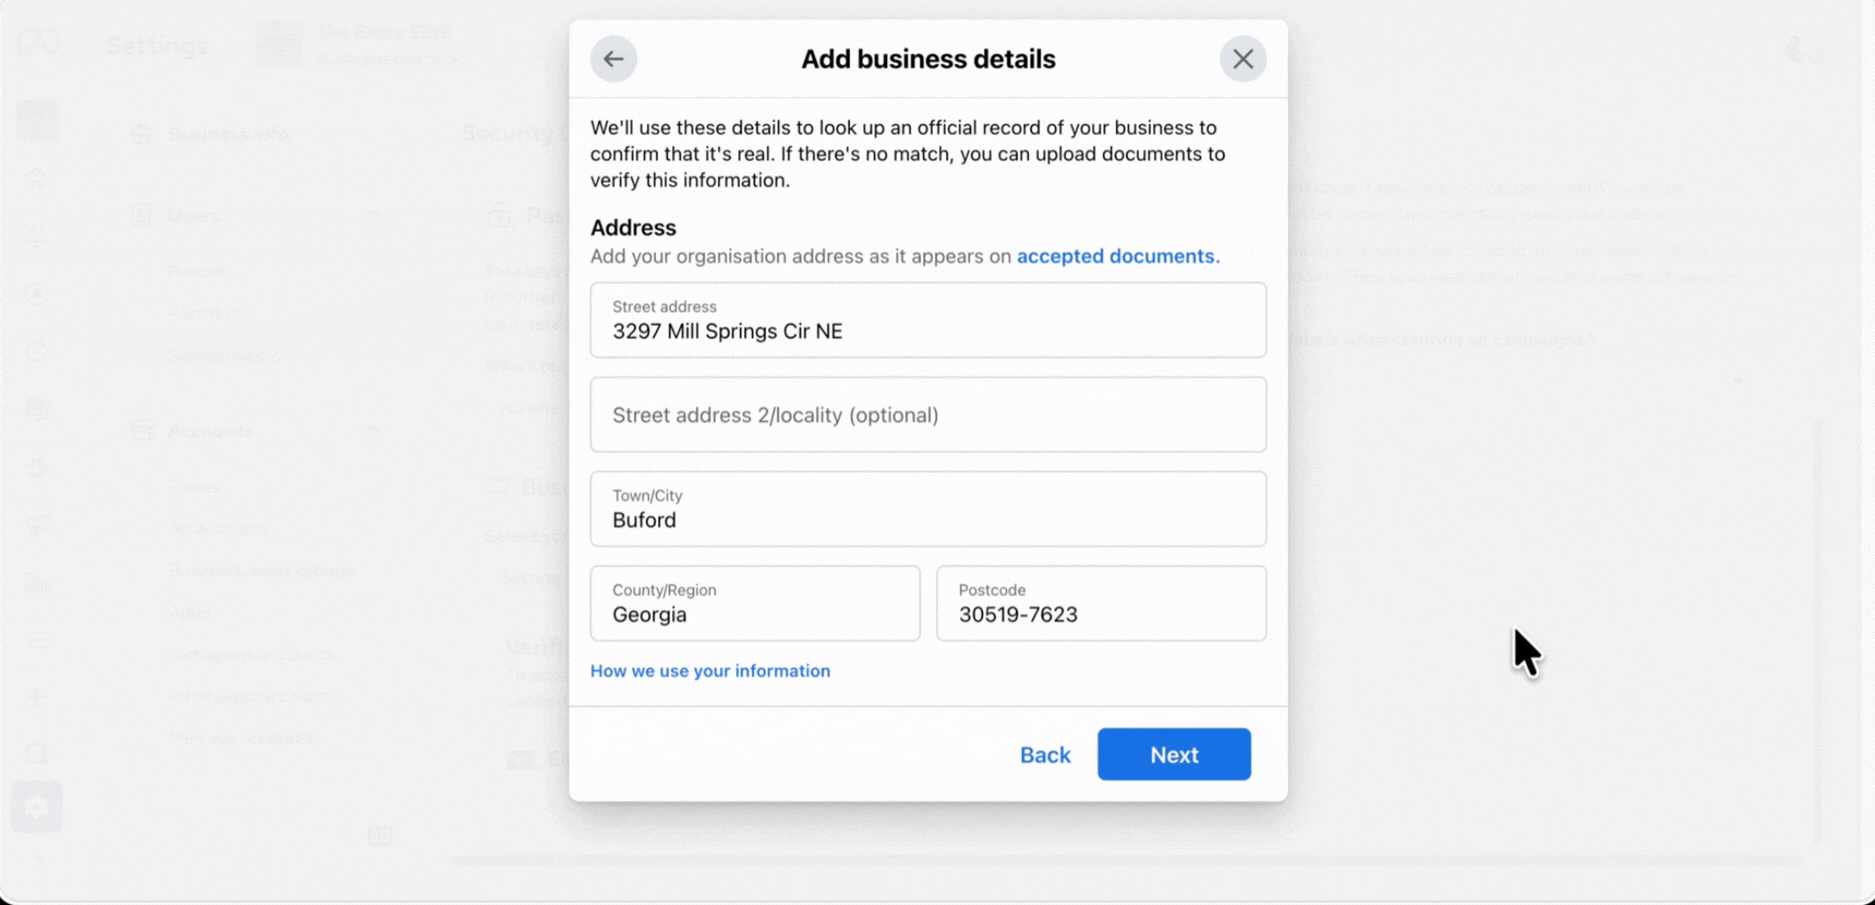
7. Type the business address and click on Next.
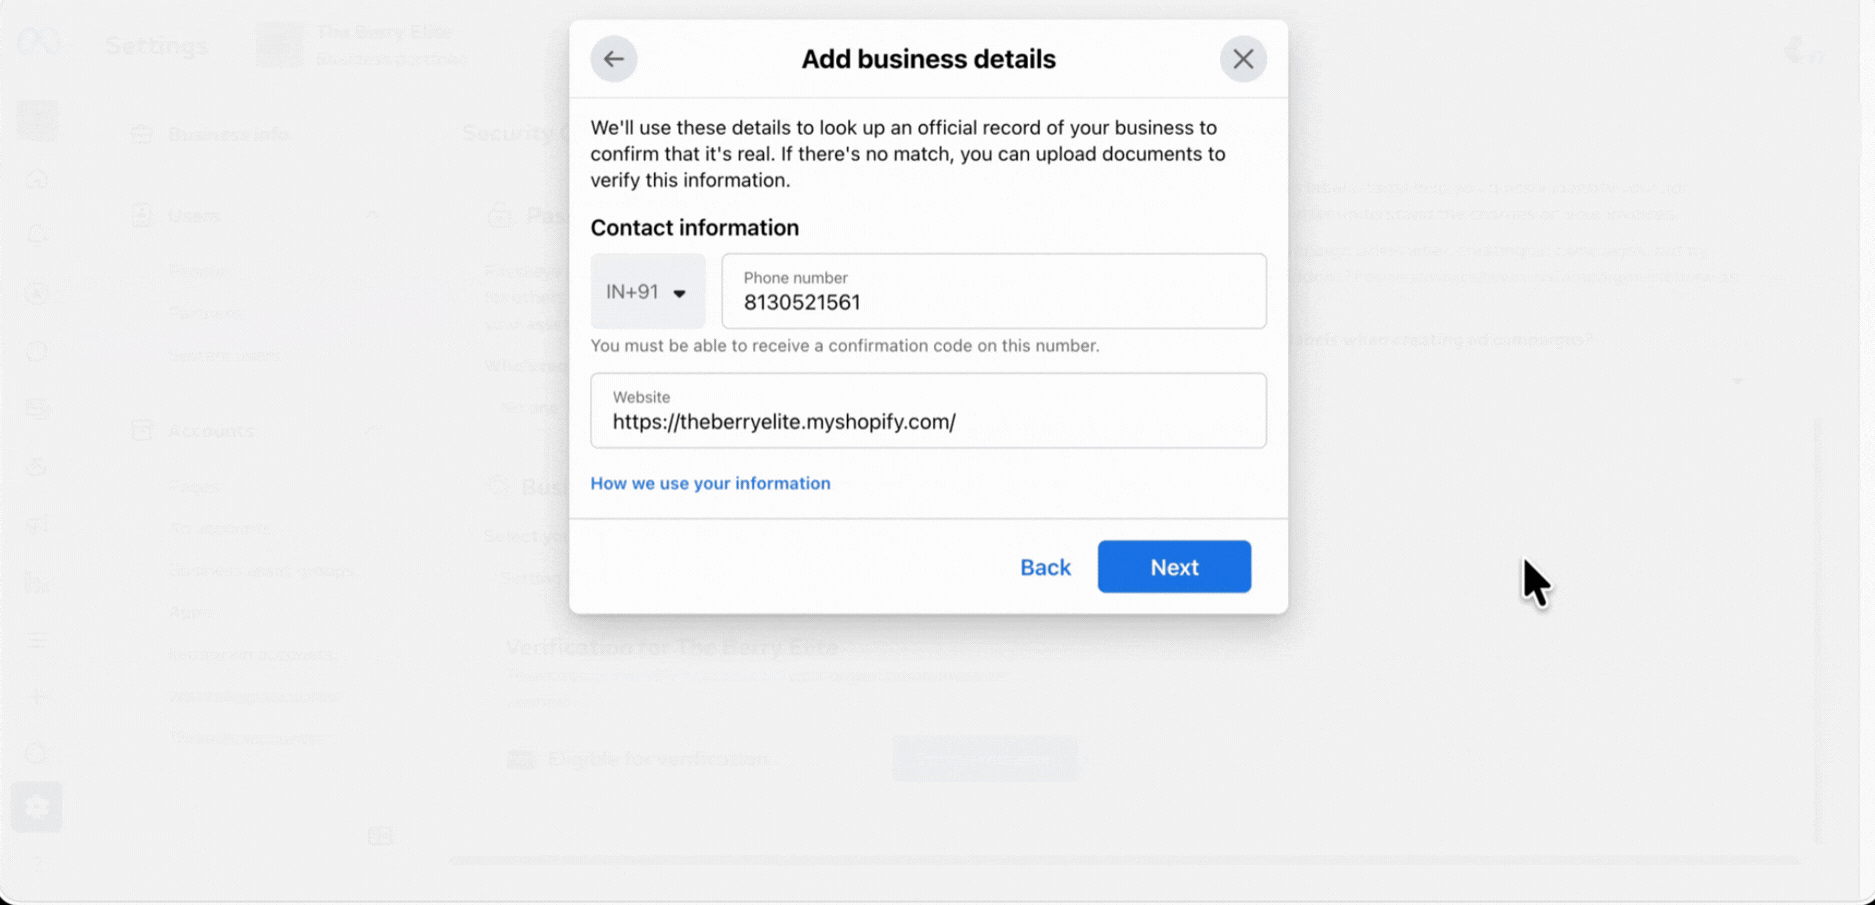
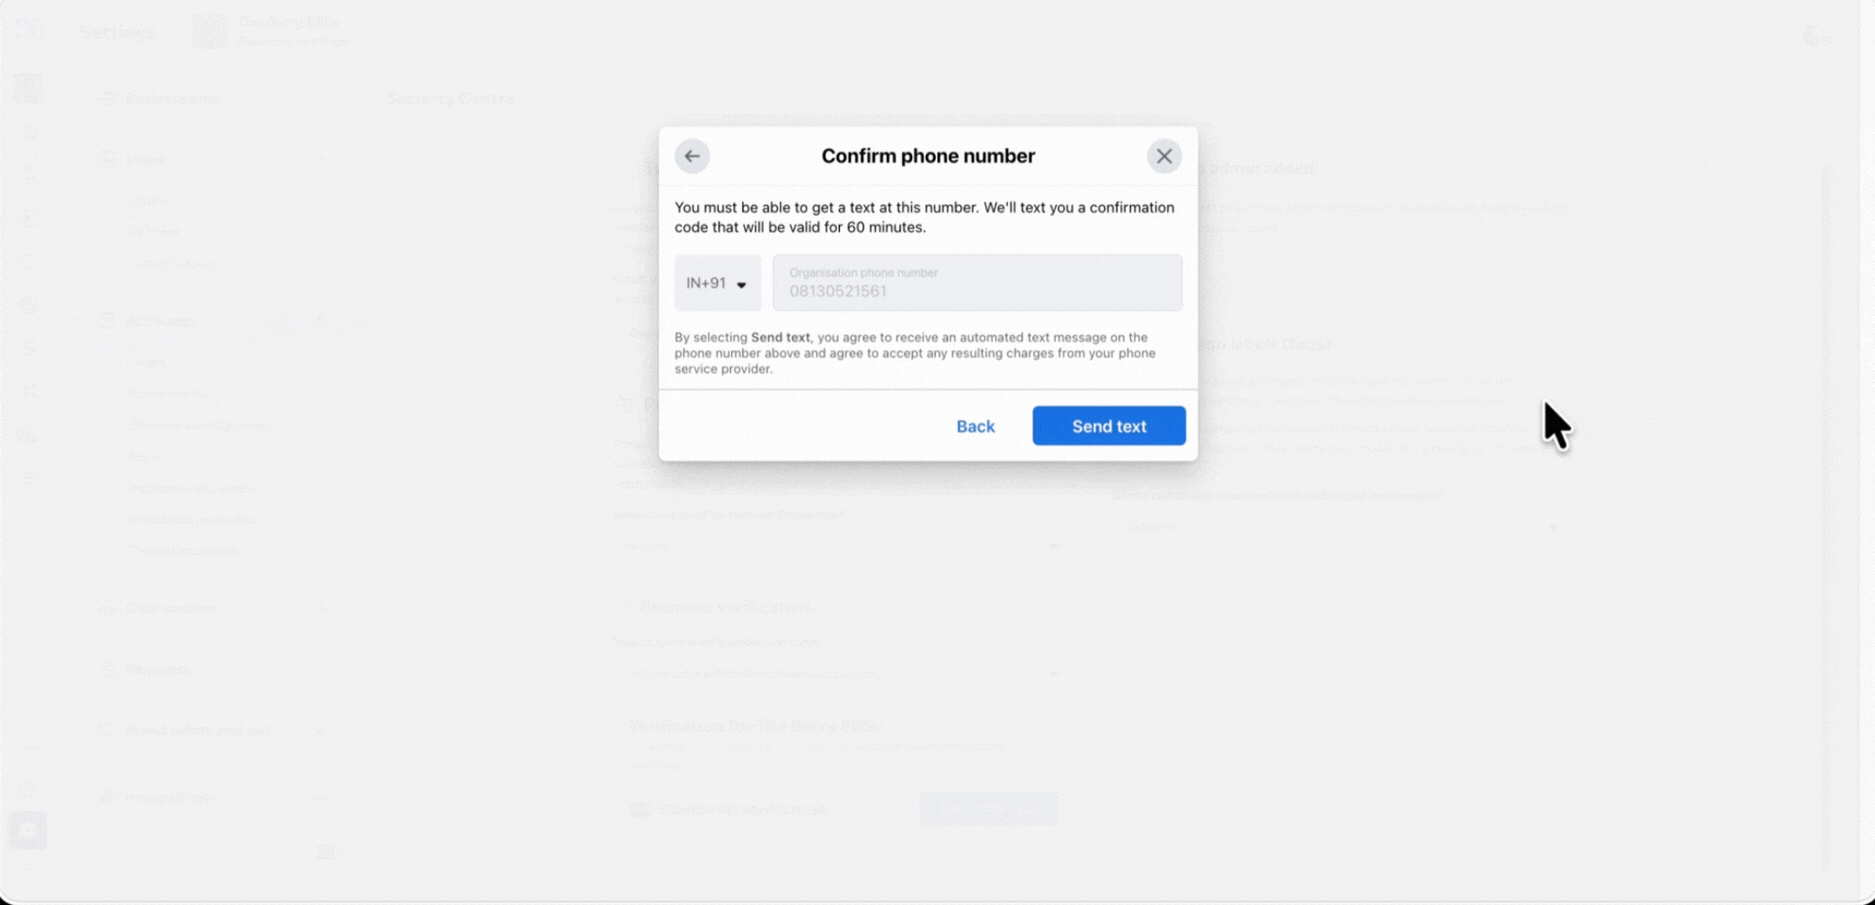
8. Type your business phone number and click on Next.
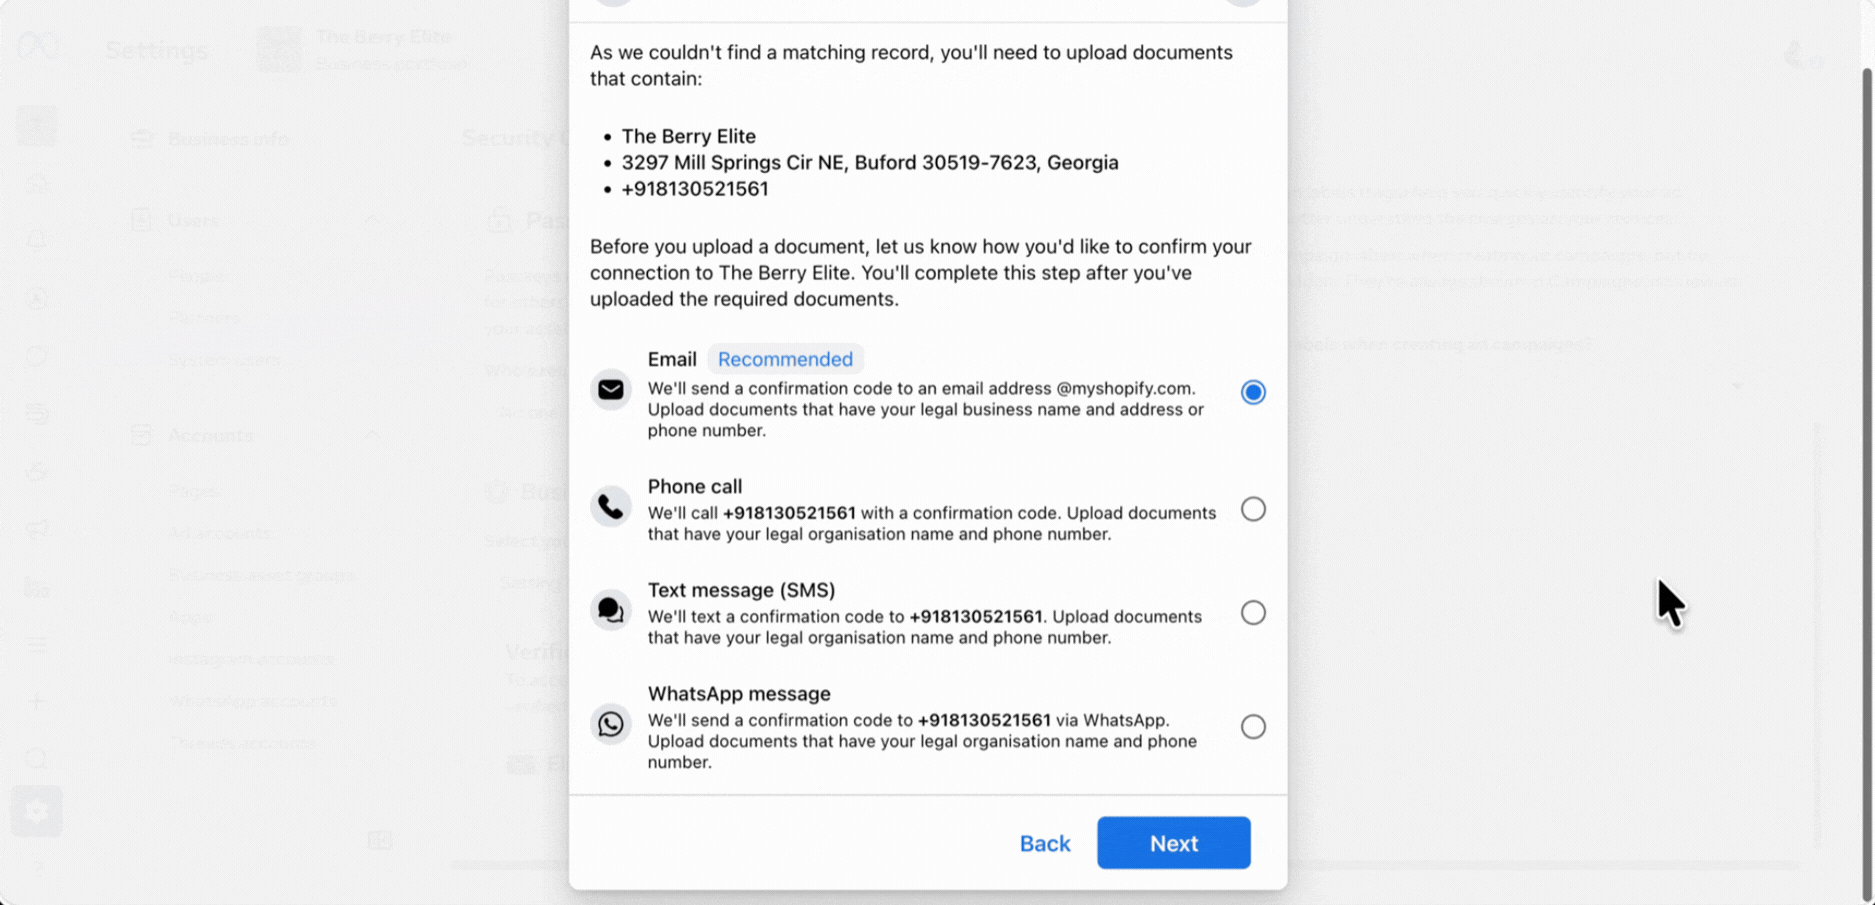
9. Choose a preferred method to receive the OTP and click on Next.
10. Upload your documents:
- Upload your first document as proof of business (e.g., incorporation certificate or registration document).
- Upload your second document that includes your business phone number.
Make sure the phone number on the document matches the number you entered earlier, otherwise your application may be rejected.
Click on Next to proceed.

11. Click on Send text.
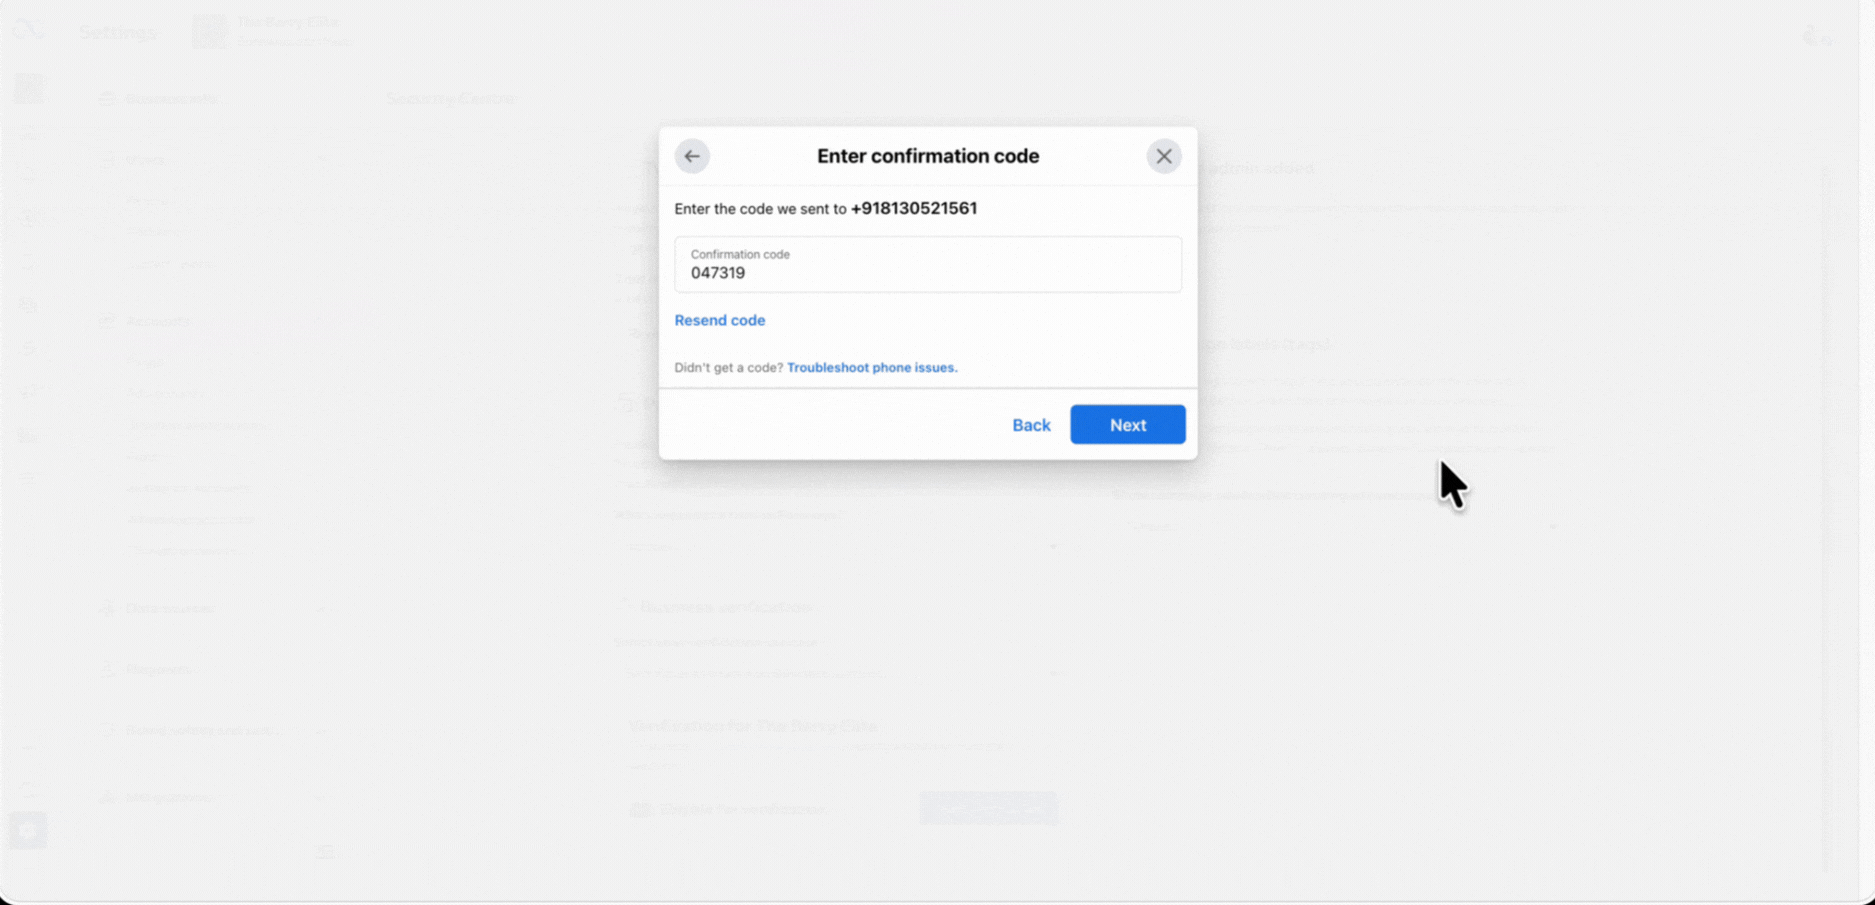
12. Type the verification code and click on Next.
And that’s it! You should hear back within 3–5 business days. Keep an eye on your email or regularly check your verification status in the dashboard.