

How to Set up a Shopify Trigger to Build a New Workflow
Understand on how to set up a Shopify trigger to build a new workflow from scratch on FlowHippo.
Share on WhatsApp
.png)
Setting up a Shopify trigger to create a new workflow is straightforward. Simply select the trigger type, define the conditions, choose and set up the Shopify & Zoko action, activate the workflow, and test it.
Follow these steps to understand.
- Click on Create new flow.
- You can give the name of the flow you are creating by clicking on the Edit pencil option.
- Hover the mouse over the overview screen and click on the Edit button to open the flow designer.
The first step is to select the shopify trigger. It can be something like a Cart created, a Customer updated, or any other action defined within the Shopify platform. Once you’ve decided the type of trigger, you will be taken to a screen with all the options available for that trigger. Here you need to set the trigger configuration; otherwise, the workflow will not work correctly.
In our example, if we are setting up the Shopify trigger as an Order created.
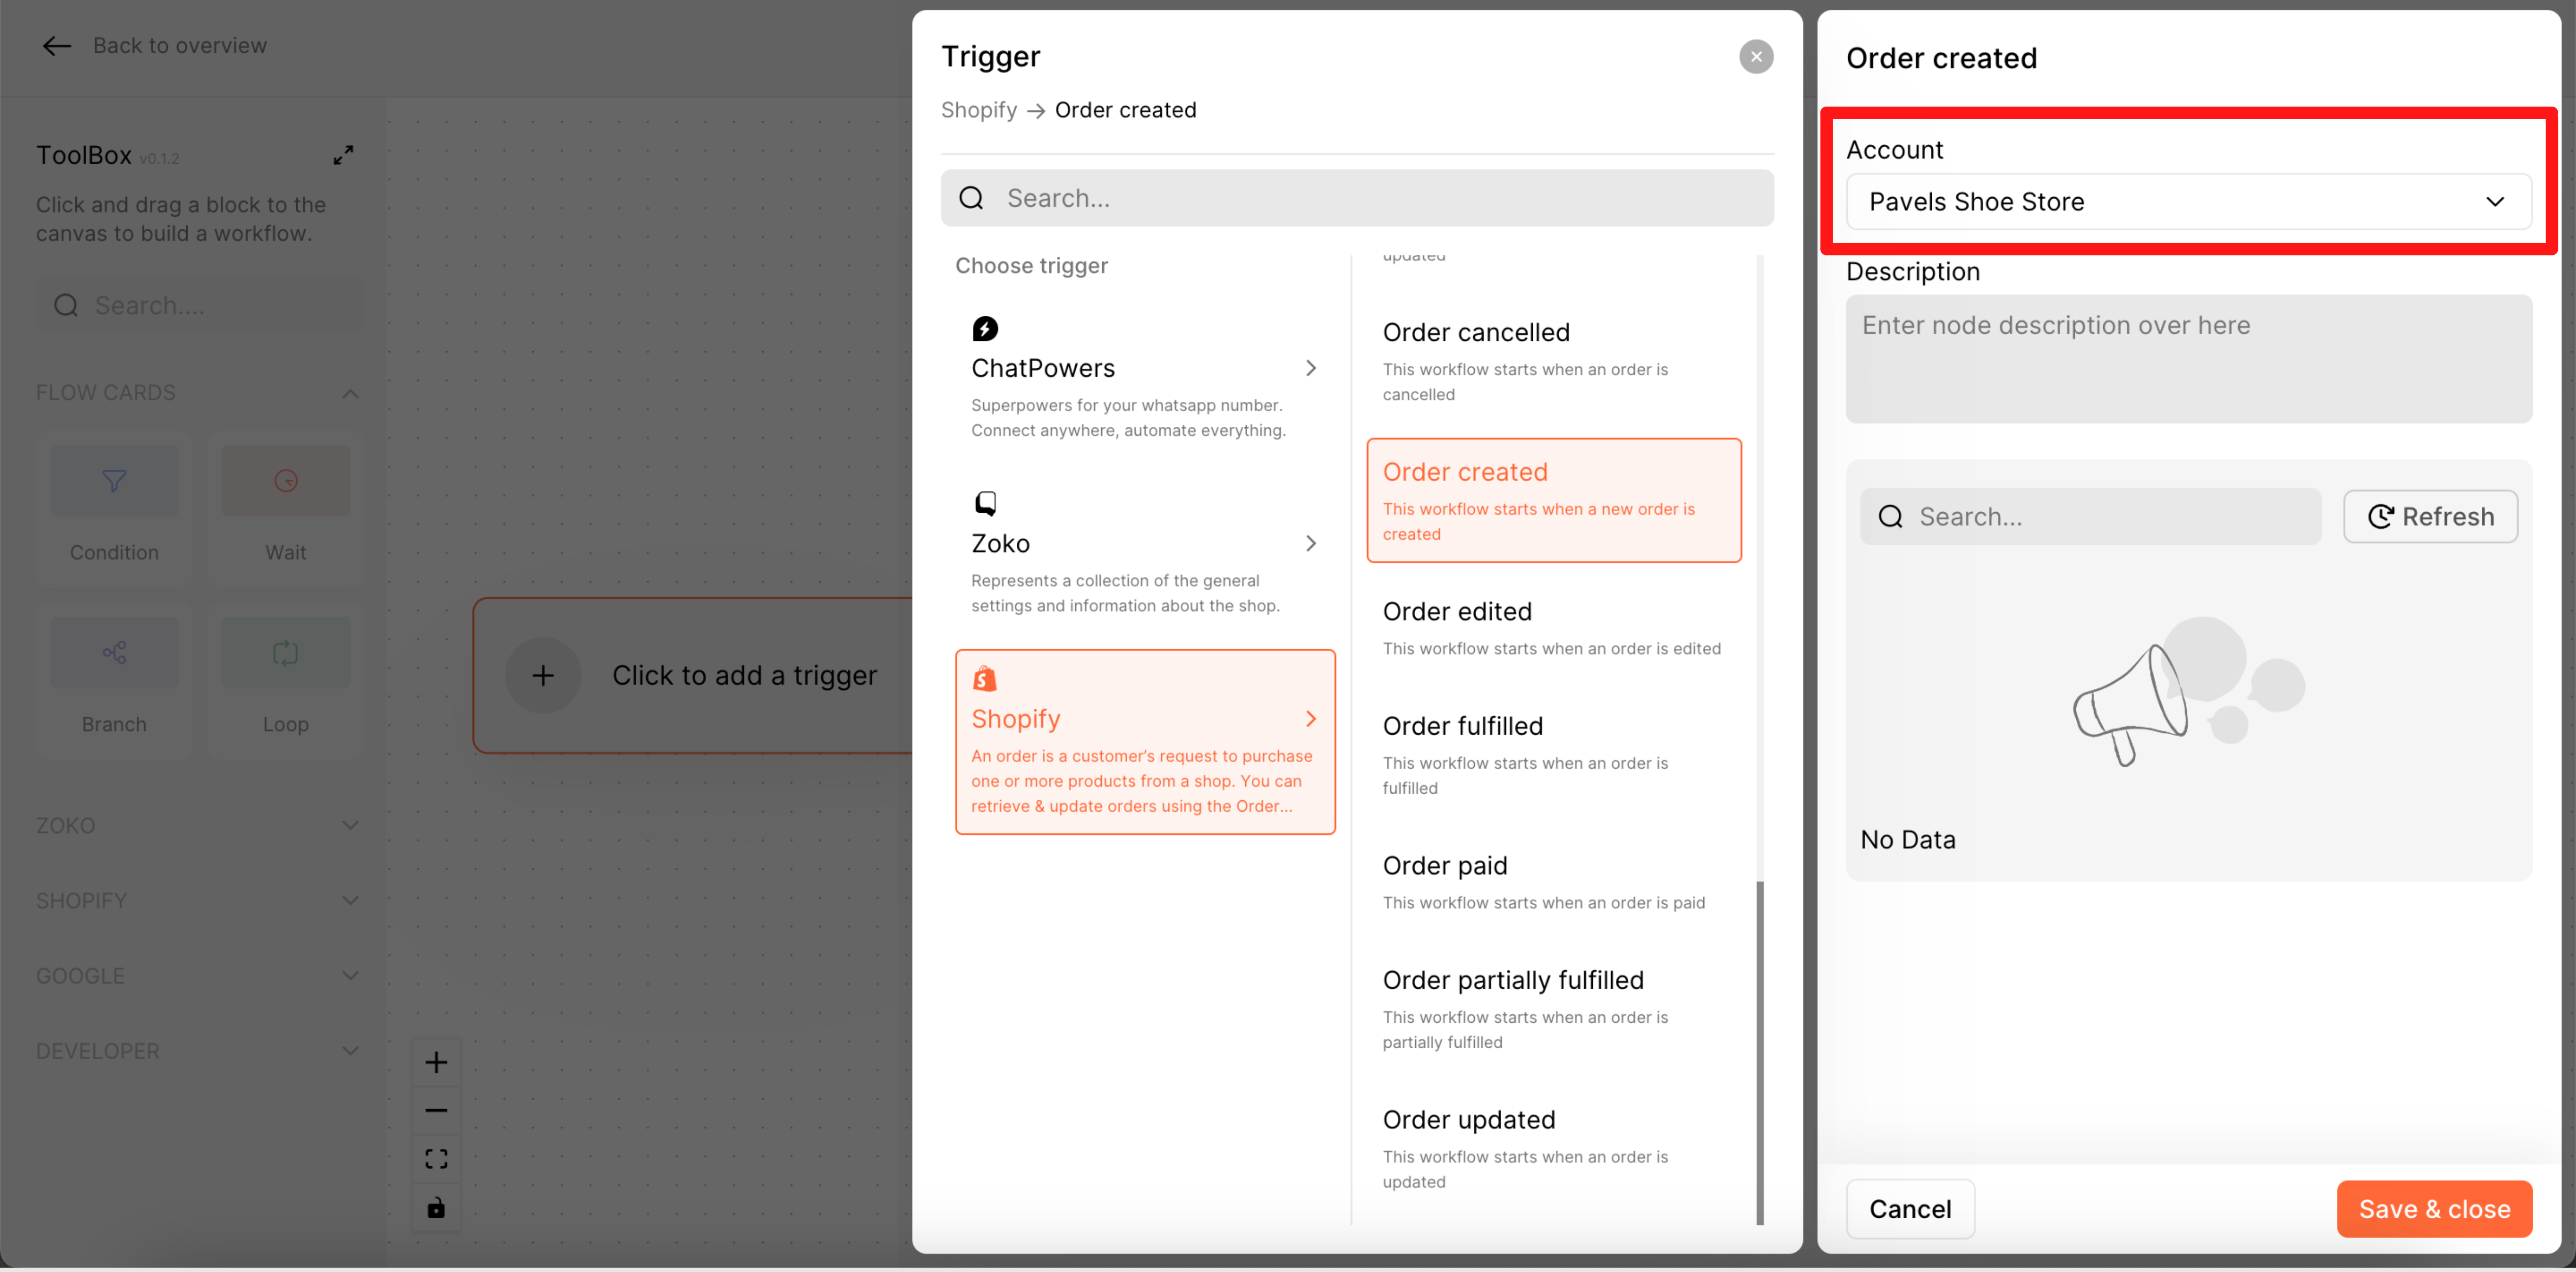
- Click on Trigger to open configuration settings.
- Click on Shopify >> Order created.
- Choose the Shopify Account from the dropdown menu.
- Type the description name of the Shopify trigger flow here. In our case, we added the description as “Picks up the order created details from the Shopify Store.”
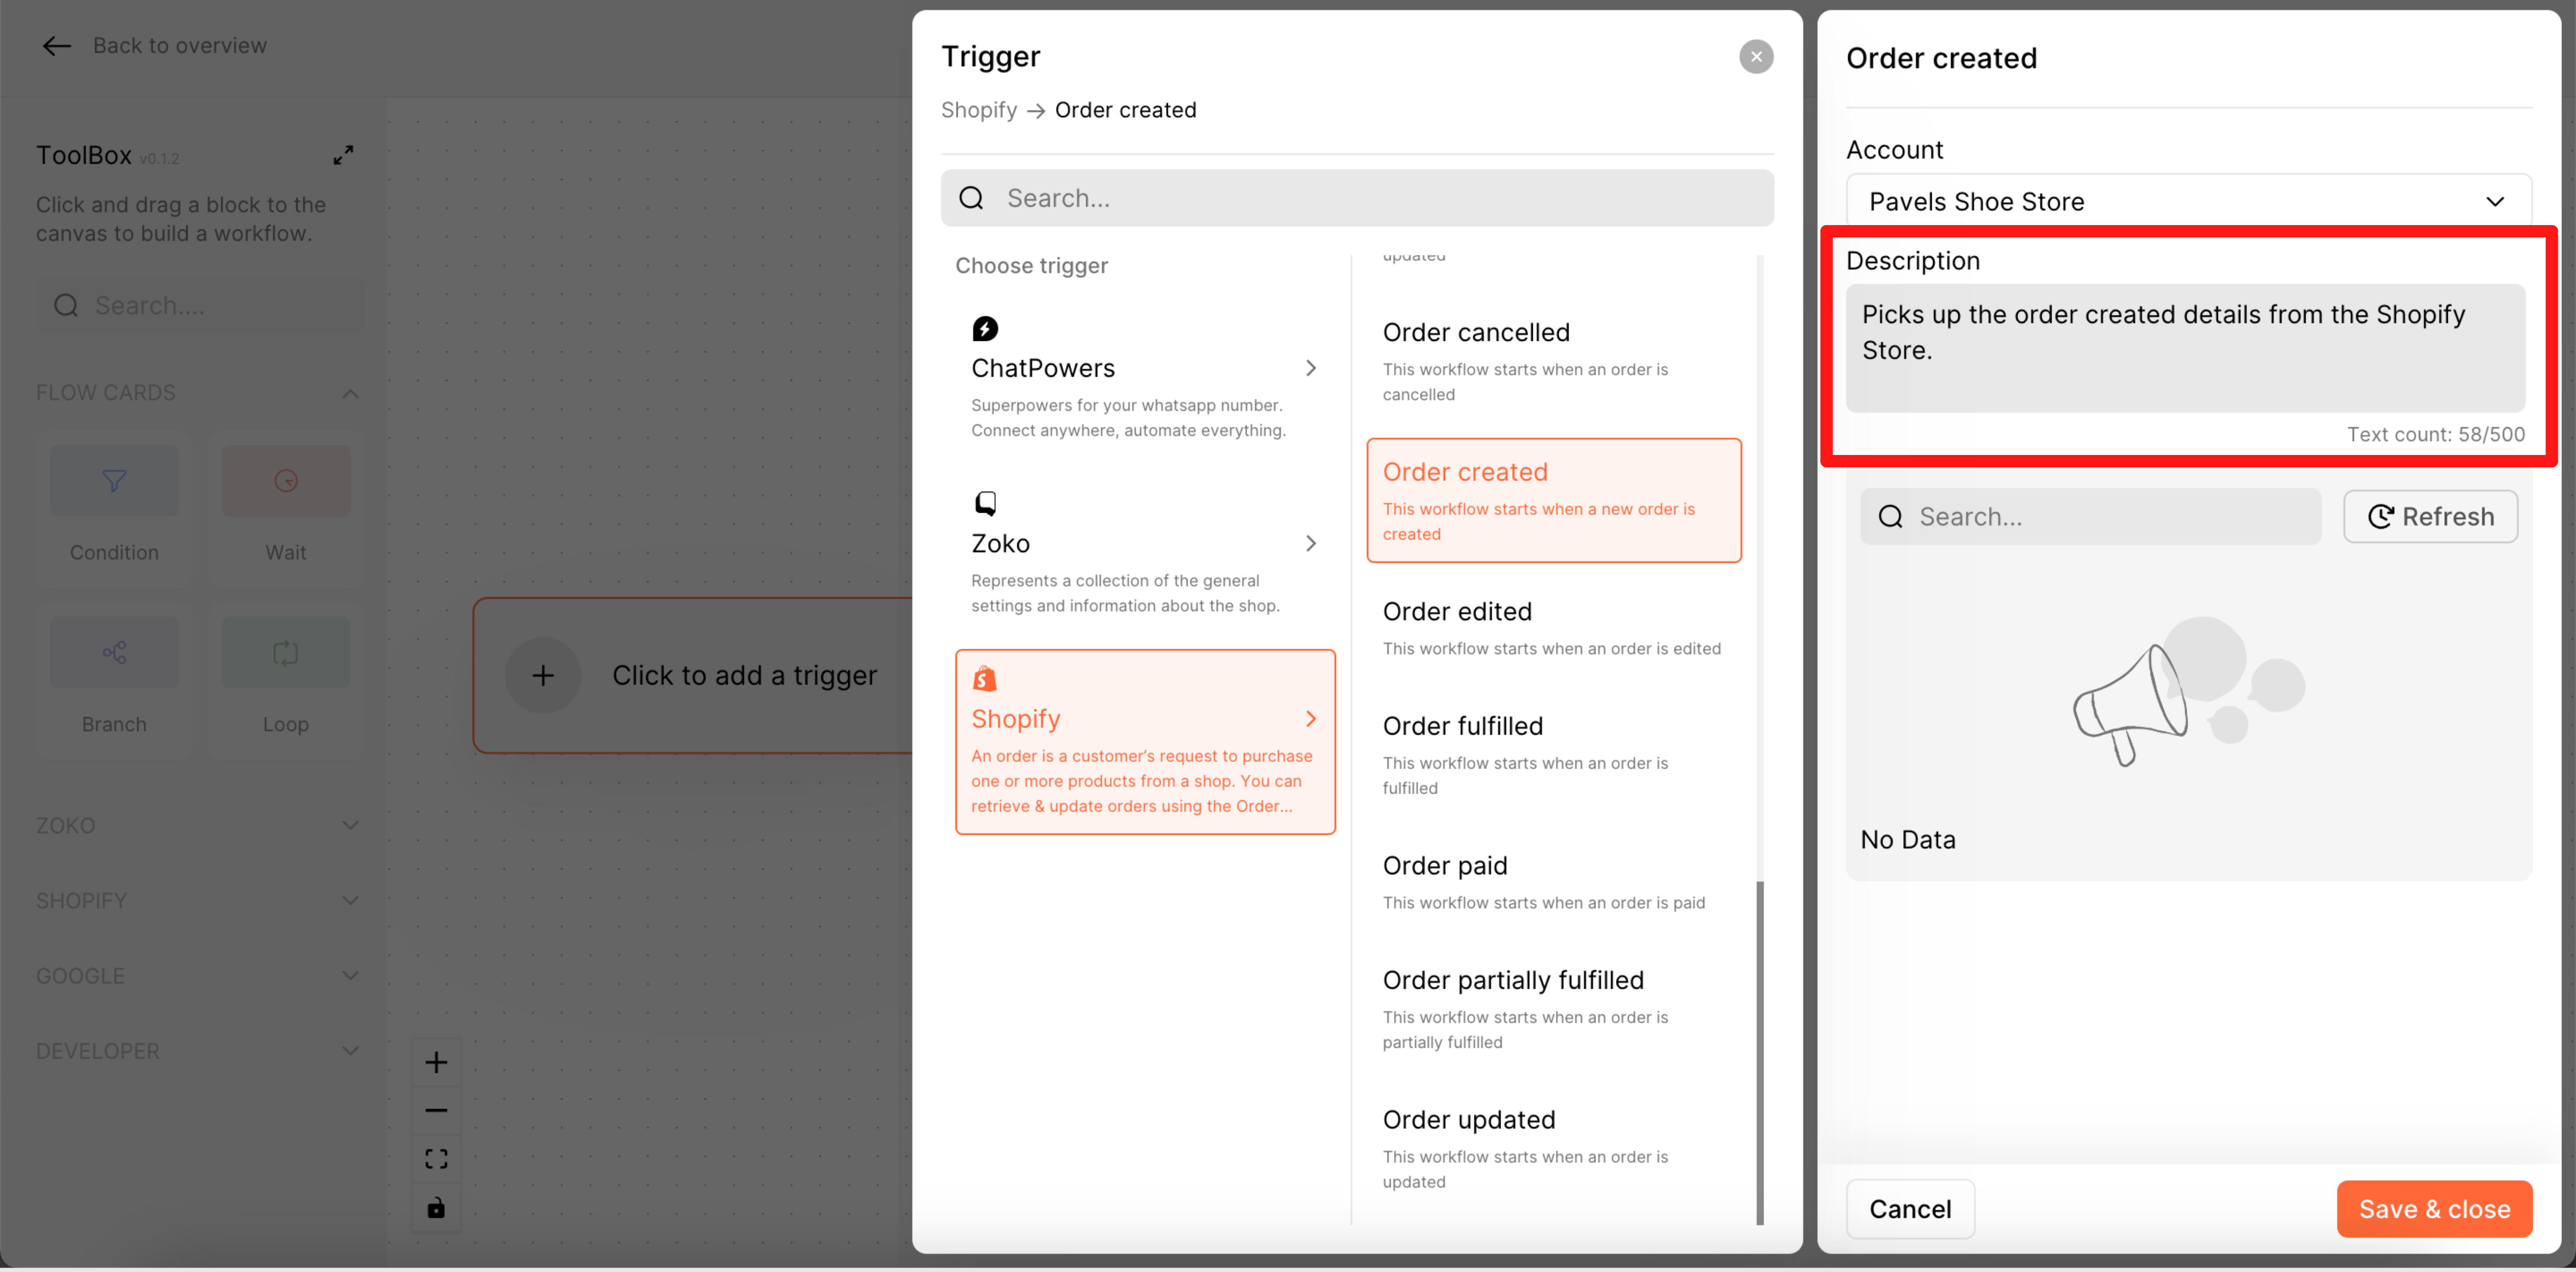
- Click on the Refresh button to pull the previous order created details from the Shopify store, which will be displayed here.
Pro tip: Hover the mouse over the data, then click on each entry to reveal more information.

- Click on Save & Close.
The next step is to define the conditions for your trigger. This is done by specifying any filters you want to be applied to the trigger and what all conditions are needed to be satisfied for the workflow to get triggered. For example, you may want to send a confirmation message to customers who have placed an order over a certain amount but not to send a confirmation message for orders below that amount. You can set a condition in your workflow that checks the order total and only triggers the workflow if the total meets your specified criteria.
Refer to our article to understand on Setting up the Condition in the Flow.
In our example,
- Pick the condition card from the toolbox and drag it into canvas designer.
- Click on the Condition card to open the configuration settings.
- Type the description name of a condition that you are setting up.
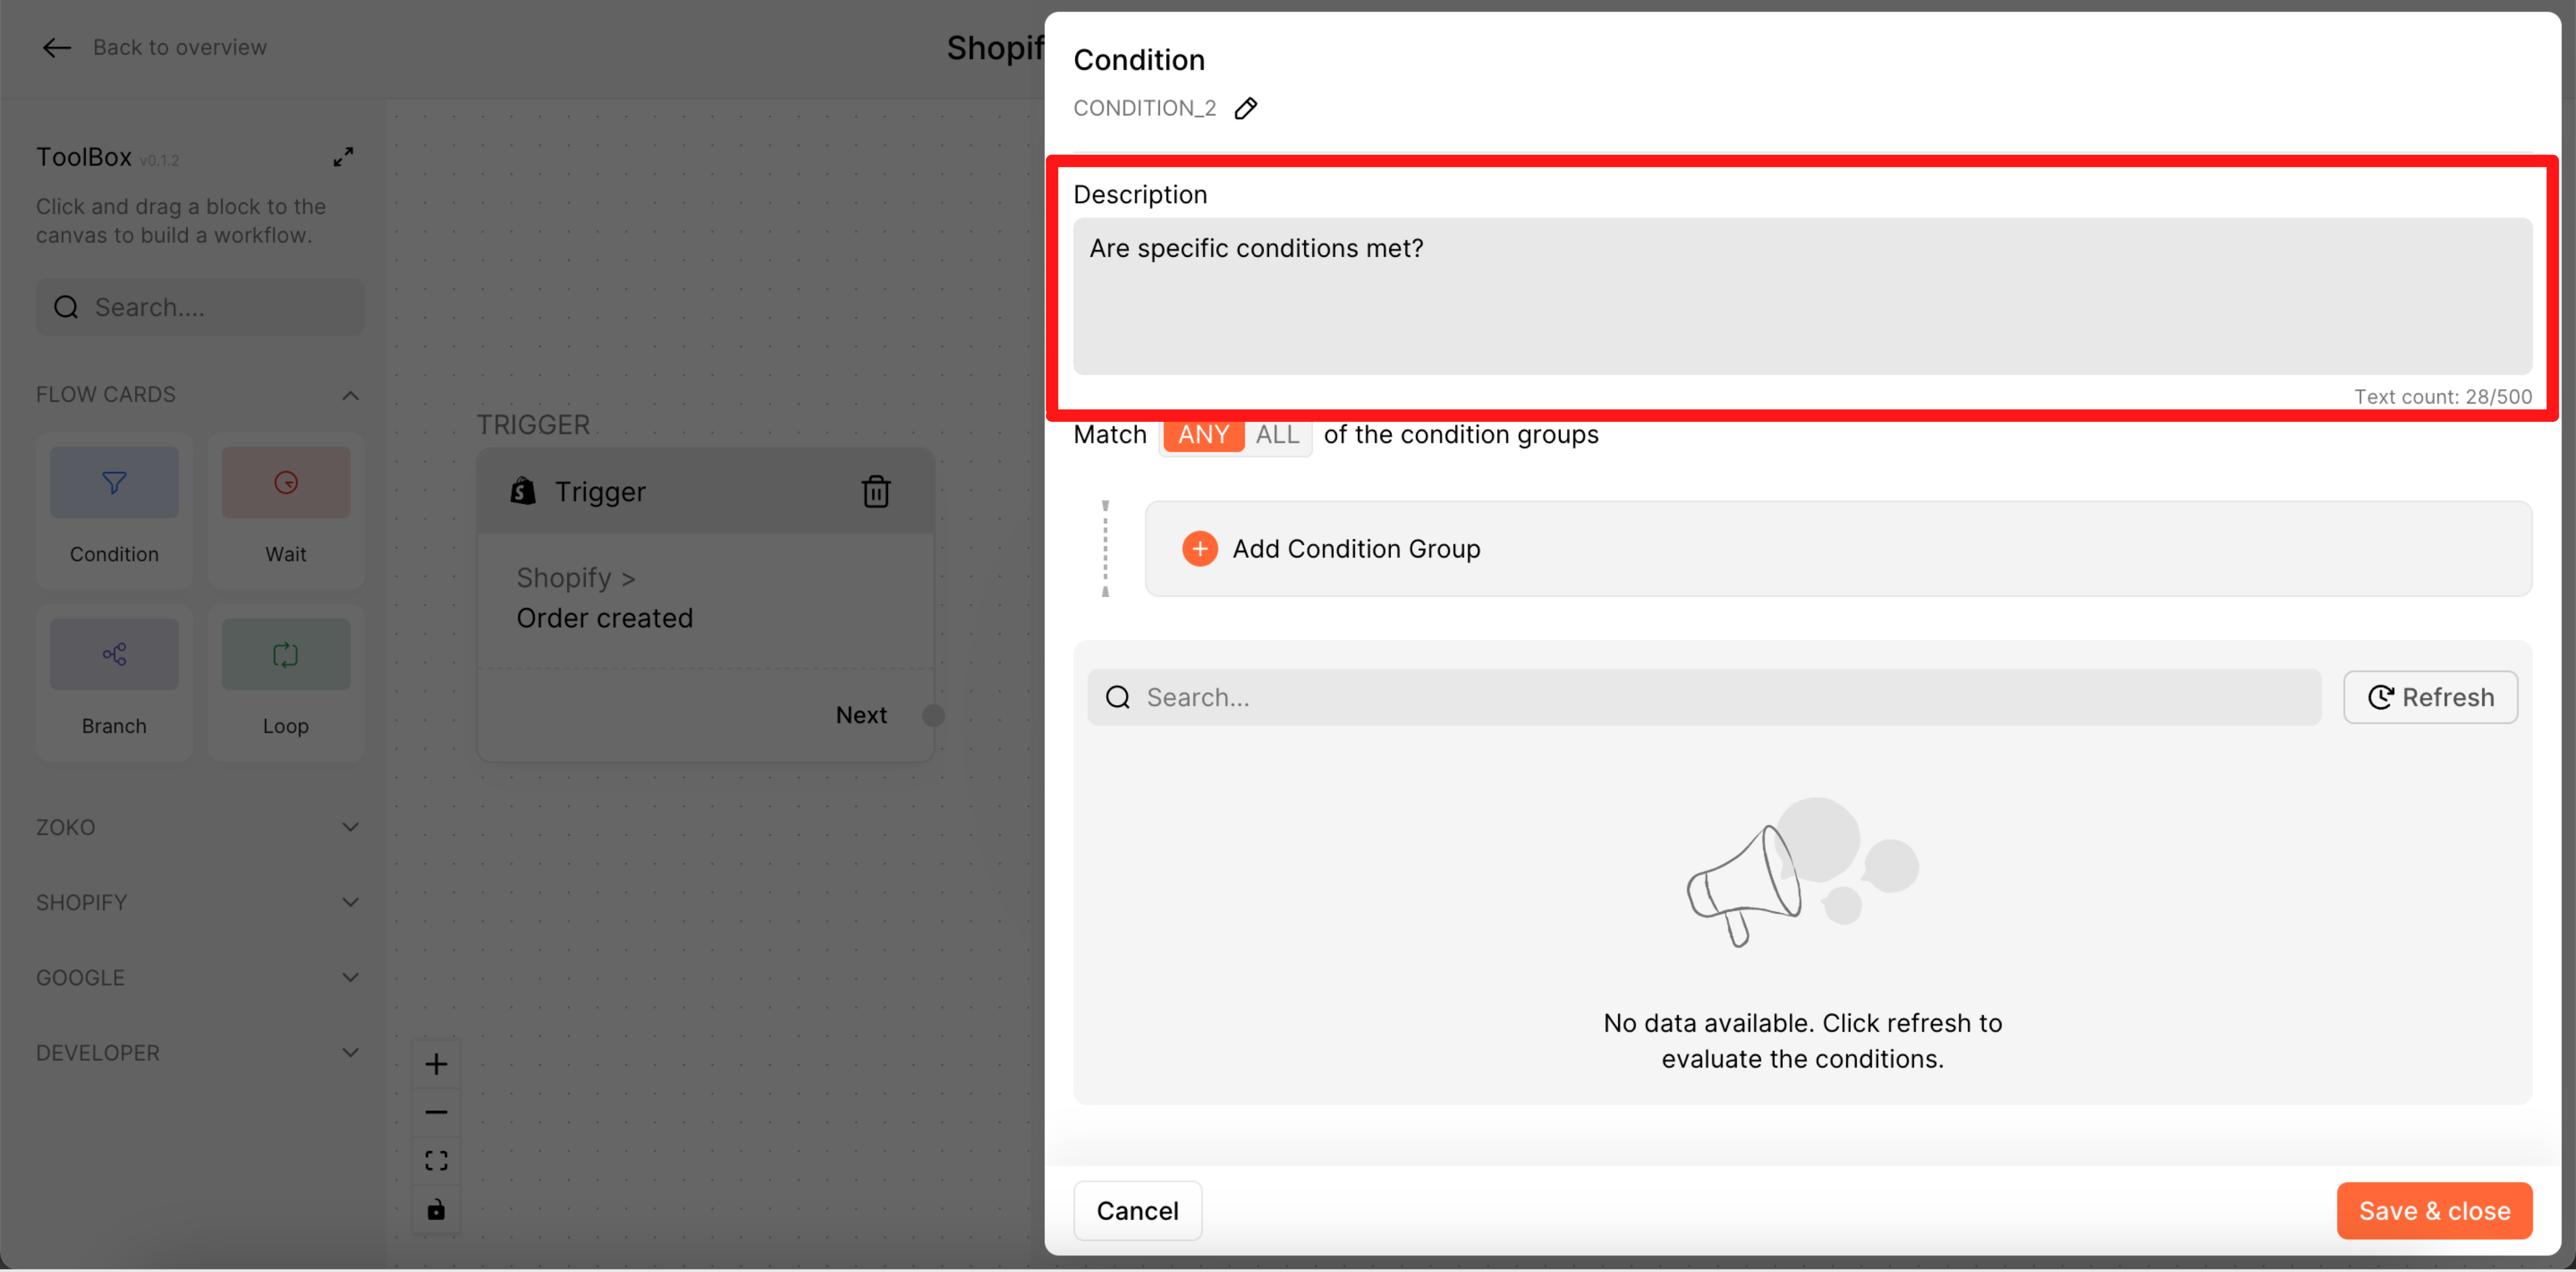
- Click on +Add Condition Group.
- Click on enter a value and add the trigger criteria from the trigger. In our case, we selected subtotal_price.
- Choose the sensitive from the dropdown. In our case, we selected Greater than.
- Type the order value greater than here. In our case, we add the order value greater than 2000.
Pro tip: You can add multiple conditions by clicking the +Add Condition button.
- Click on Save & Close.

The automation will only be triggered when an order is placed in the store, and the total order exceeds 2000. When the condition is met, the automation will send a confirmation message to the customer.
If the order total is less than 2000, the automation will not be triggered and will take no action.
You can customize the conditions and actions for your automation to fit your specific needs and business goals.
After you have set up the trigger and conditions for your automation, the next step is to add Zoko action cards, which will be taken within the Zoko platform as part of the workflow. Examples of Zoko action cards could include sending a message to a customer, adding a tag to a customer's profile, assigning a chat to a specific team member, and much more. Refer to our article to Understand the Definition of Zoko Action Cards.
In our example, Adding a message action card. You can choose different actions for your automation to fit your specific needs.
- Pick the Message card and drag it into the designer canvas.
- Click on Message card to open the configuration settings.
- Choose the Zoko account from the dropdown menu.
- Type the Description of the message here.
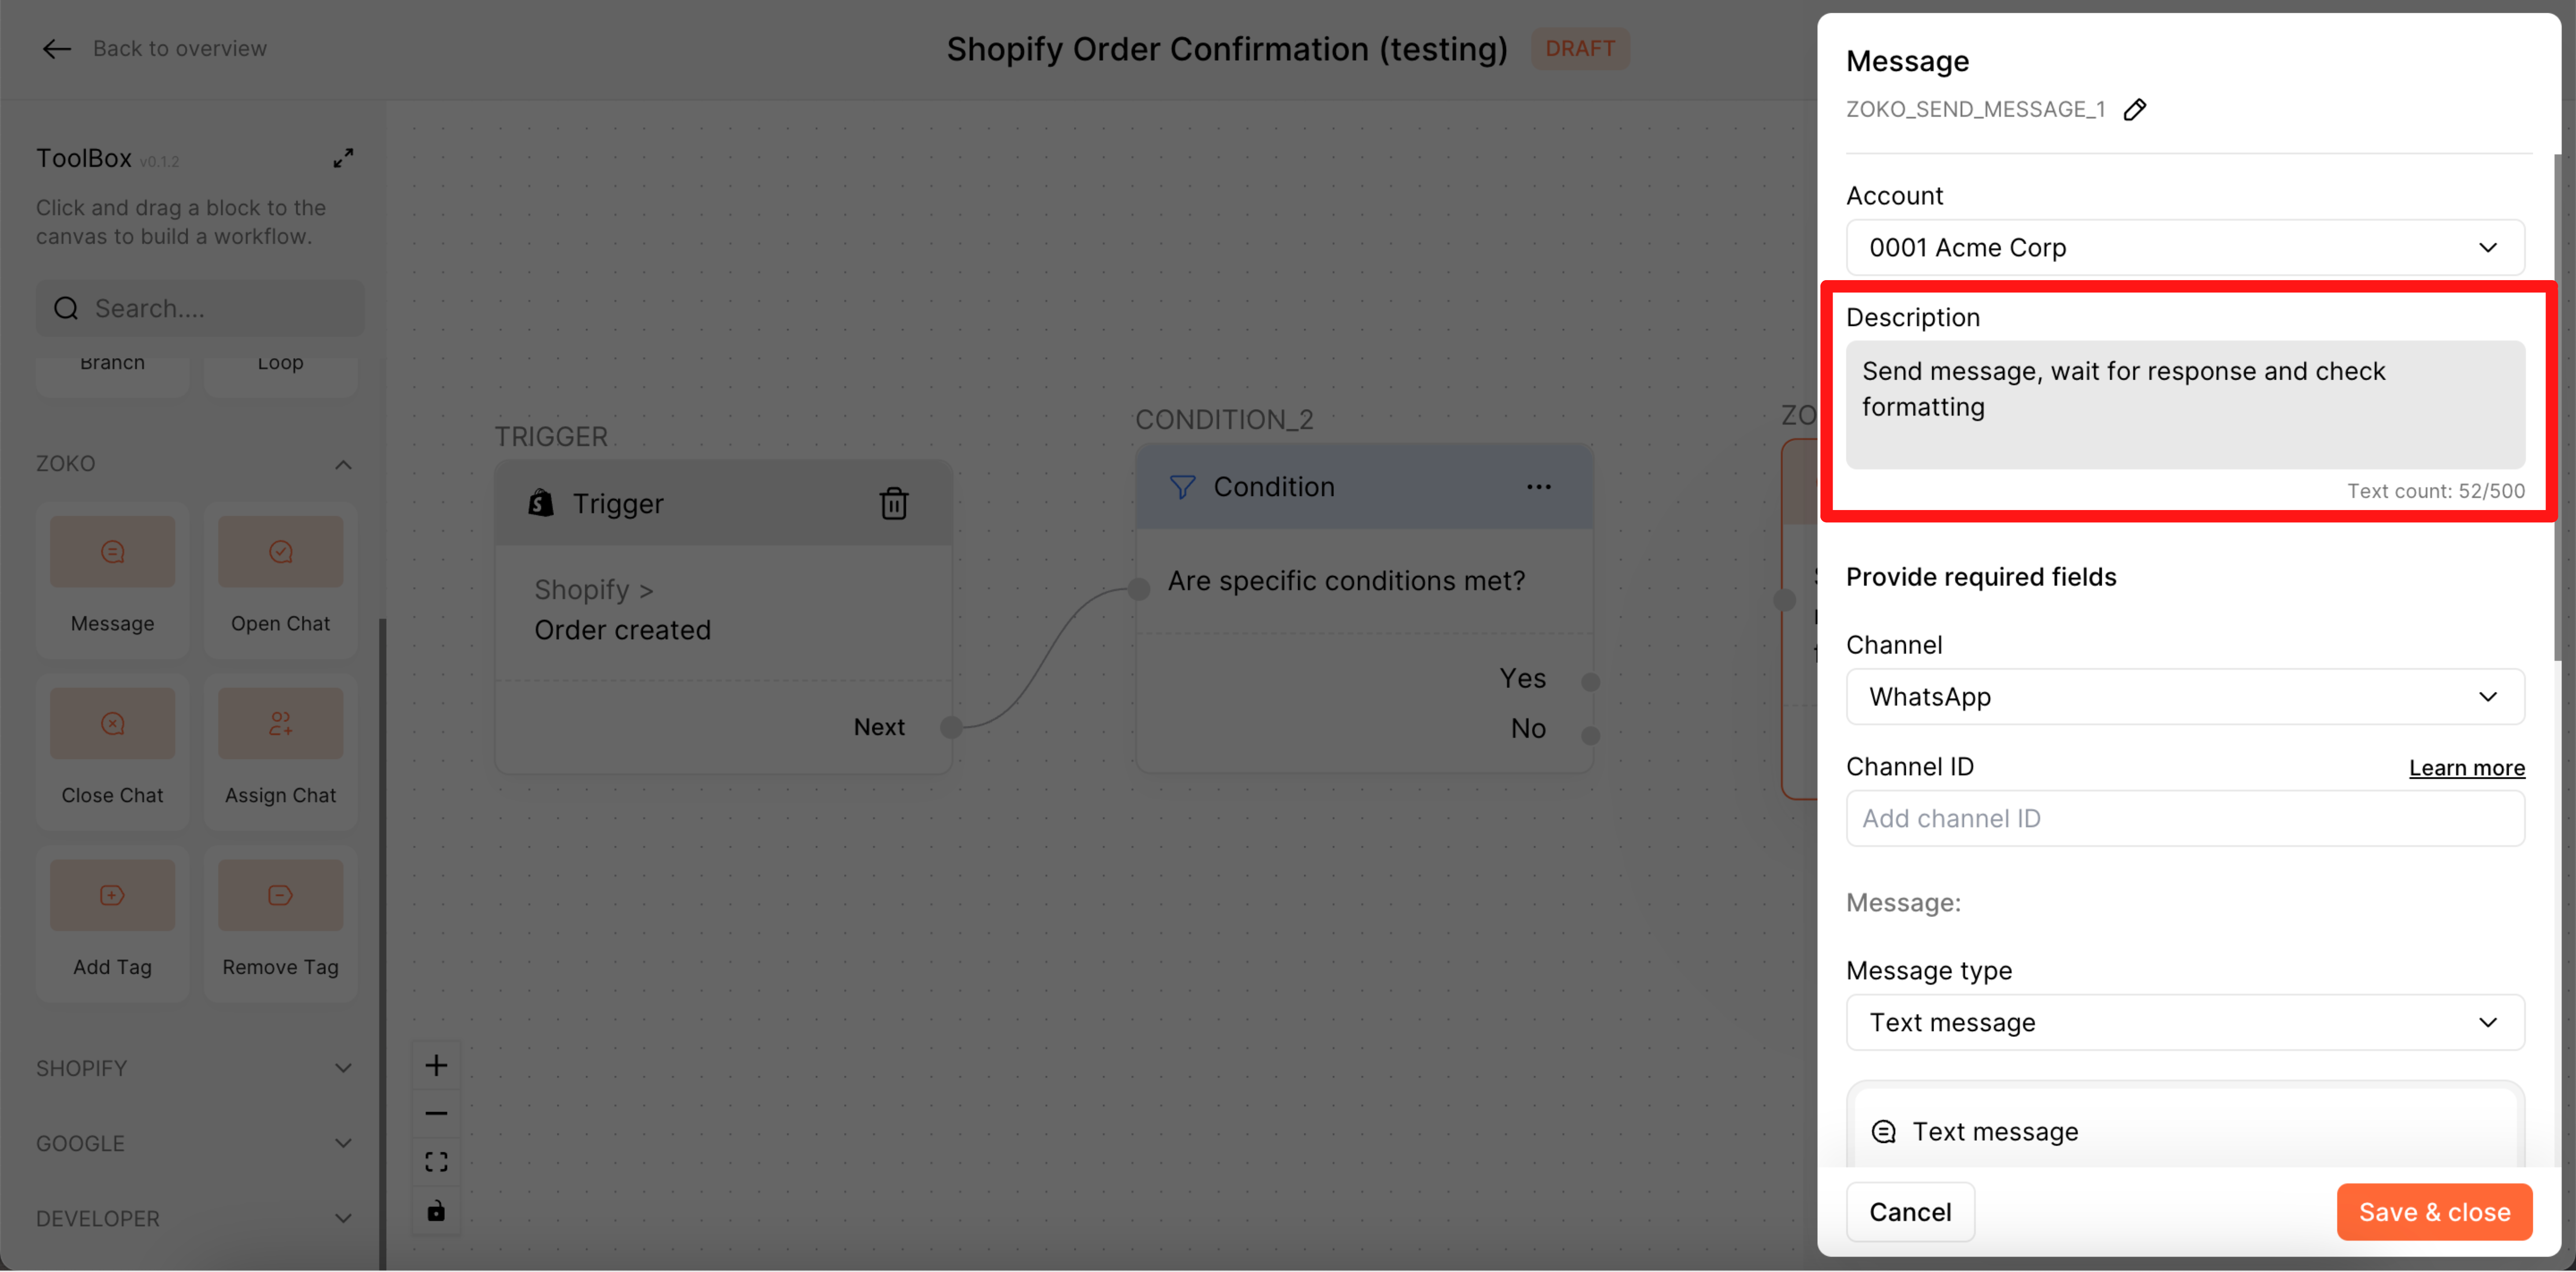
- Choose the channel and channel id. In our case, we selected the channel as WhatsApp and the channel id as trigger >>shipping_address>>phone. Refer to our article to understand the Channel ID in the Message Node.

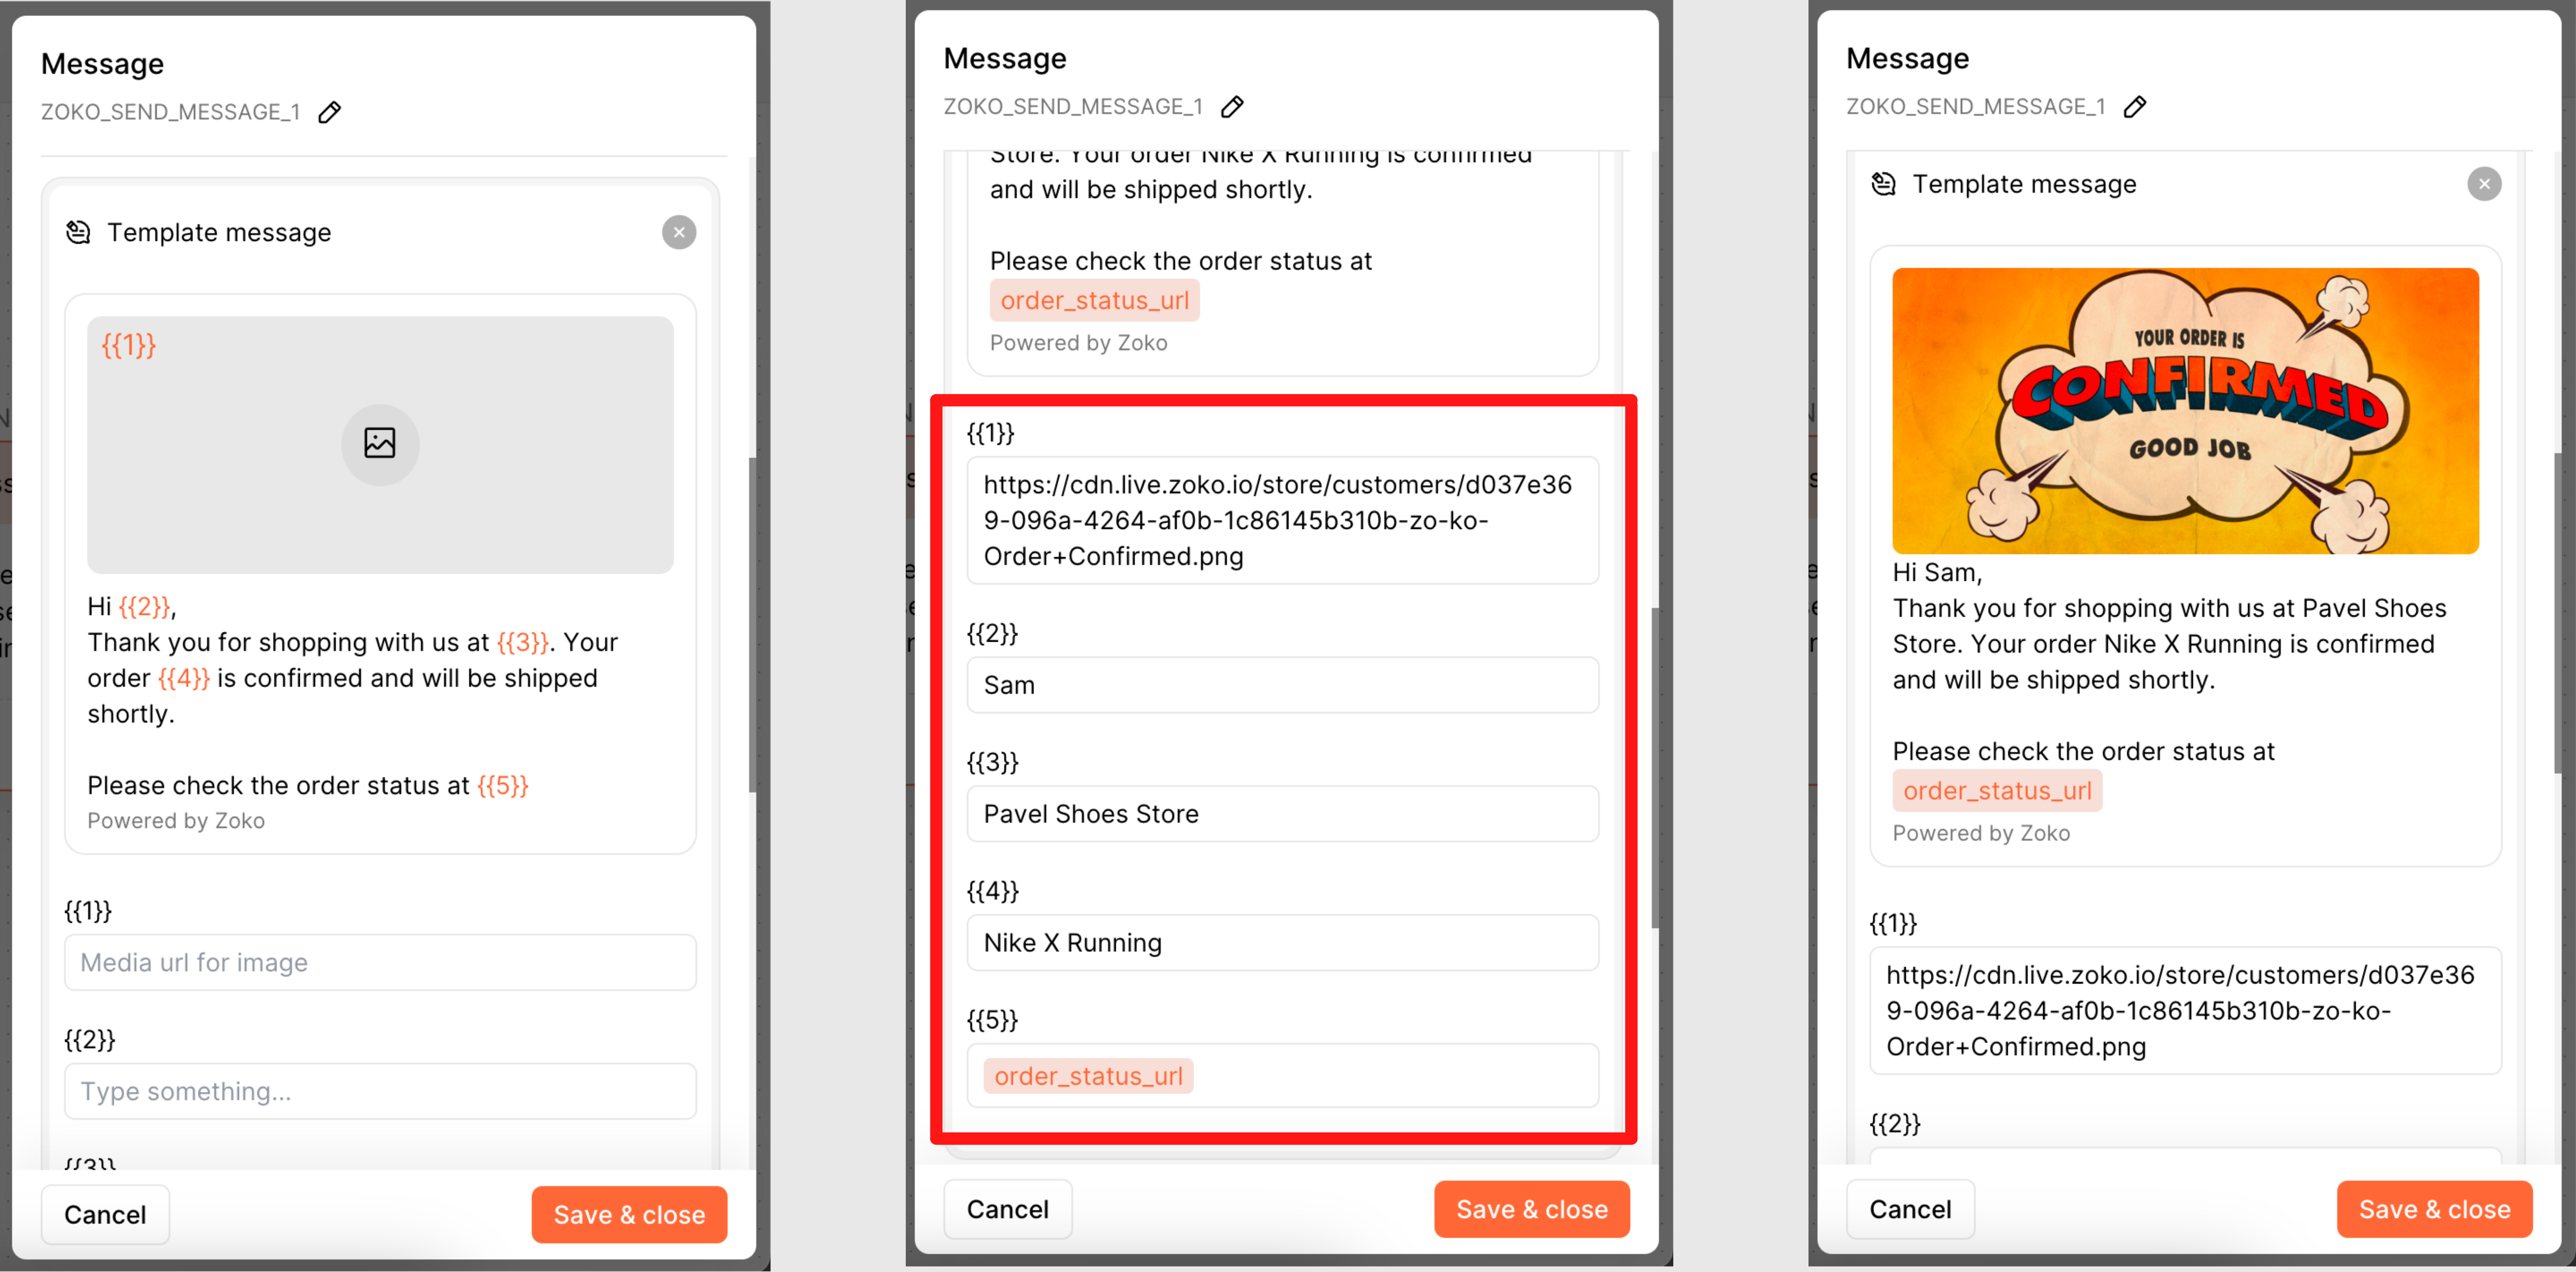
- Select the Message type from the dropdown. In our case, we selected a Template message.
- Select the Approved Template message.
Note: The template message will be displayed here only if you have created it on the zoko dashboard. If you do not have the template refer to our article, How to Create Templates.
- Fill in the variable in the template fields.
- If you want to delay sending the message at specific times, you can do it by clicking on Wait for a response and setting up the time.
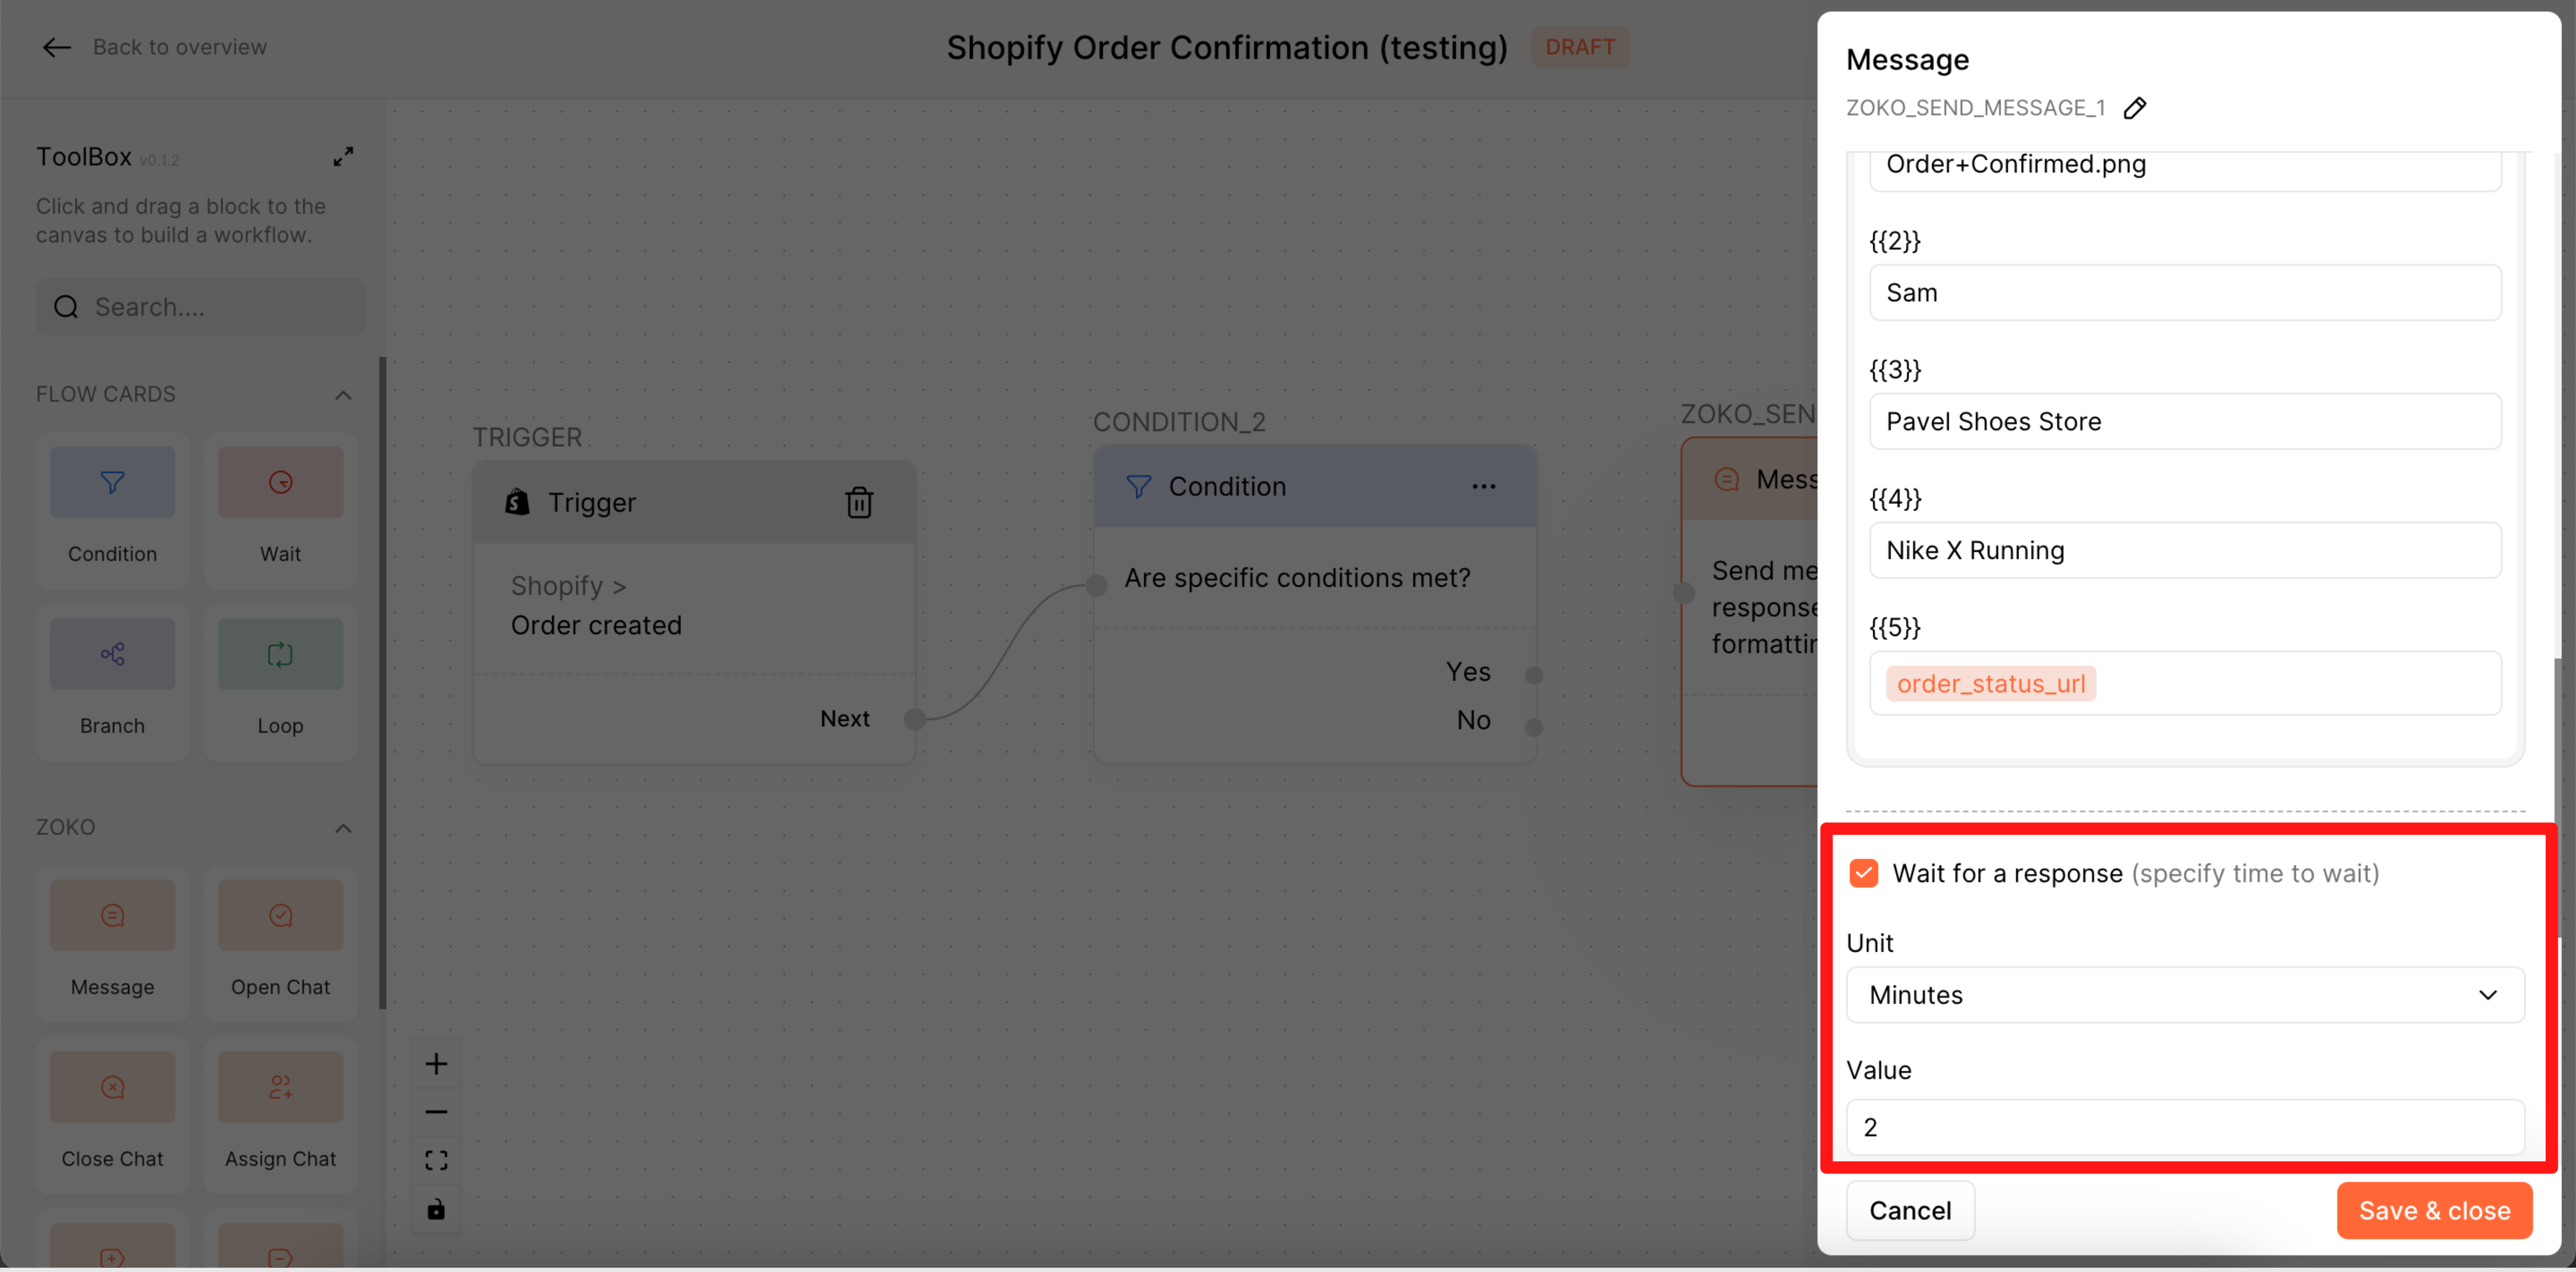
- Click on Save & Close.
Refer to our article to Understand the Message Action Card.
After setting up the trigger, conditions and Zoko action cards for your automation, you can choose the Shopify action cards you want to execute when the automation is triggered. Action cards are pre-built tasks that you can use to automate various processes in your workflow. Some examples of action cards include:
- Adding an order tag.
- Removing order tag.
And much more, etc. You can add multiple action cards to your automation and customize them to fit your needs. Refer to our article to Understand the Definition of Shopify Action Cards.
In our example, we are adding the order tag as High_orders to the Shopify store.
- Choose the Add order tag and drag it into the designer canvas.
- Click on Add order tag card to open the configuration settings.
- Choose the Shopify account from the dropdown and type the Description name for the tag.
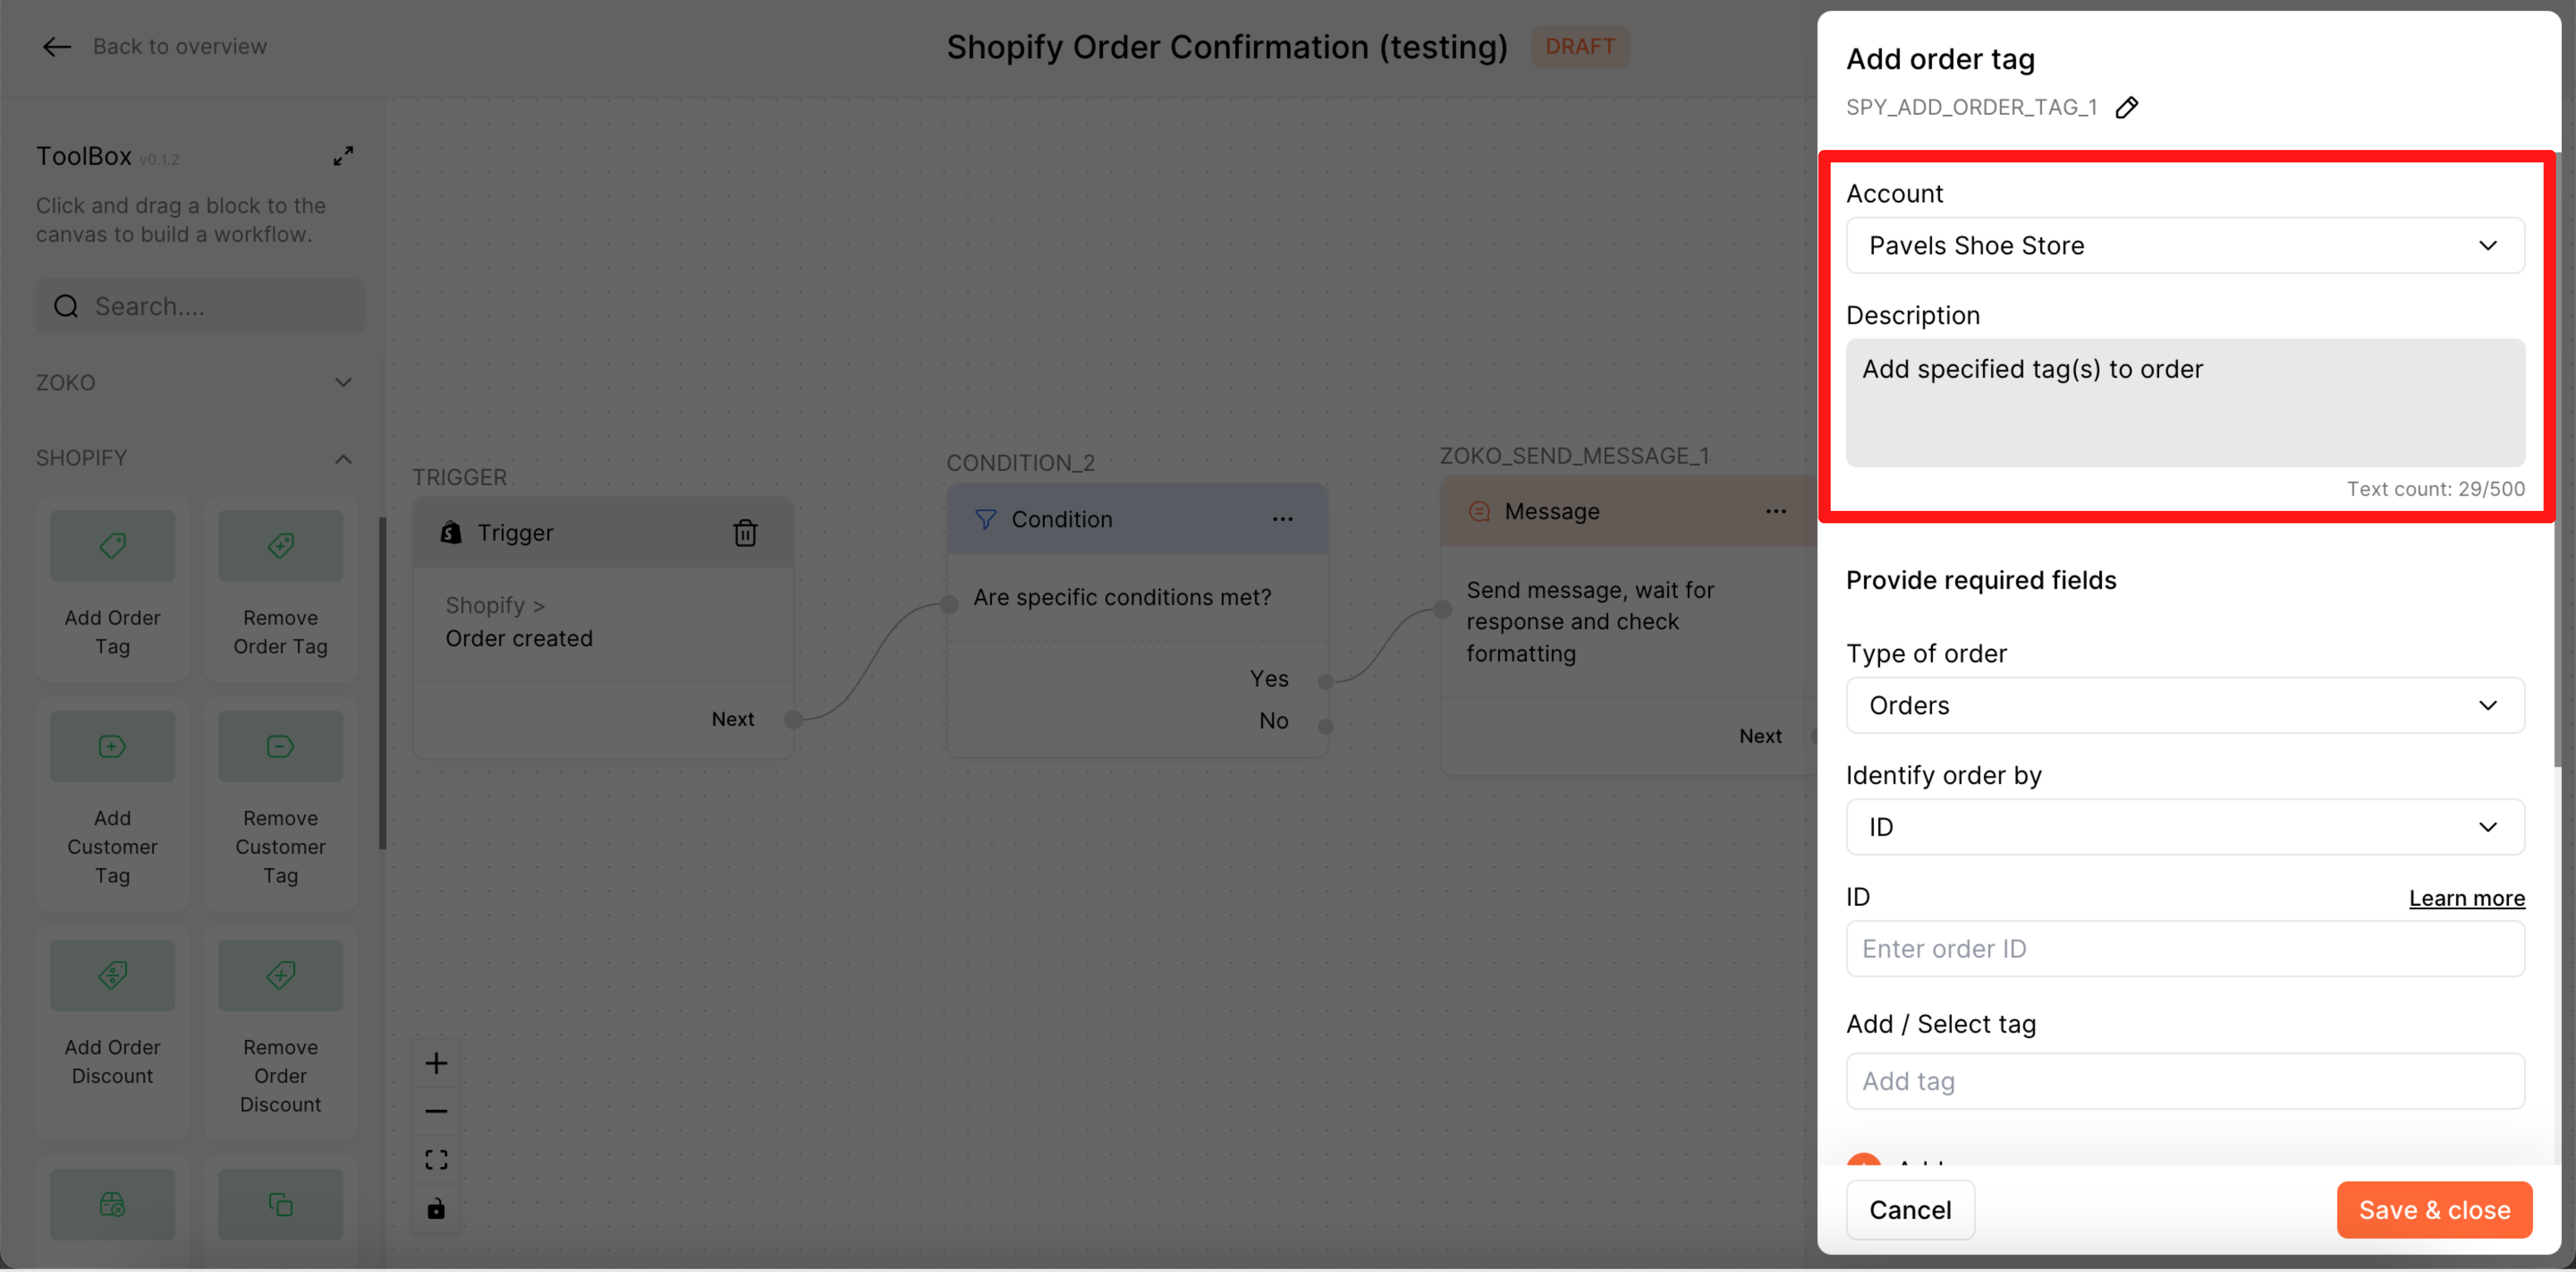
- Select the type of order from the dropdown. In our case, we selected Orders.
- Select the Identify order by from the dropdown. In our case, we selected ID.
- Select the Order ID from the criteria. In our case, we selected id.
- You can type here the text that you want to add a tag. In our case, we added a tag name as premium_customer.

- You can also add multiple tags by clicking on +Add and typing the tag name.
- Click on save & close.
Remember that to save the workflow in drafts, simply click on the Save button after you have made the changes or created a new workflow. This will save the workflow as a draft, and you can come back to it later to make additional changes or publish it when you are ready.
Finally, After you have set up the trigger, conditions, and Zoko & Shopify action cards for your automation, the next step is to publish the flow and test it to ensure it's working as expected. You can do this by placing a test order on your Shopify store and checking to see if the automation is triggered and the action cards are executed correctly.
It's also a good idea to test your automation with different orders to ensure it's working as expected in all cases. For example, if you have set up conditions for your automation, you should test the automation with orders that meet the conditions and orders that don't meet the conditions to ensure it works correctly in both cases.
Keywords: Shopify card, Build workflow, Specific actions, Shopify trigger, FlowHippo.