

How to Connect Your WhatsApp Catalog on Zoko
Learn how to connect your WhatsApp catalog on Zoko step-by-step [FOR SHOPIFY USER ONLY].
Share on WhatsApp
.png)
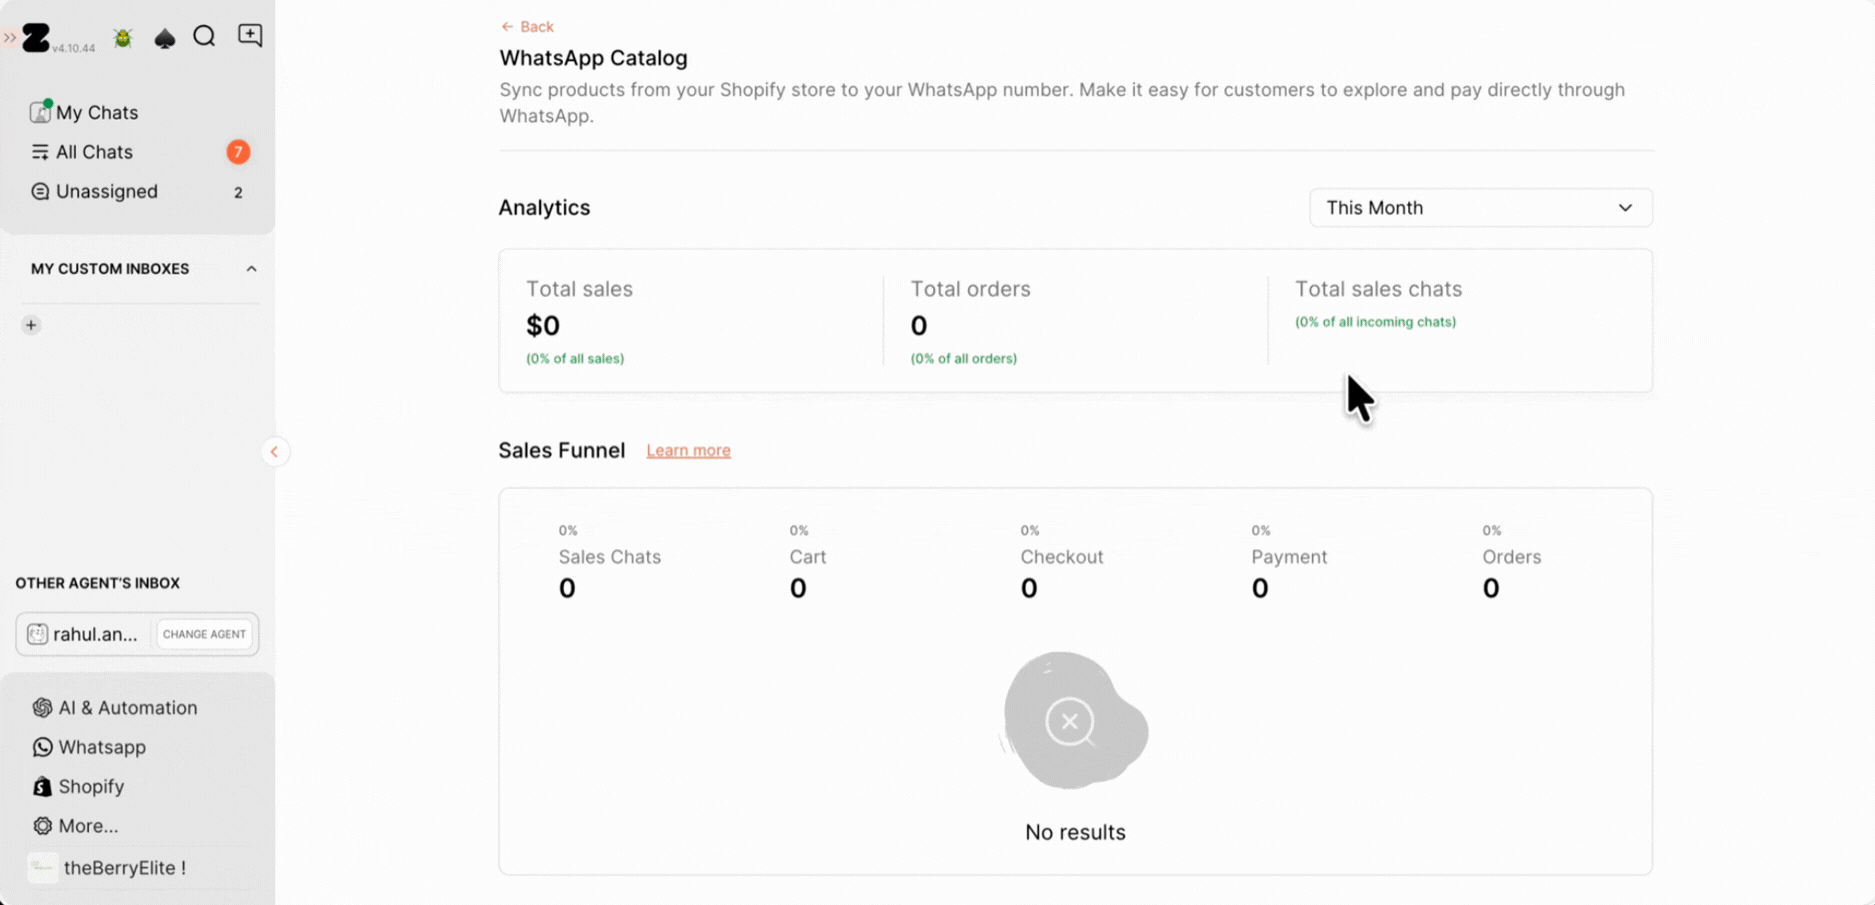
This article guides you through connecting your catalog with your Zoko account via Zoko catalog settings, Meta Business Suite, and Business Manager profile, enhancing catalog management and boosting sales. Enabling catalogs allows businesses to efficiently share products with customers, providing a seamless shopping experience within WhatsApp.
Important
- This setup is only for Shopify users
- Your Shopify store must already be integrated with Zoko
- You must have admin access to your Meta Business Manager
To do this:
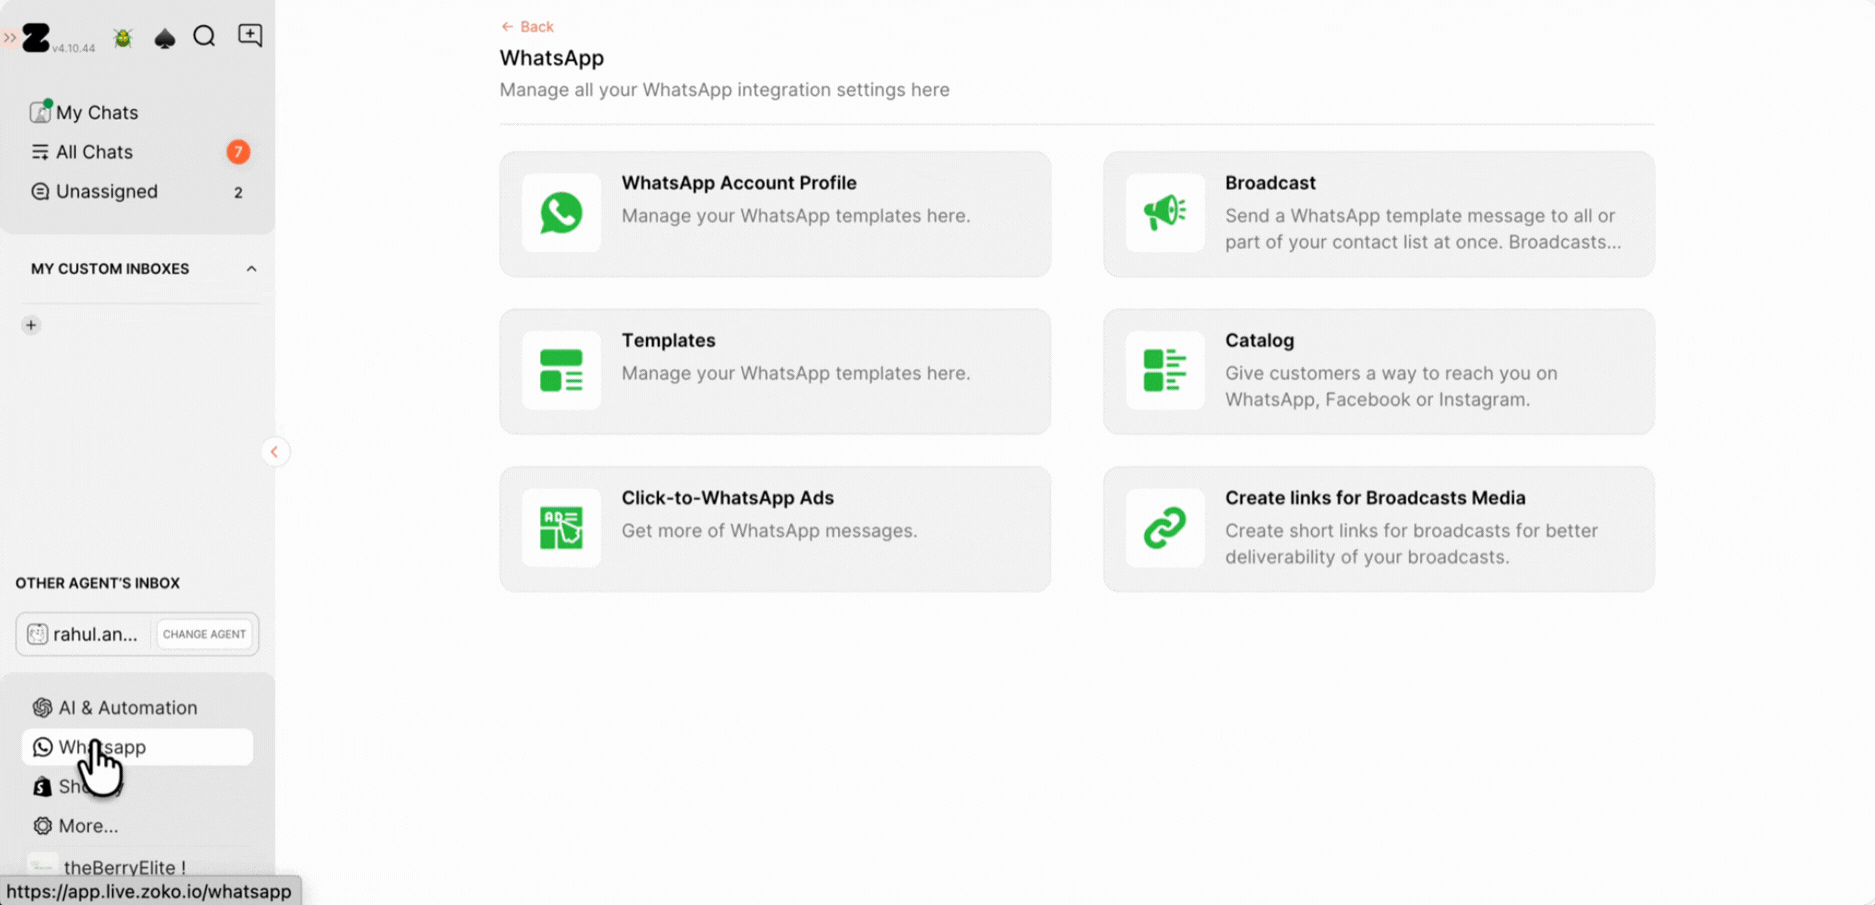
1. Go to the WhatsApp section.
2. Select Catalog.
STEP 1: Add Compliance Information [INDIAN Users only]
To comply with the commerce laws in India, you must provide certain information in your business profile.
1. Scroll down from the top to see the Catalog Settings. Click on AddCompliance information.
2. Fill in all the required details in the fields (Business Name, Business Type, Email, and Mobile Number).
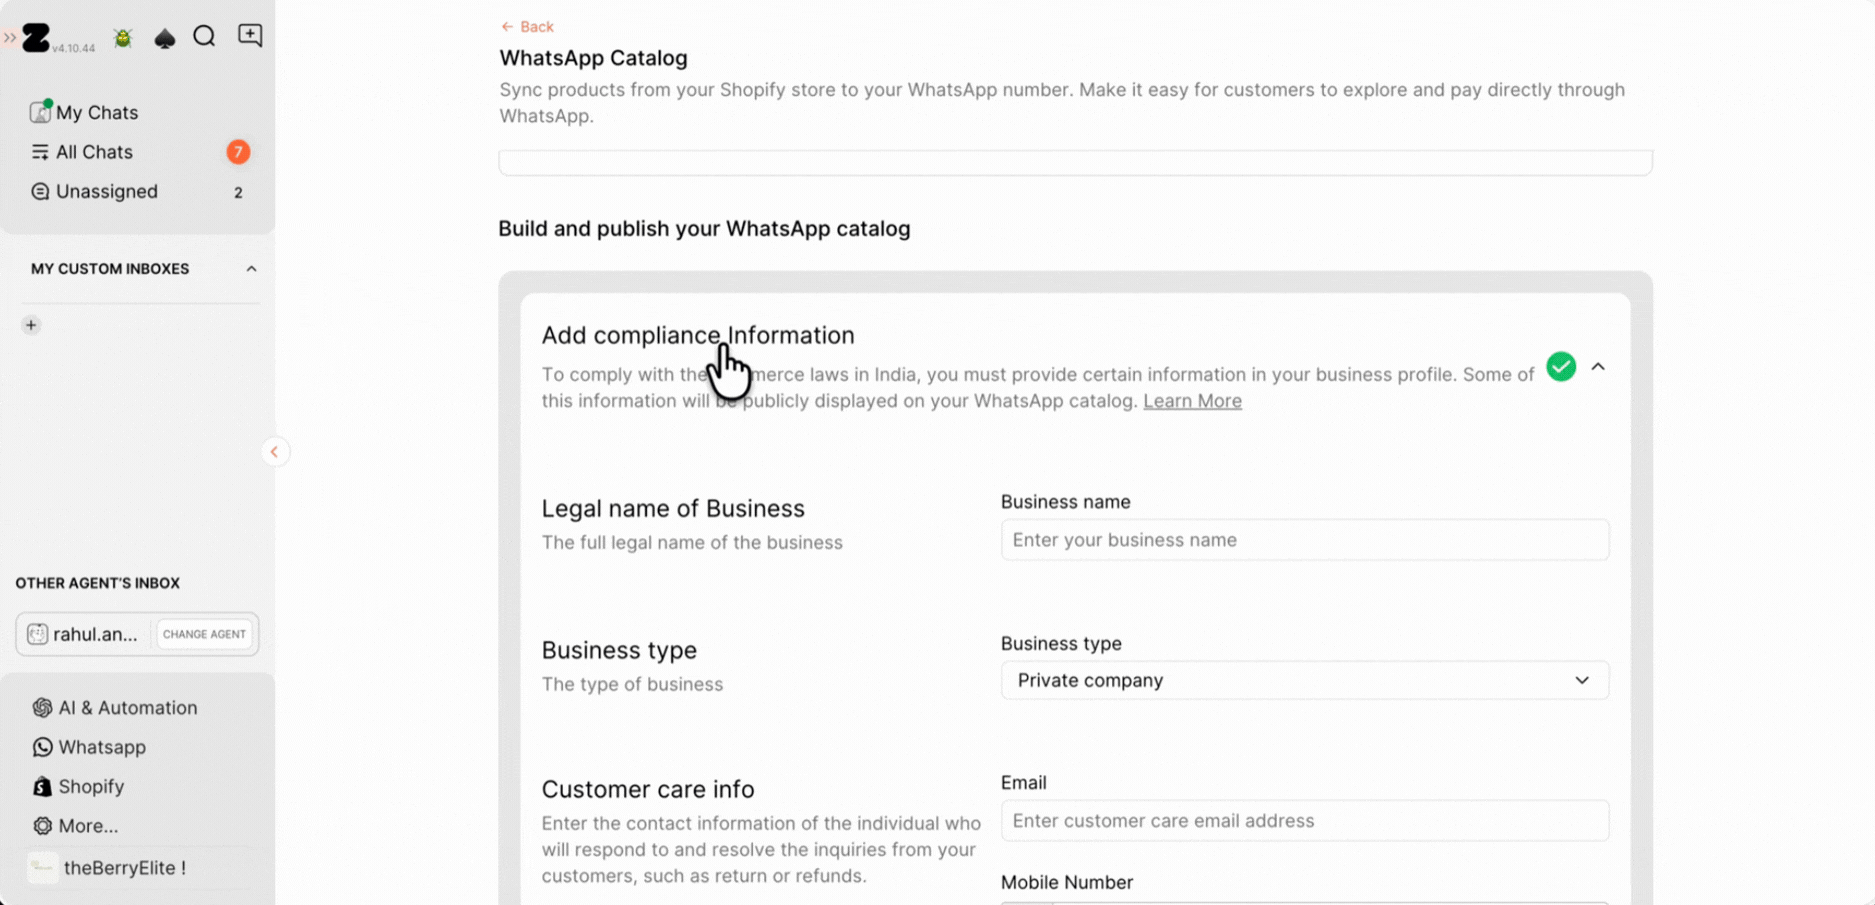
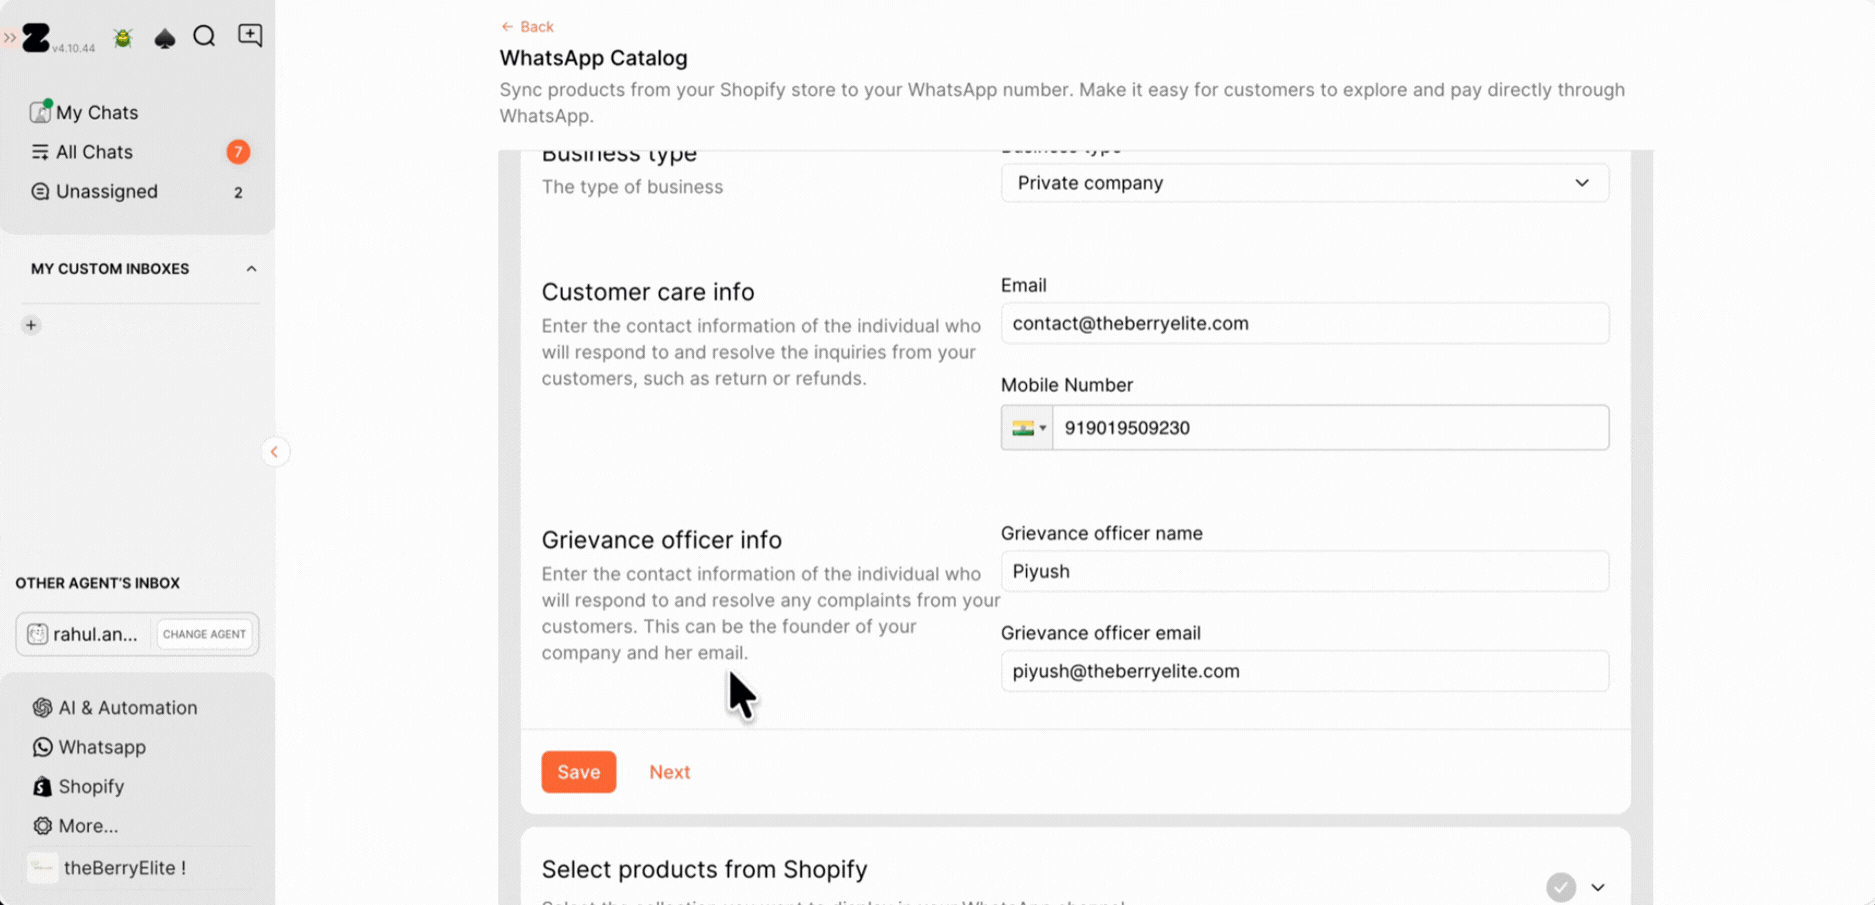
3. Type the Grievance Officer details in the fields (this will be only for the founder/head of the company email and number so that whenever a complaint is received, it will go to this email and phone number).
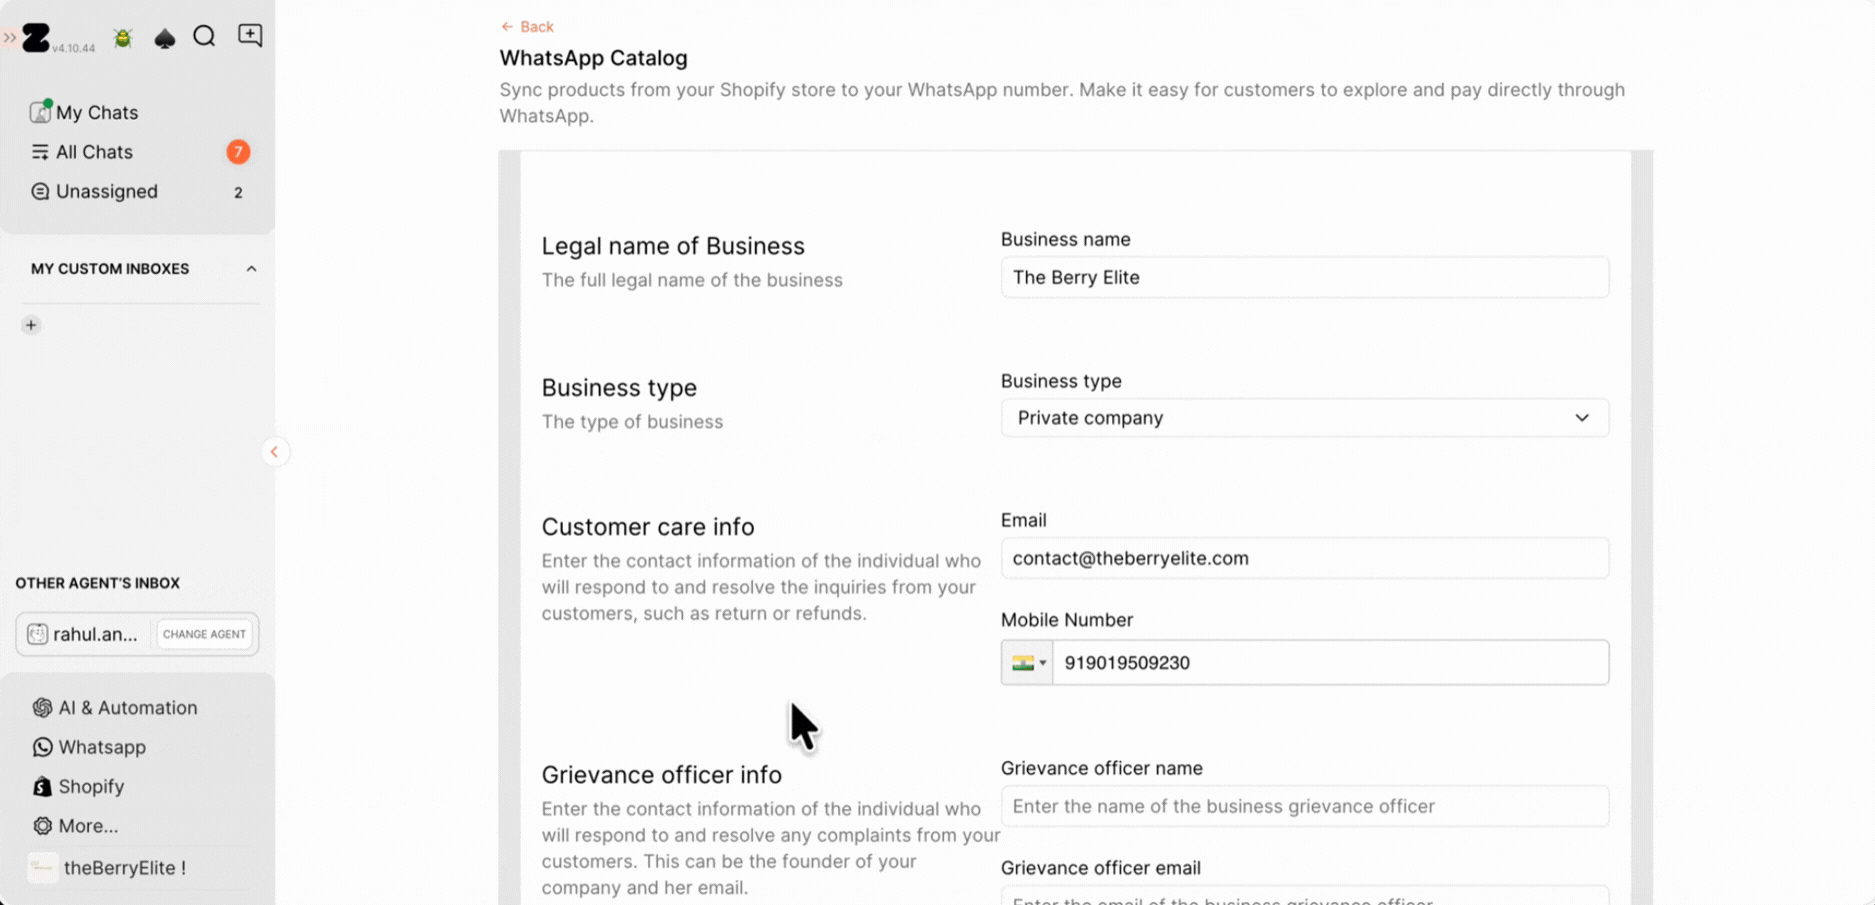
4. Click on Next to fill in the details in the next steps. If you wish to save the step, then click on Save and proceed to the next step later.
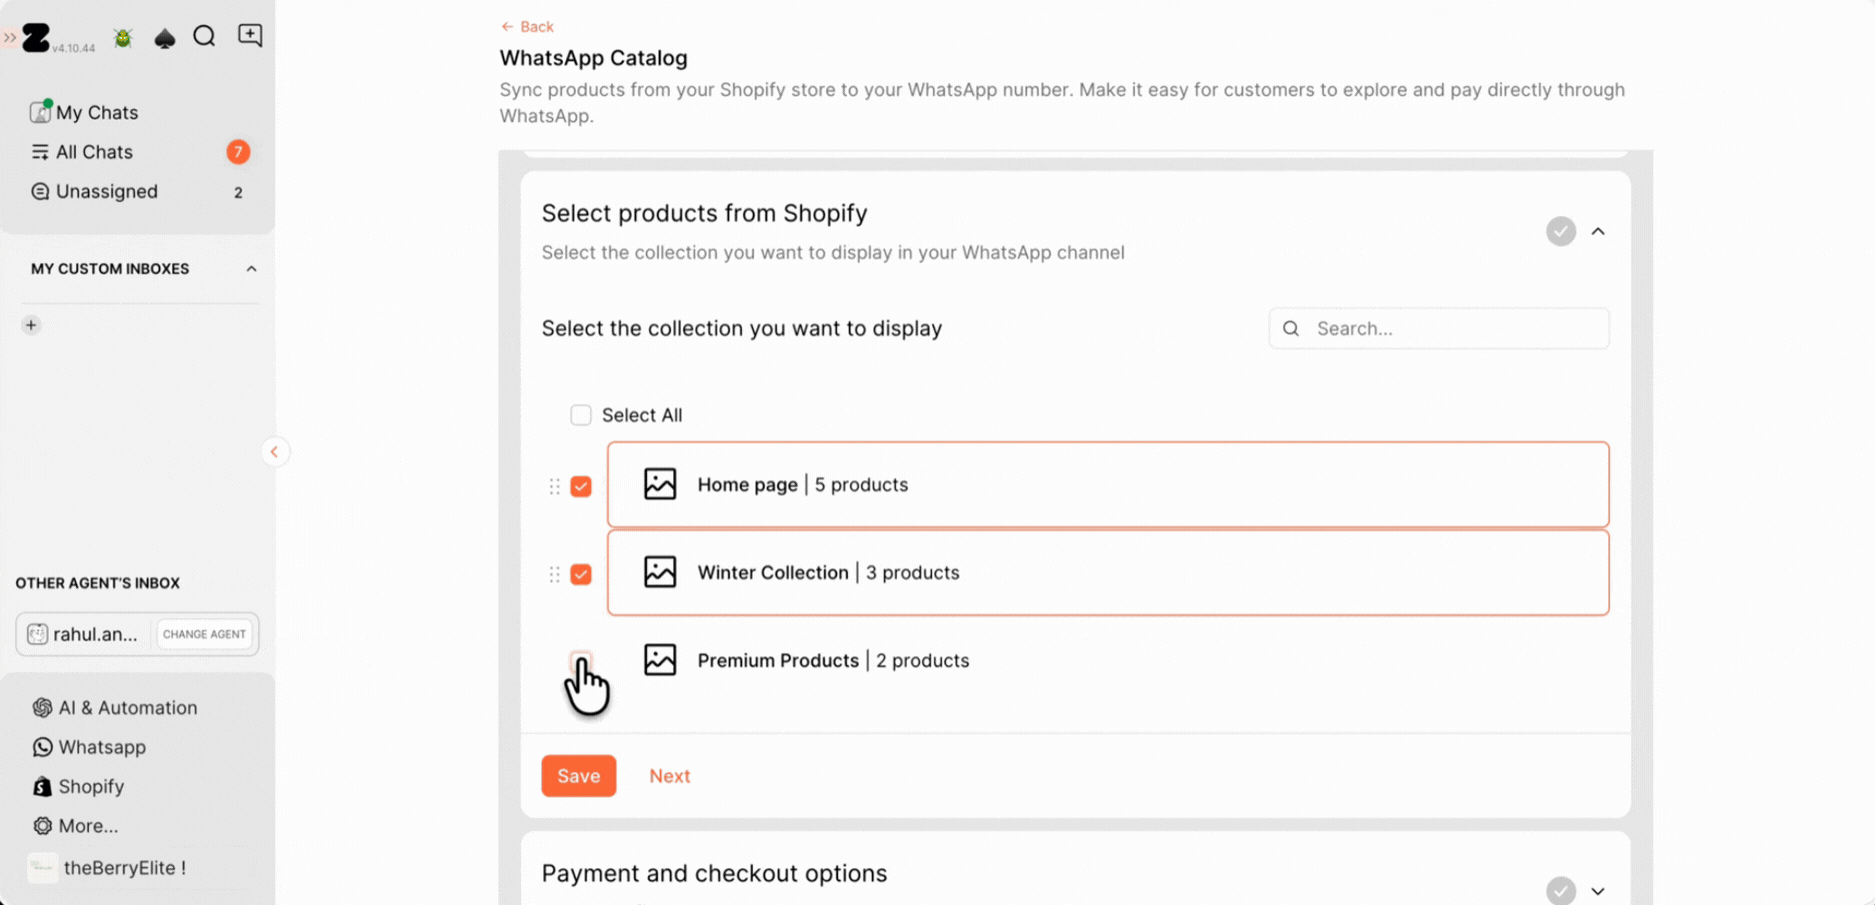
STEP 2: Select Products From Shopify
Select the collection that you want to display in your WhatsApp Catalog.
Important note: The collection will sync and show up here once you have created the collections list in your Shopify backend. If you don't know what collection are, please refer to Shopify's guide on how to create them - https://help.shopify.com/en/manual/products/collections
1. Select the Shopify collection(s) you want to sync
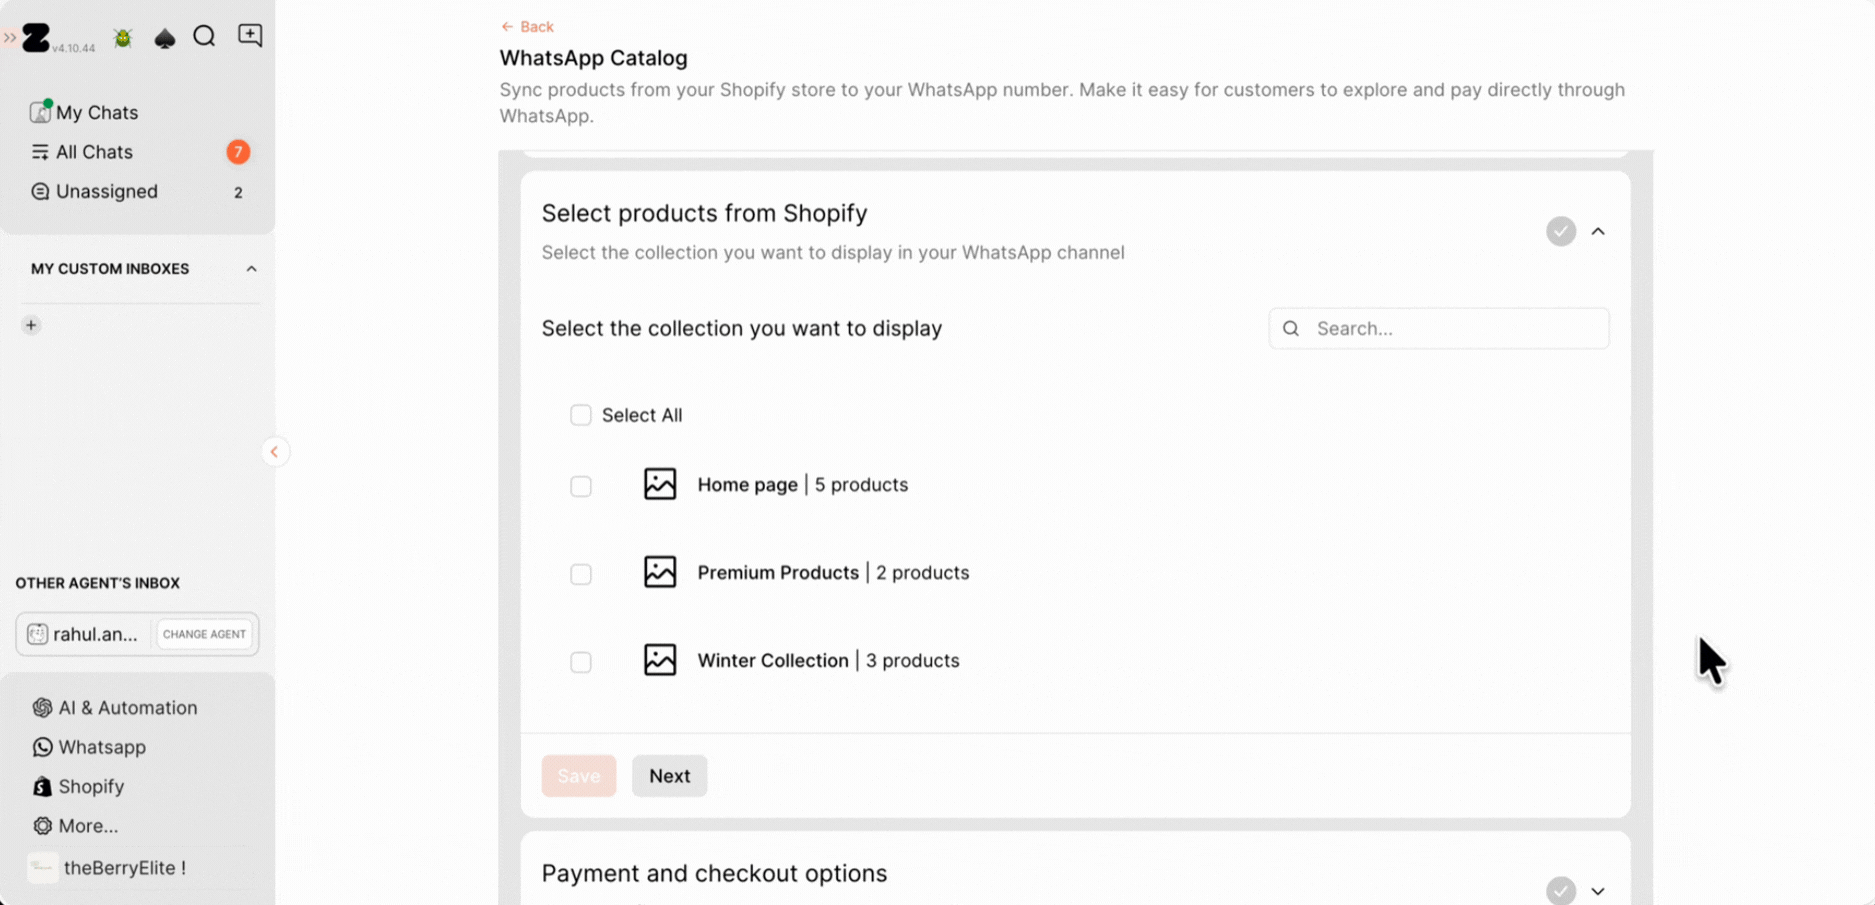
2. Click Next or Save.
Note:
- Collections will appear here only after they are created in Shopify
- Product sync can take up to 90 minutes
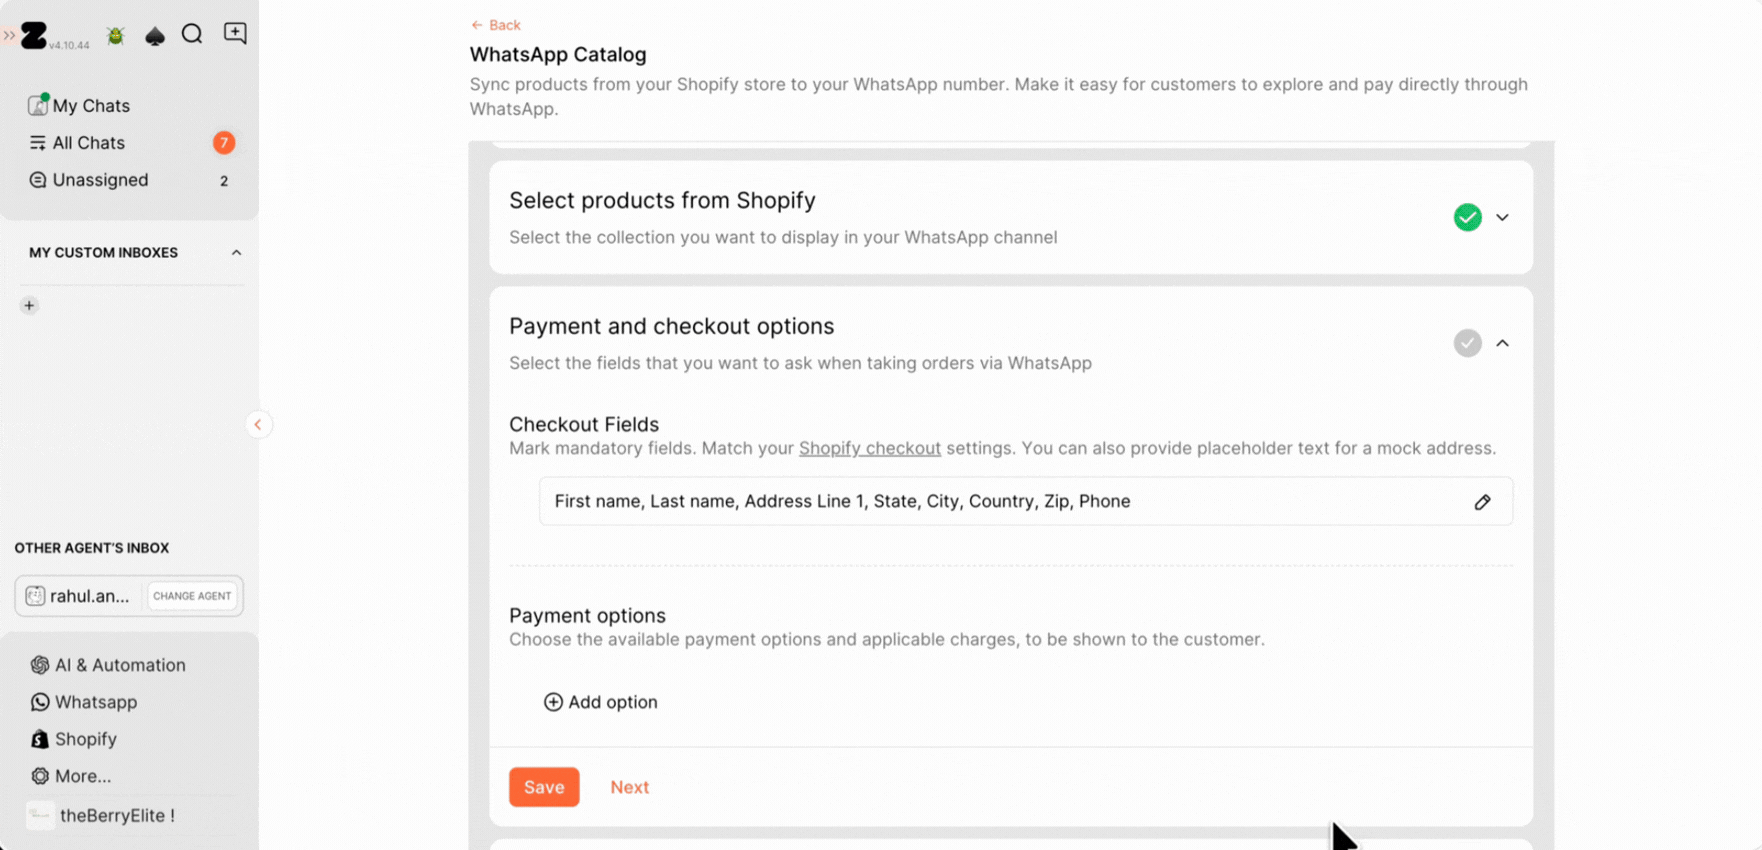
STEP 3: Configure Payment & Checkout Options
Select the fields you want to ask when taking orders via WhatsApp to ensure customers fill in the necessary details.
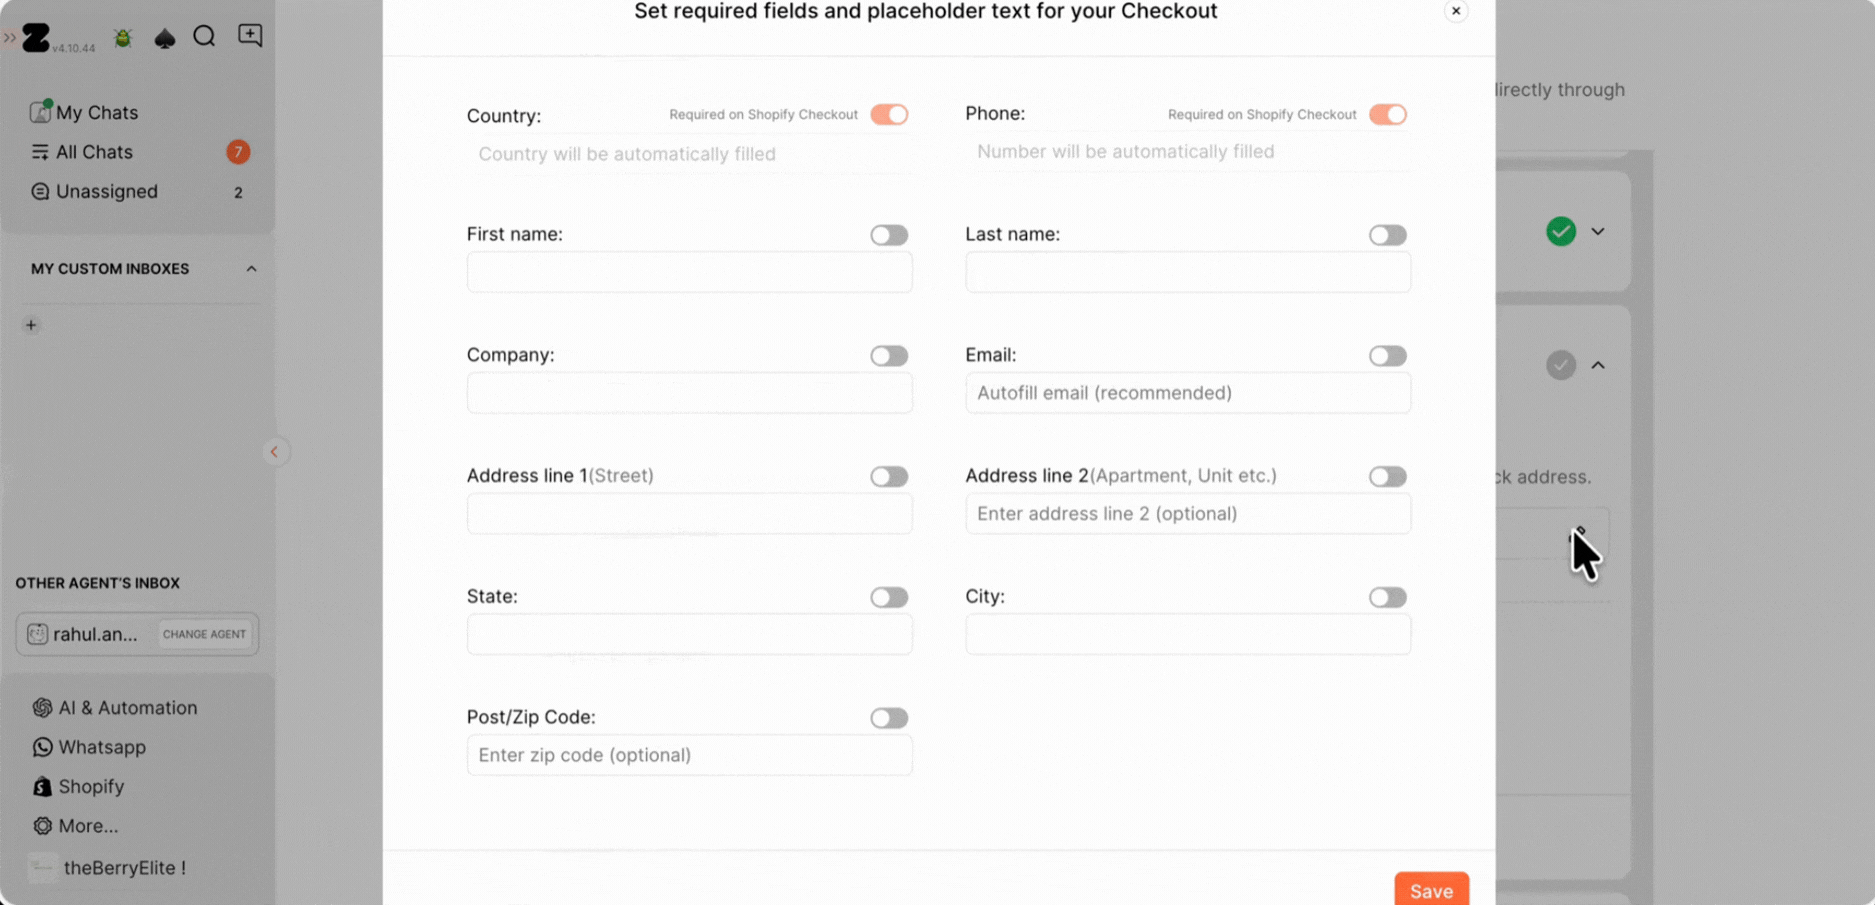
1. Click on Checkout Fields icon.
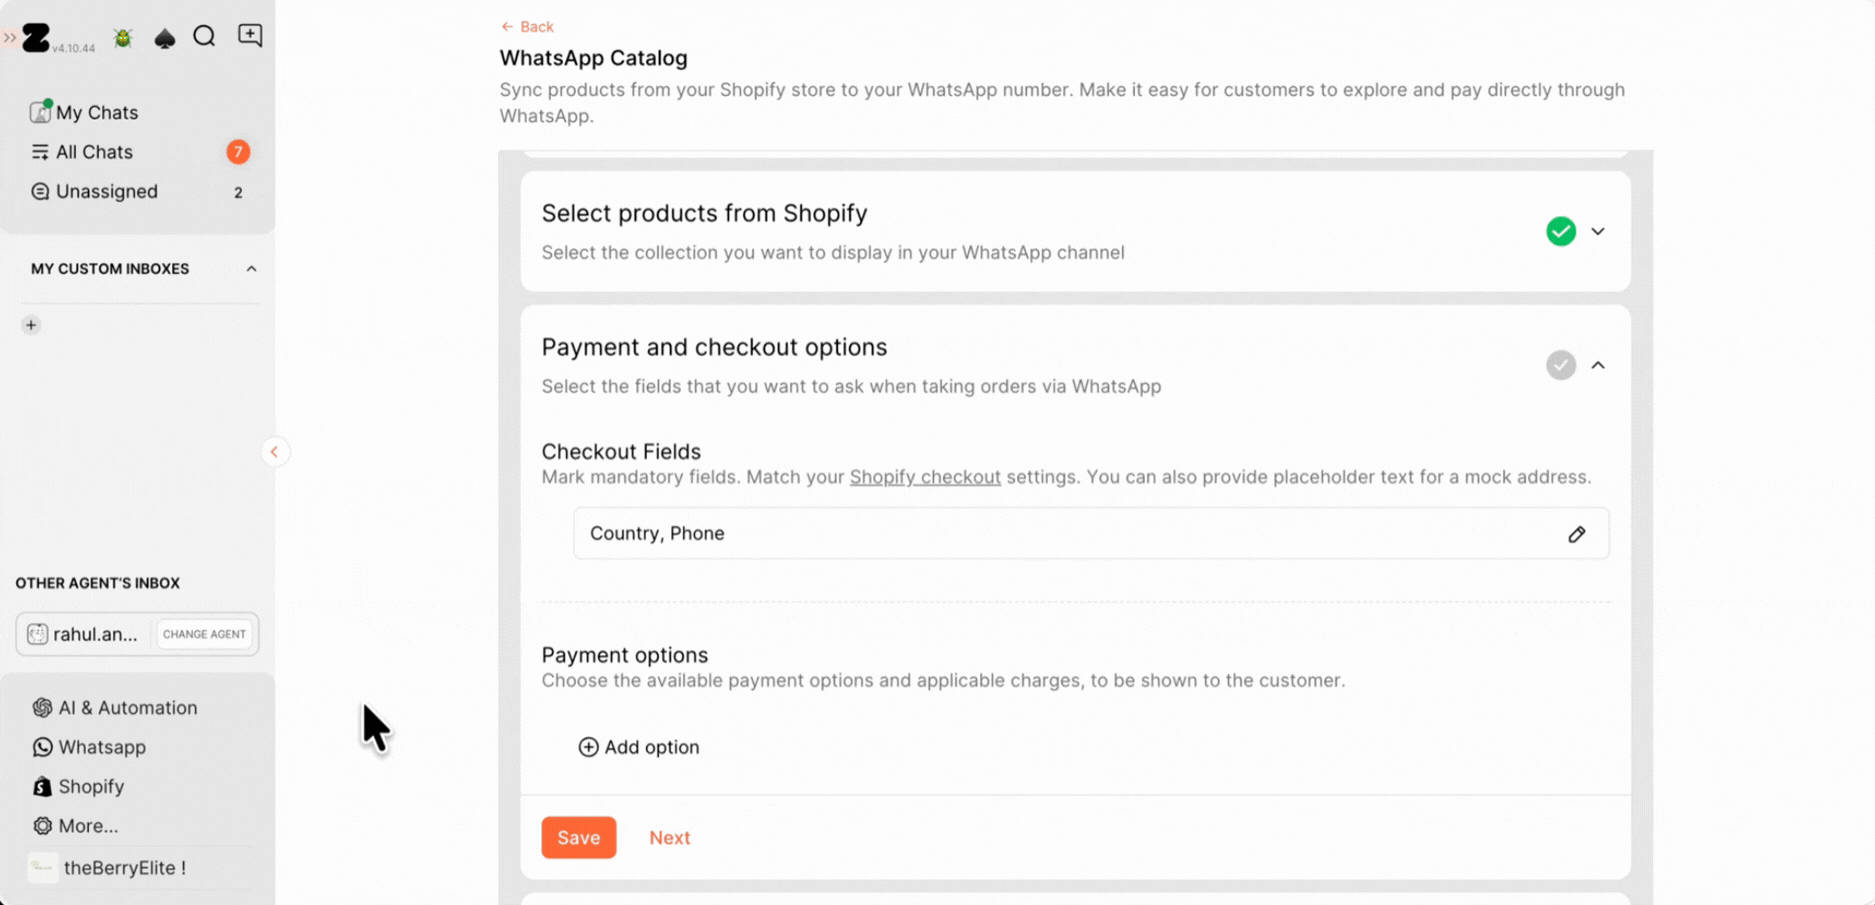
2. Select the required fields and placeholder text for your checkout and click on Save.
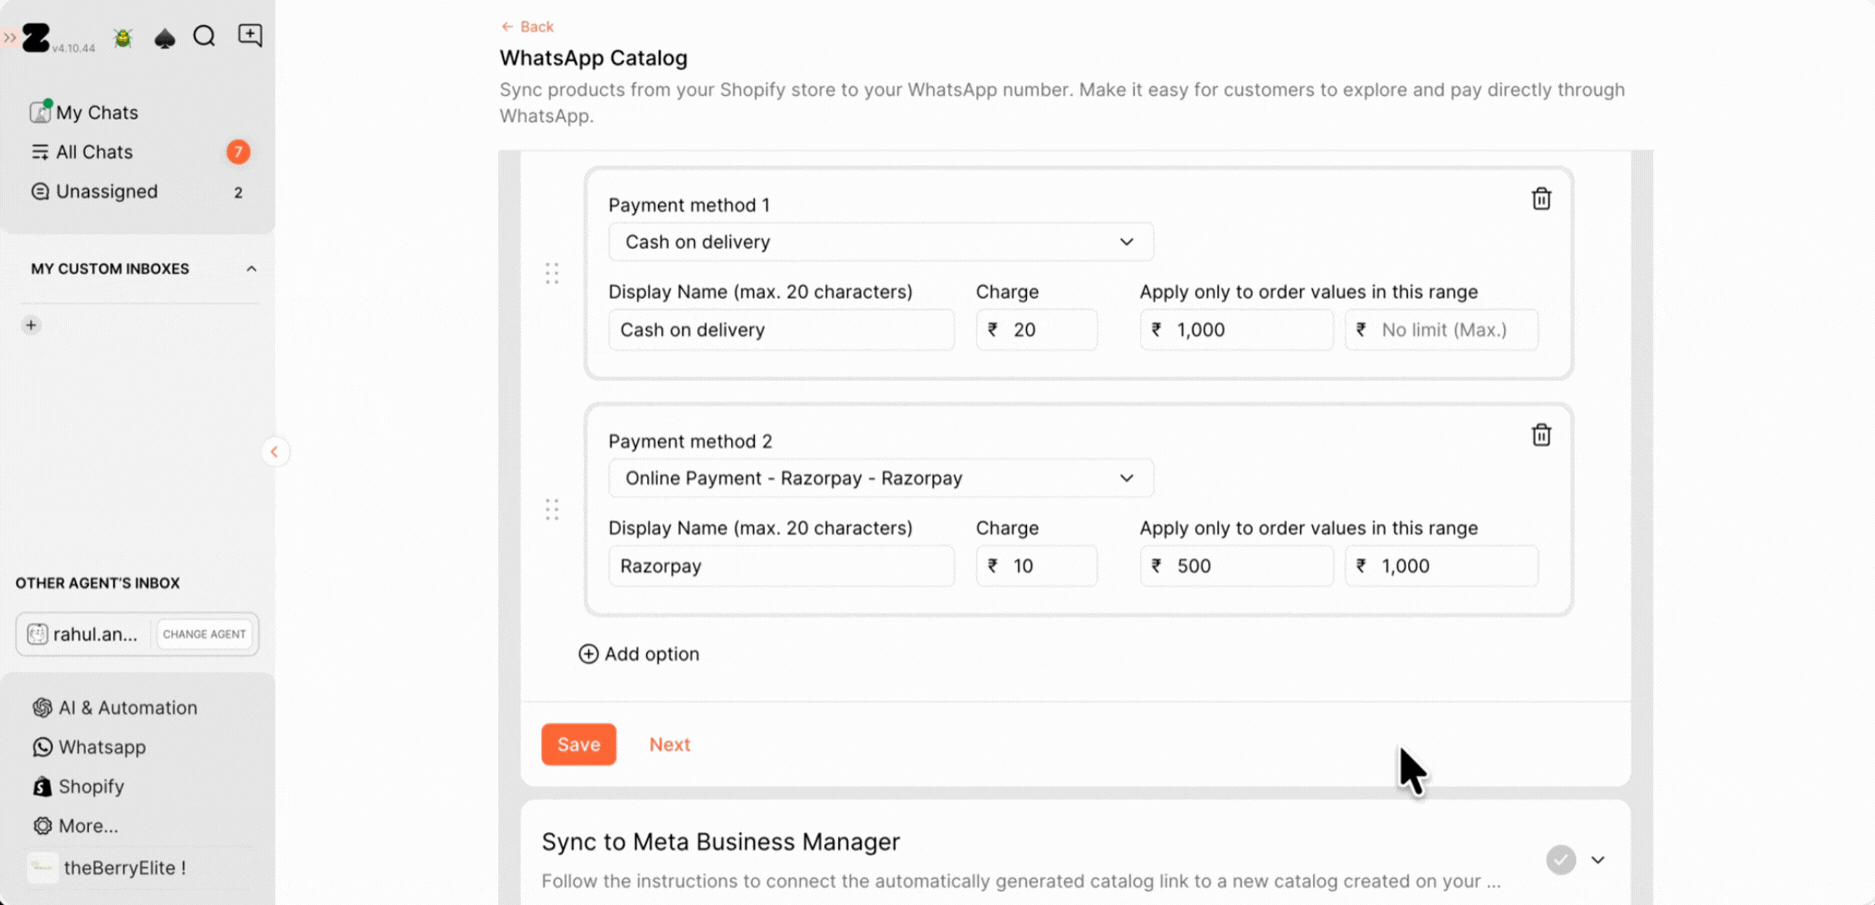
3. You can add payment options by clicking on Add Option. From here, you can add multiple payment options, up to 50, depending on what you want to offer customers.
4. Click Next or Save.
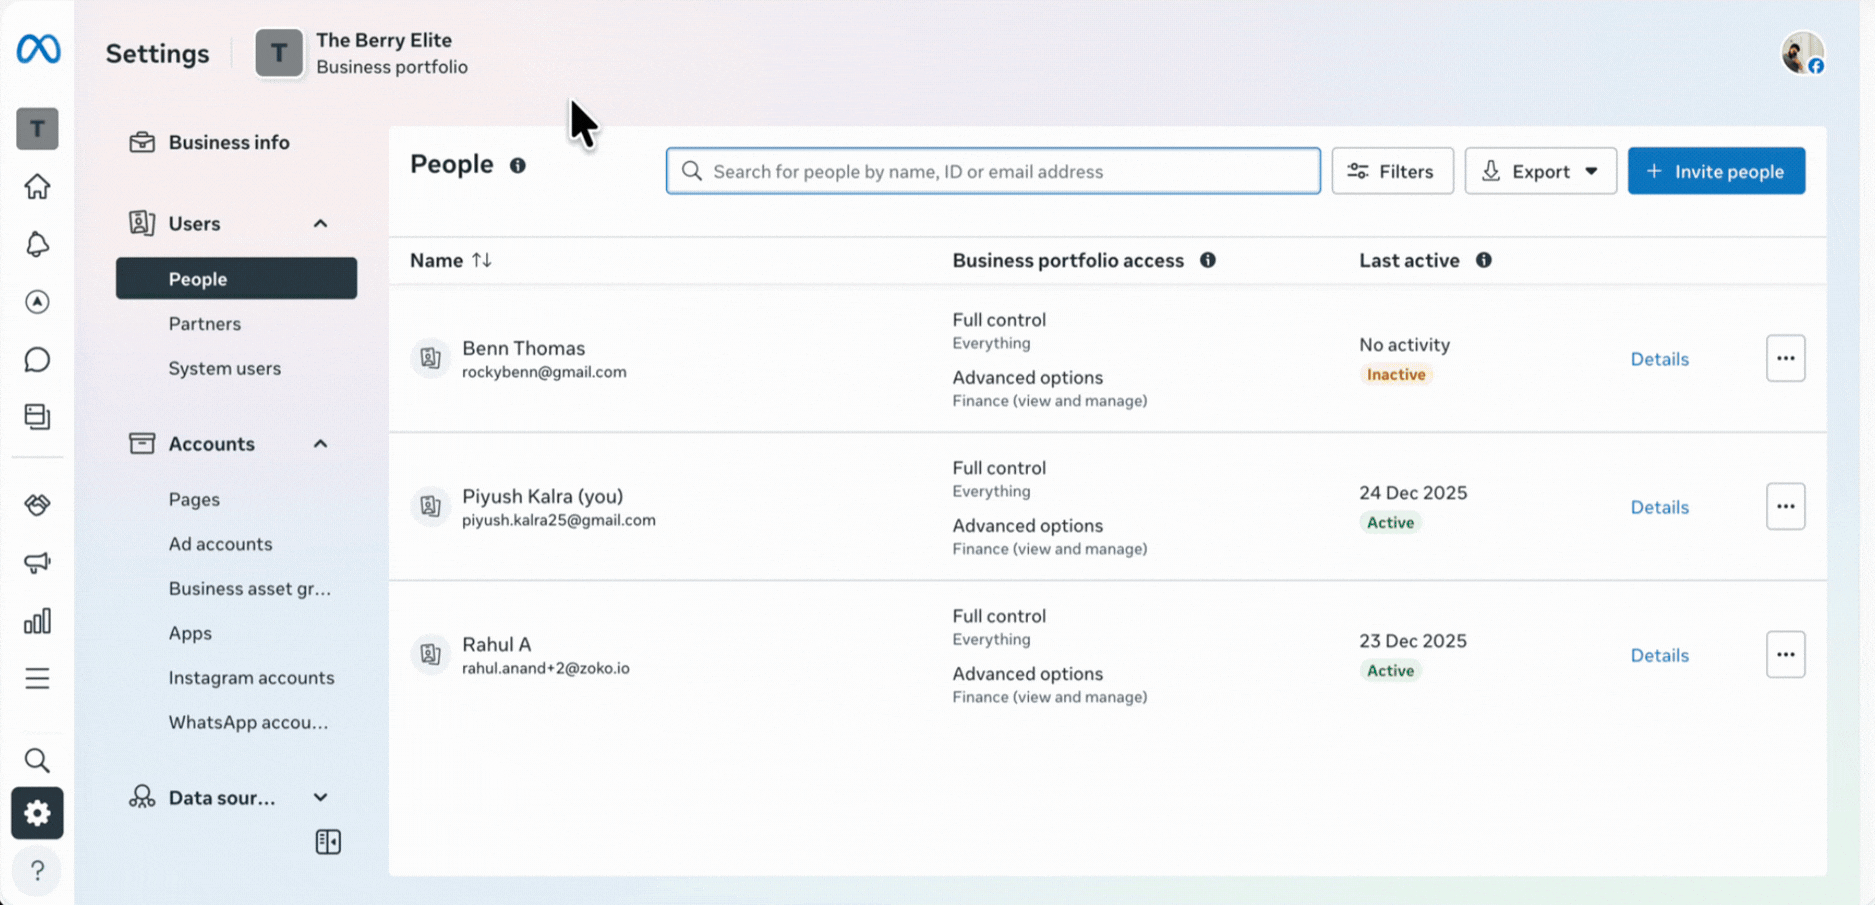
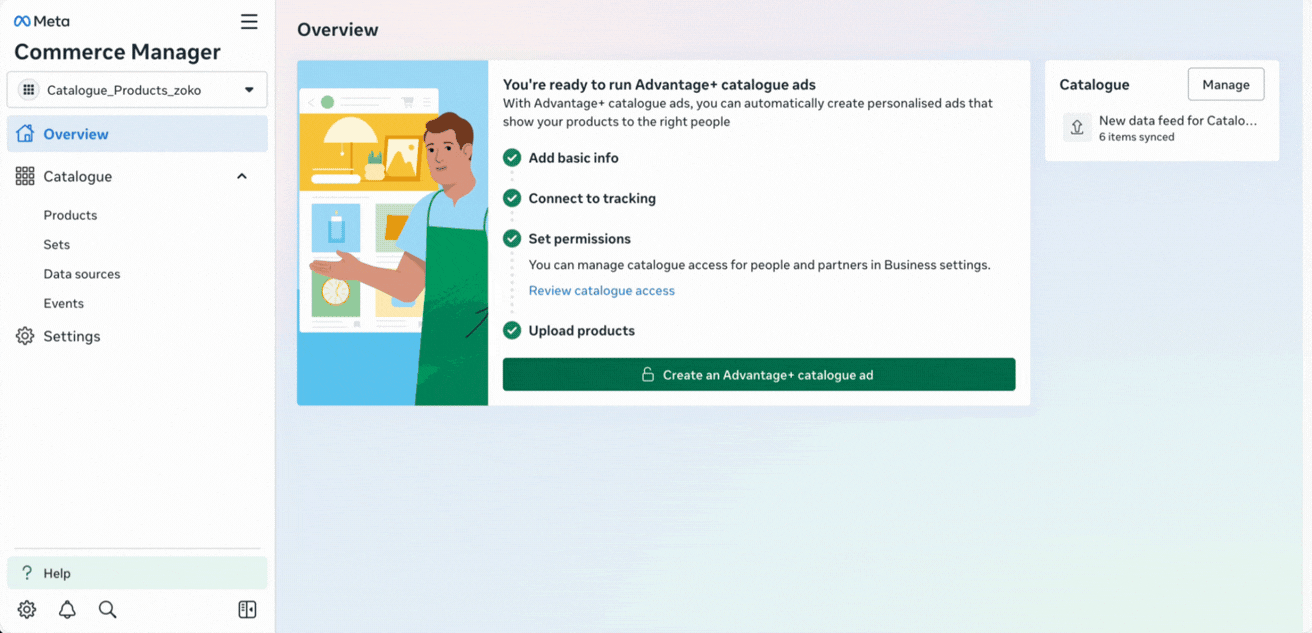
STEP 4: Creating a Catalog ID & Assigning Zoko as a Partner in Business Manager
1. Log in at this link - business.facebook.com
2. Once logged in, click on the three-dashes menu and select Commerce Manager.
3. Click on Add Products.
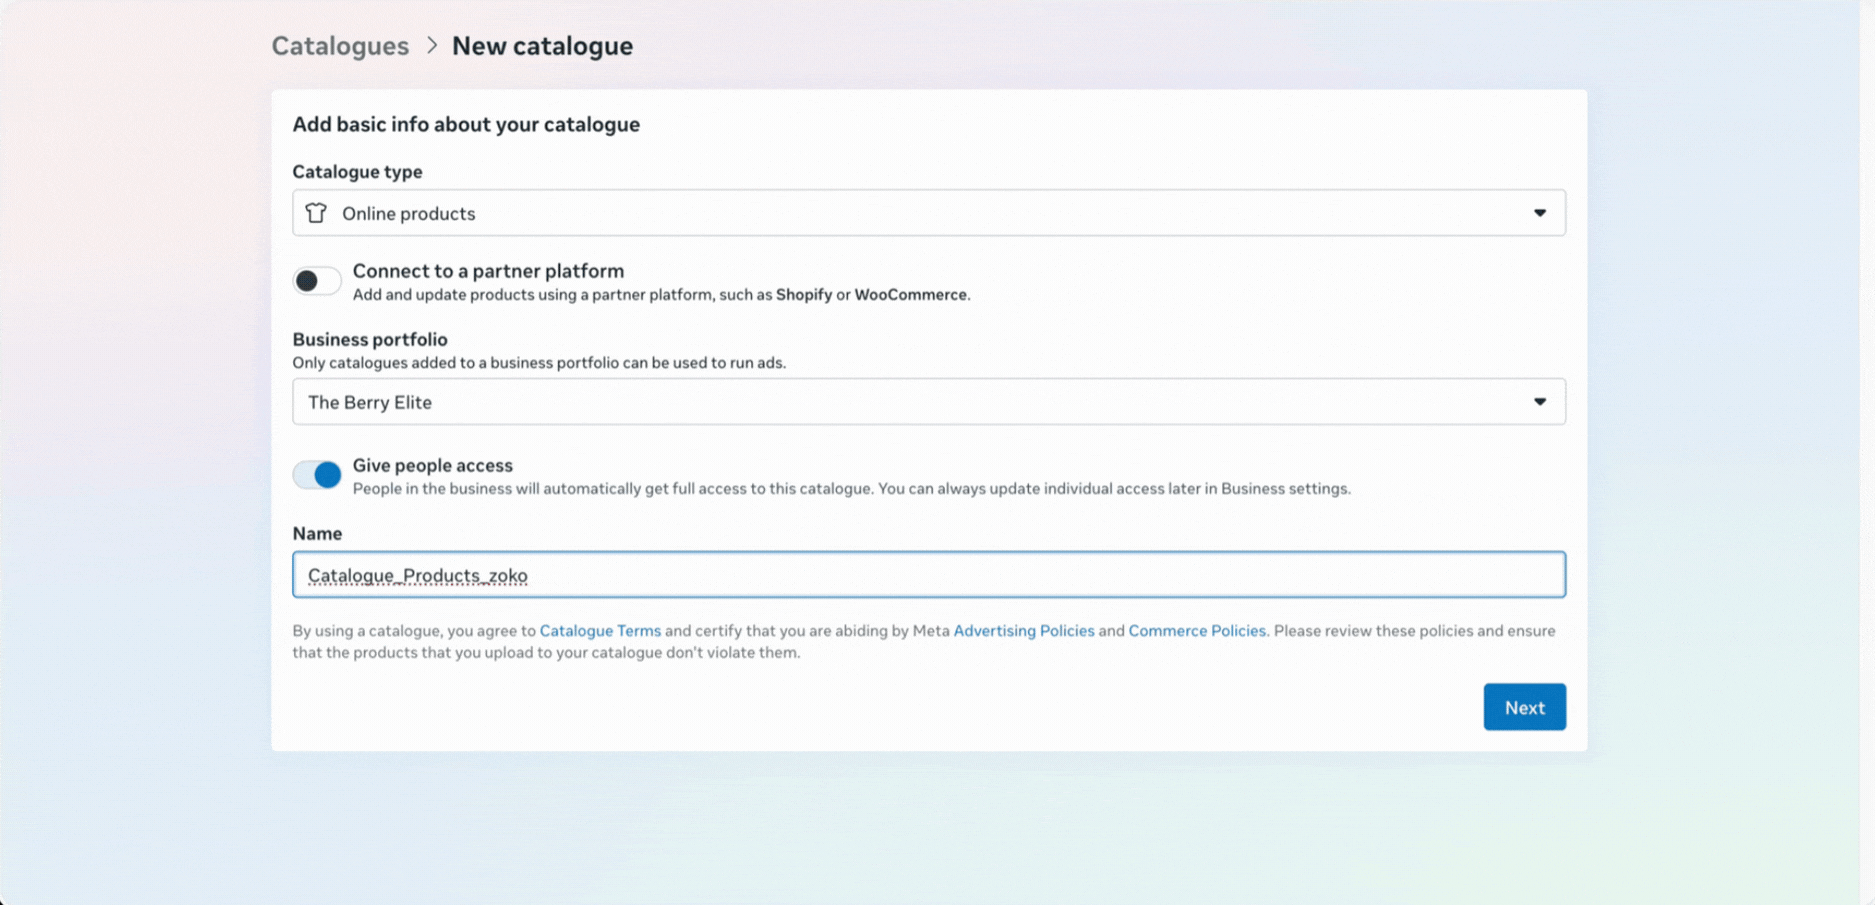
4. Choose Catalogue type form the dropdown, business portfolio, and then type a name of the catalogue so it's easy for you to identify later. (This name is internal and not visible to customers)
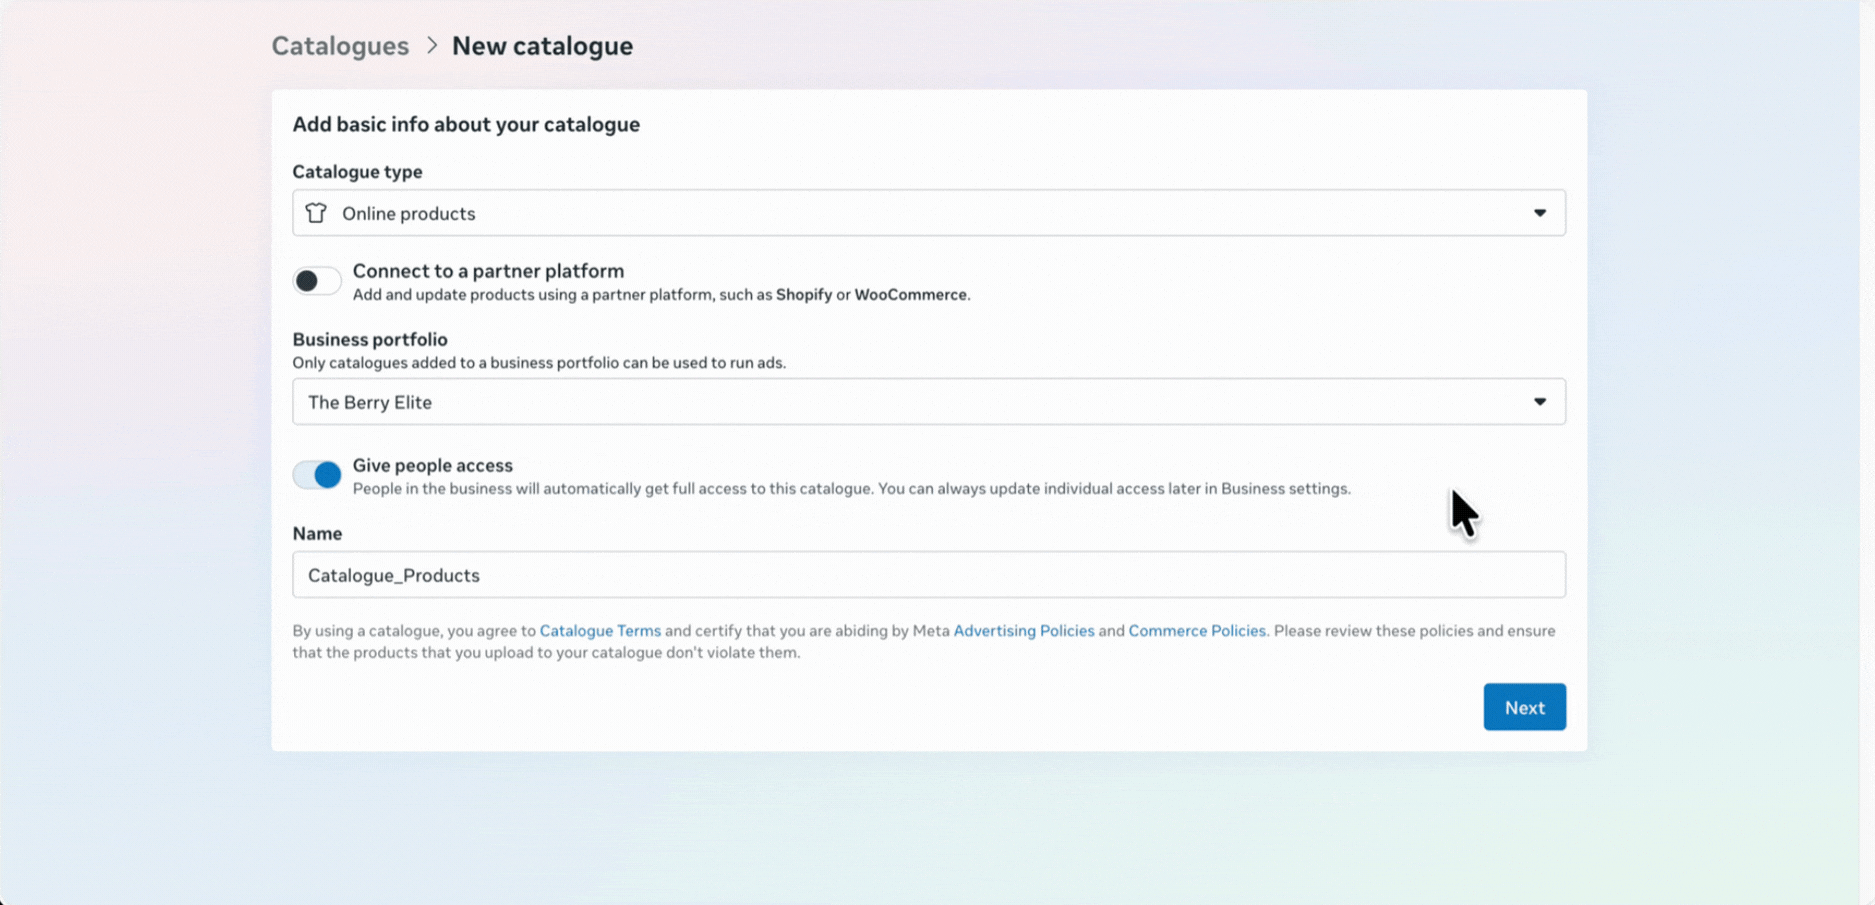
5. Click Next.
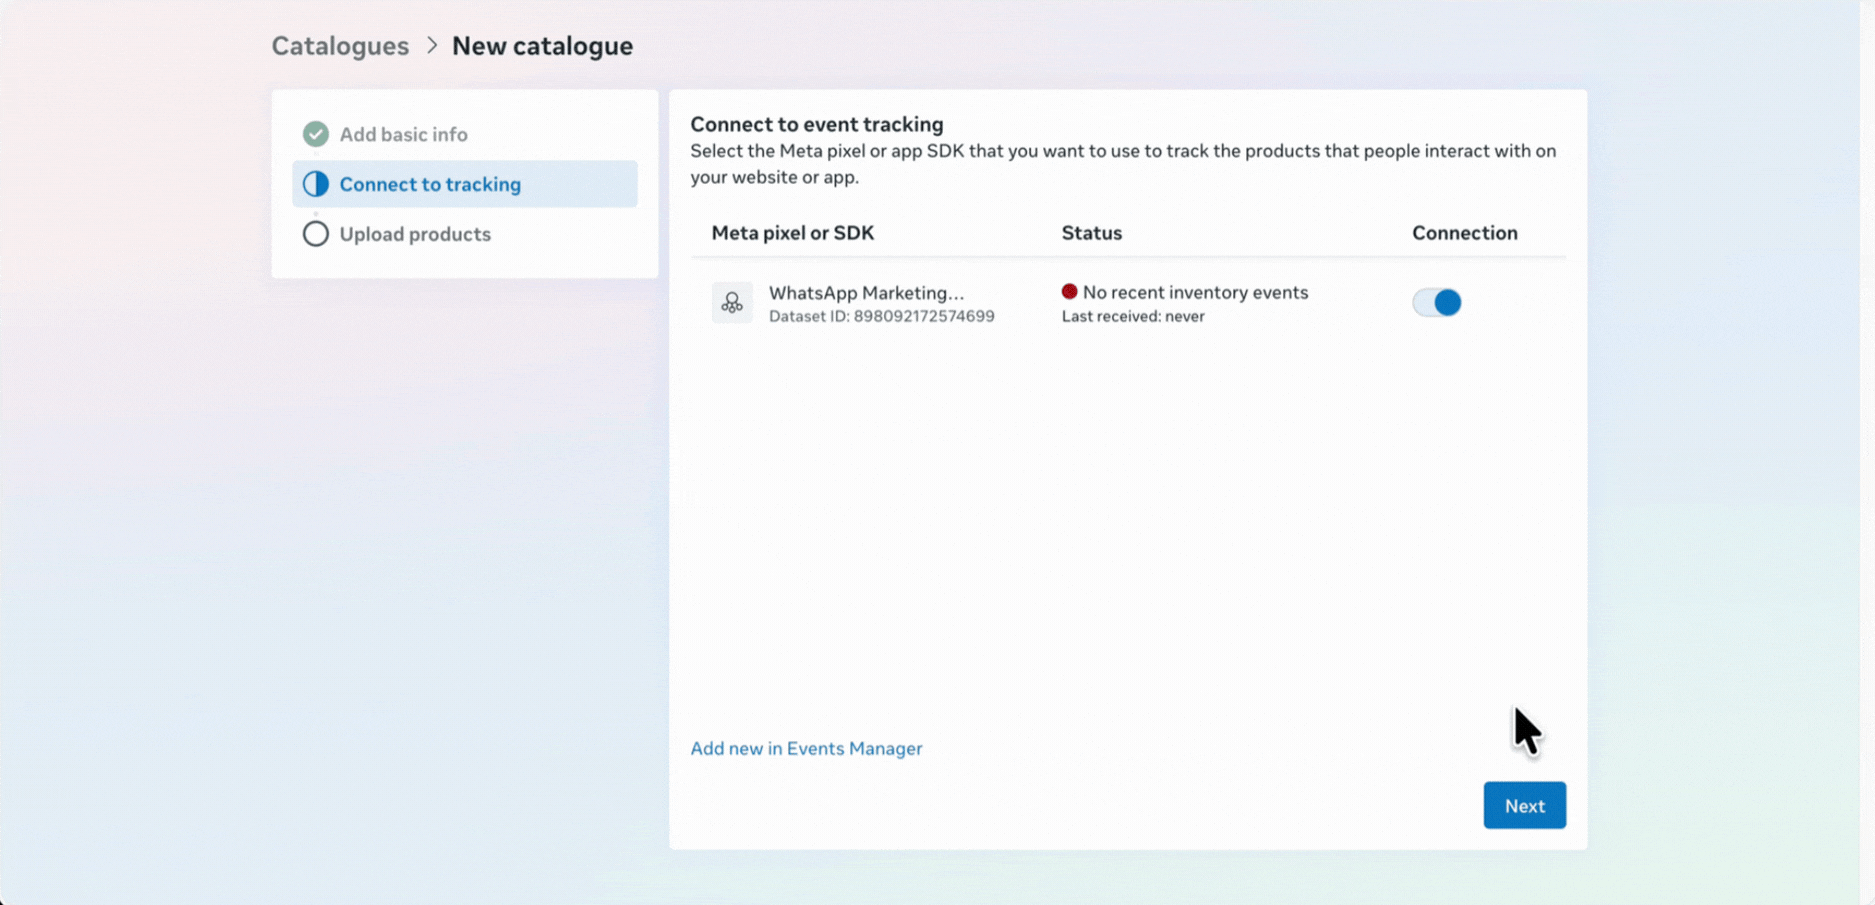
6. You can skip or enable event tracking and click on Next.
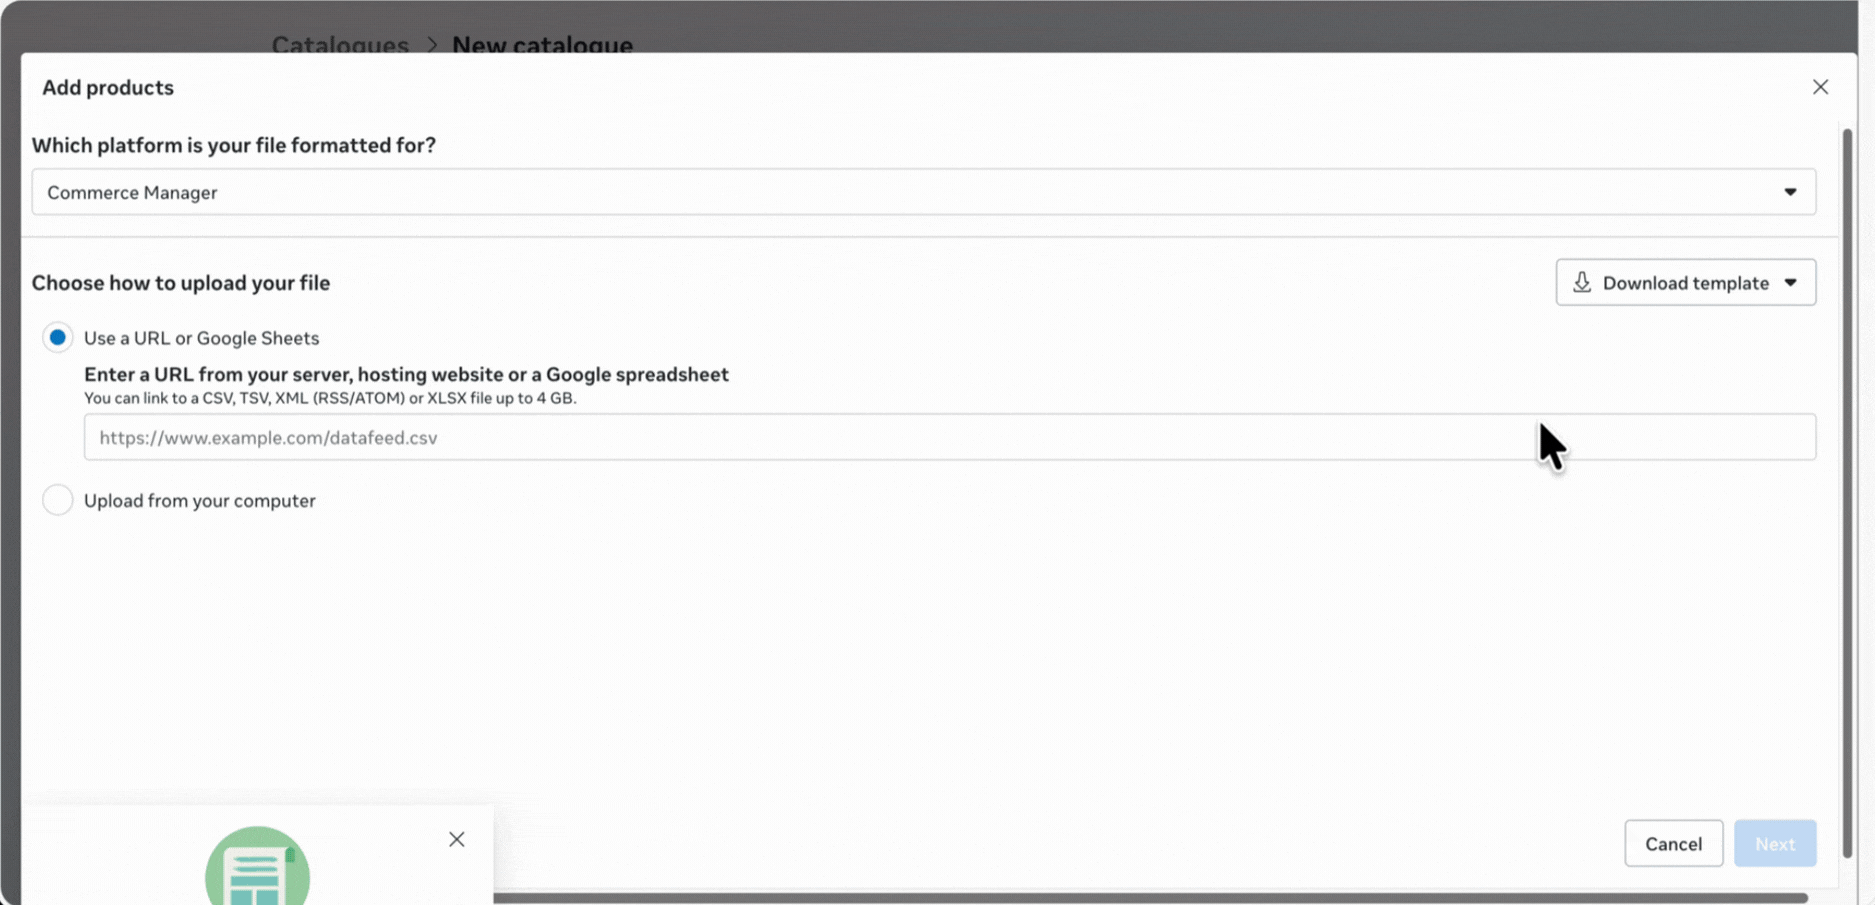
7. Select Connect to a Data Feed and click on Next.

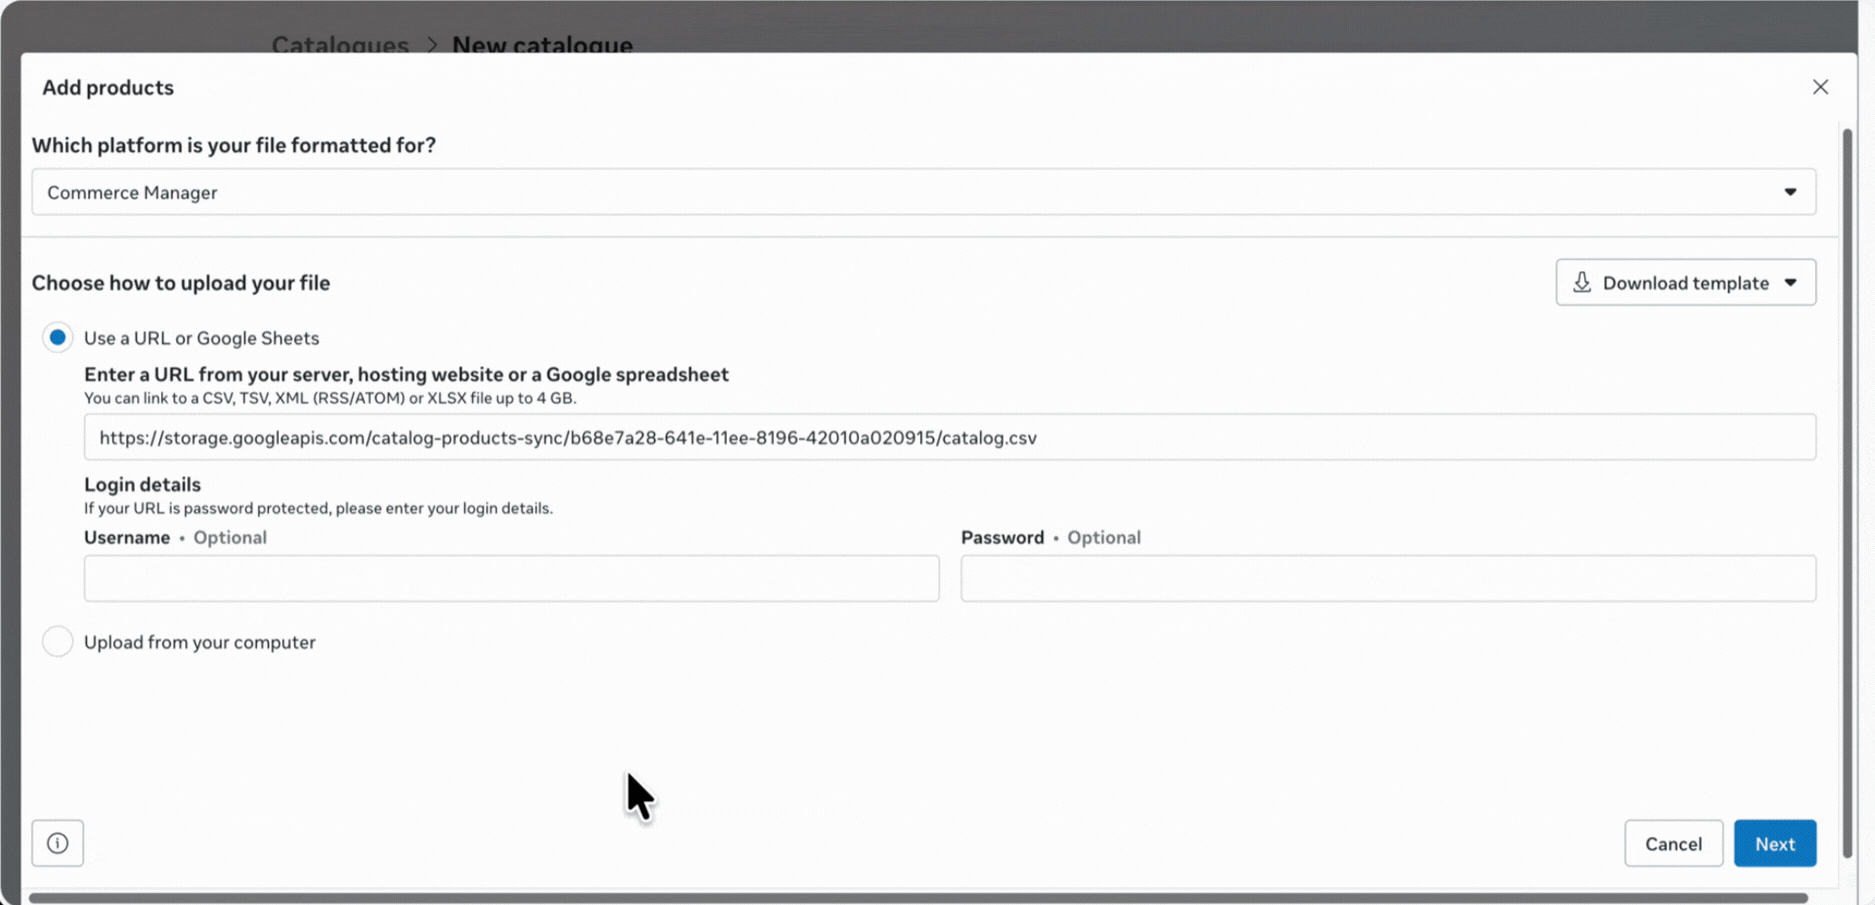
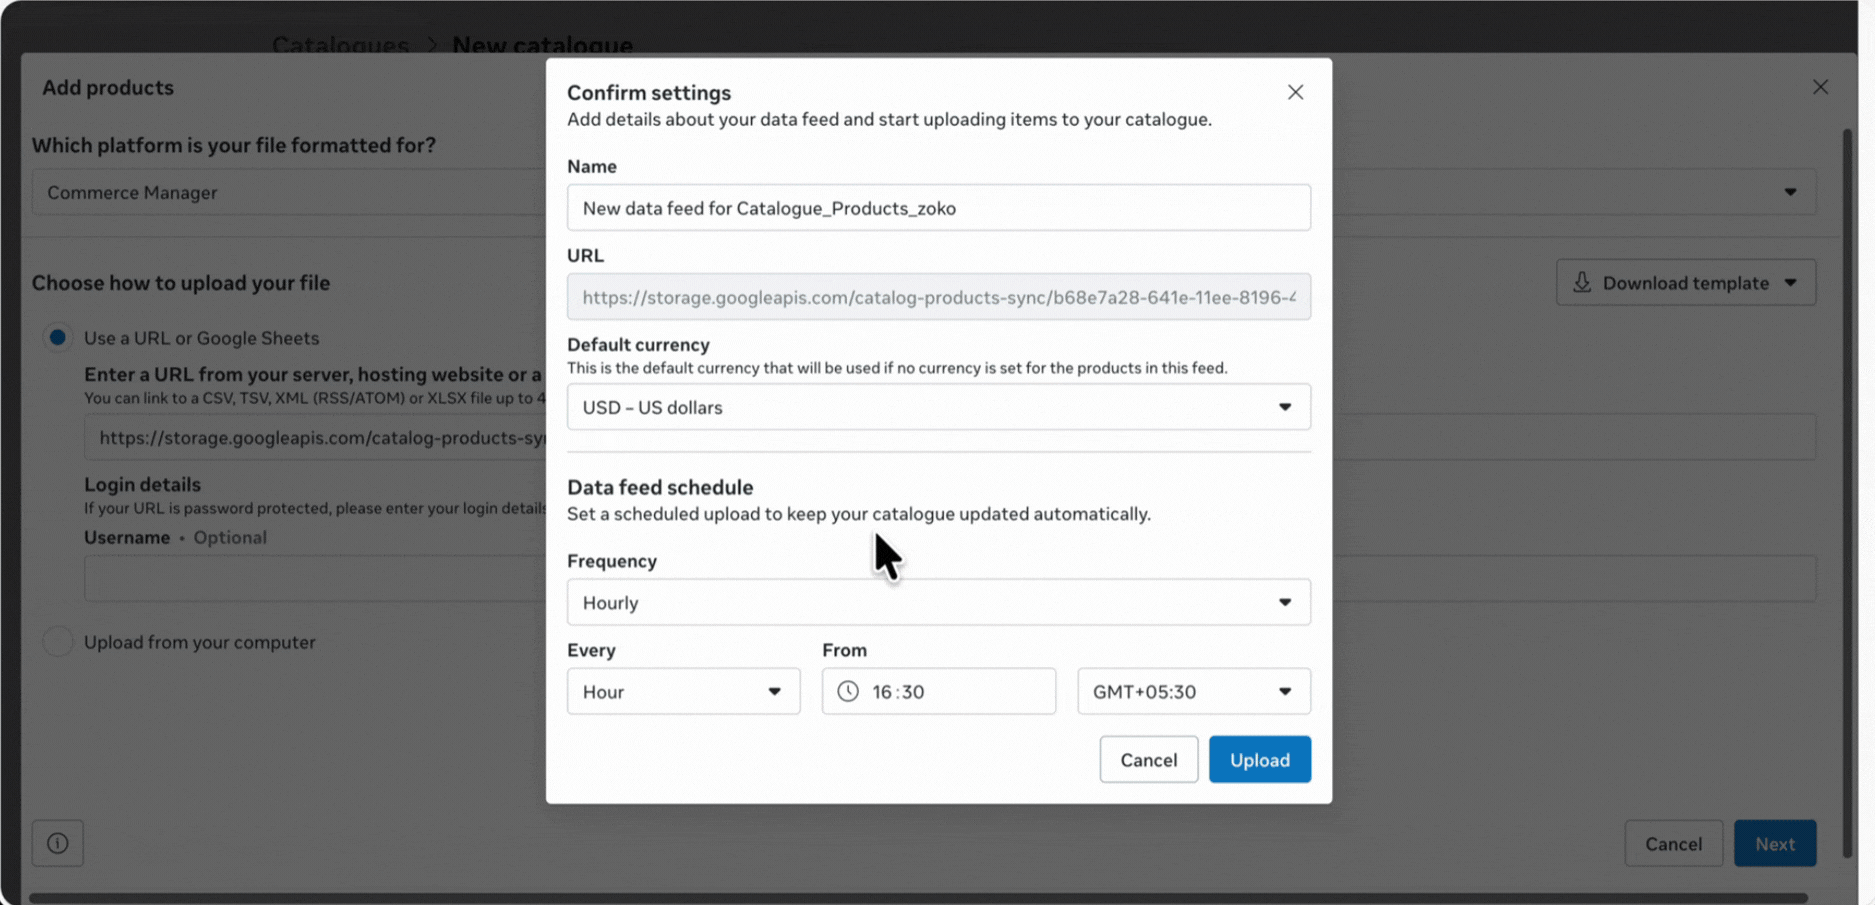
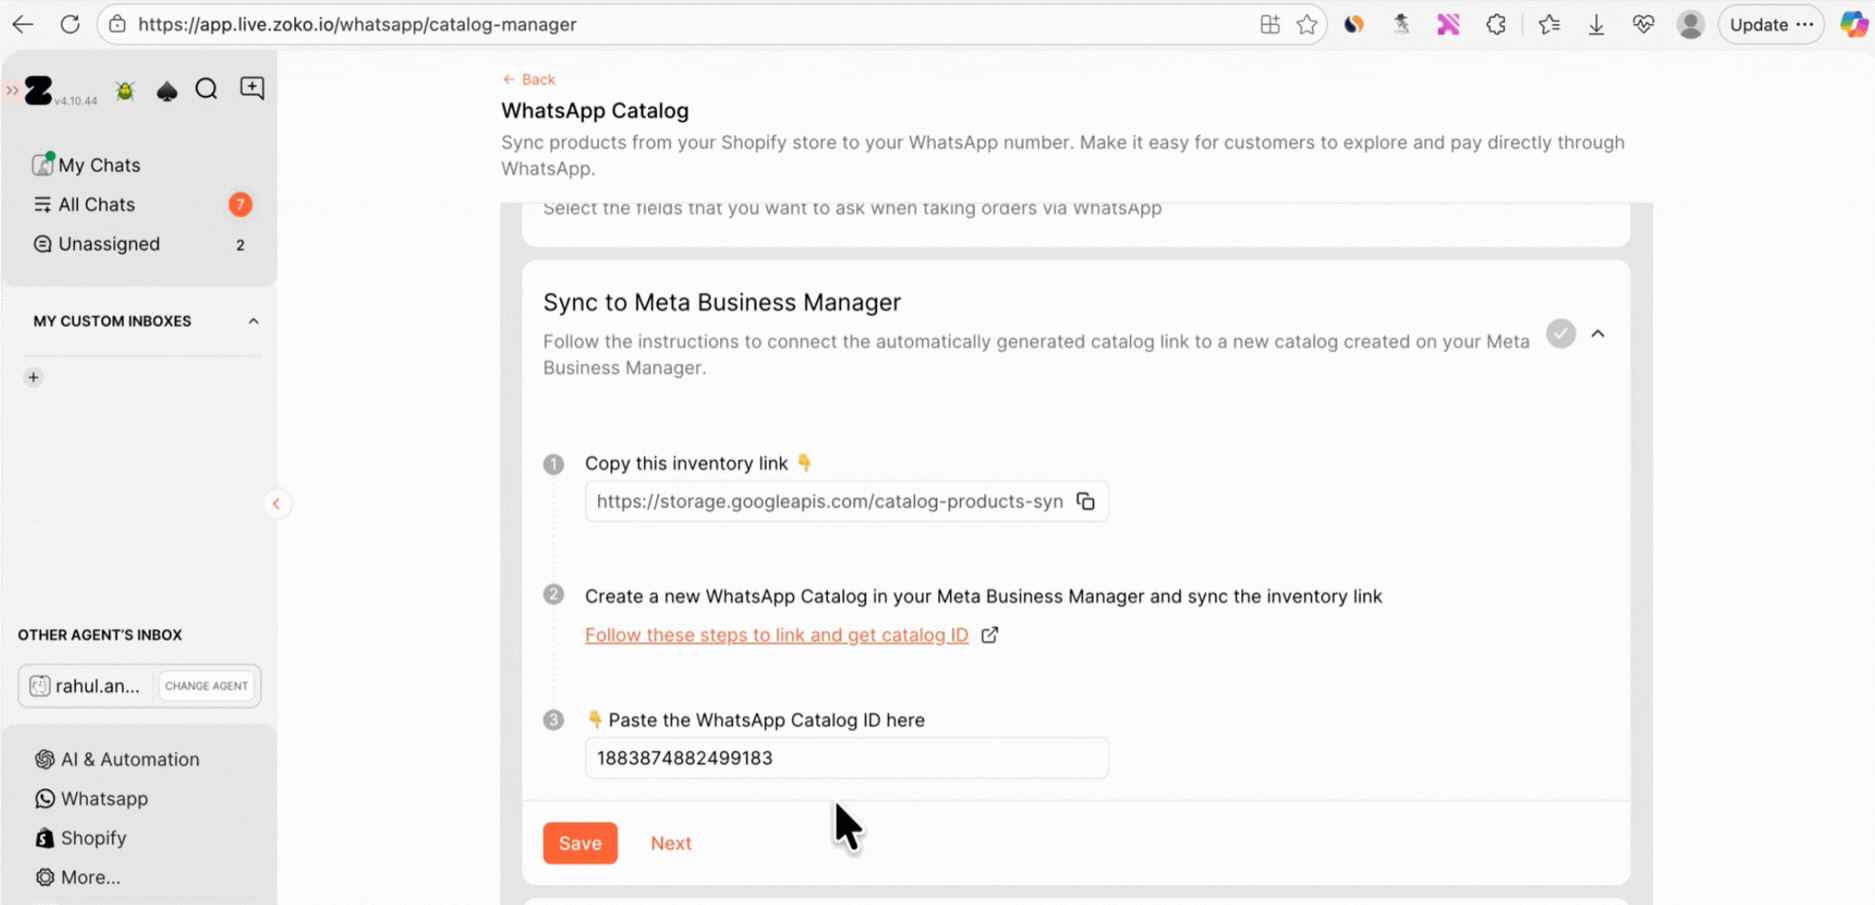
8. In Zoko Catalog Settings, copy the Inventory Feed link and paste it into the Data Feed URL field in Commerce Manager.
9. Click on Next.
10. Confirm the details, choose your Default currency. (The default currency is used if the currency is not available in a product on Shopify)
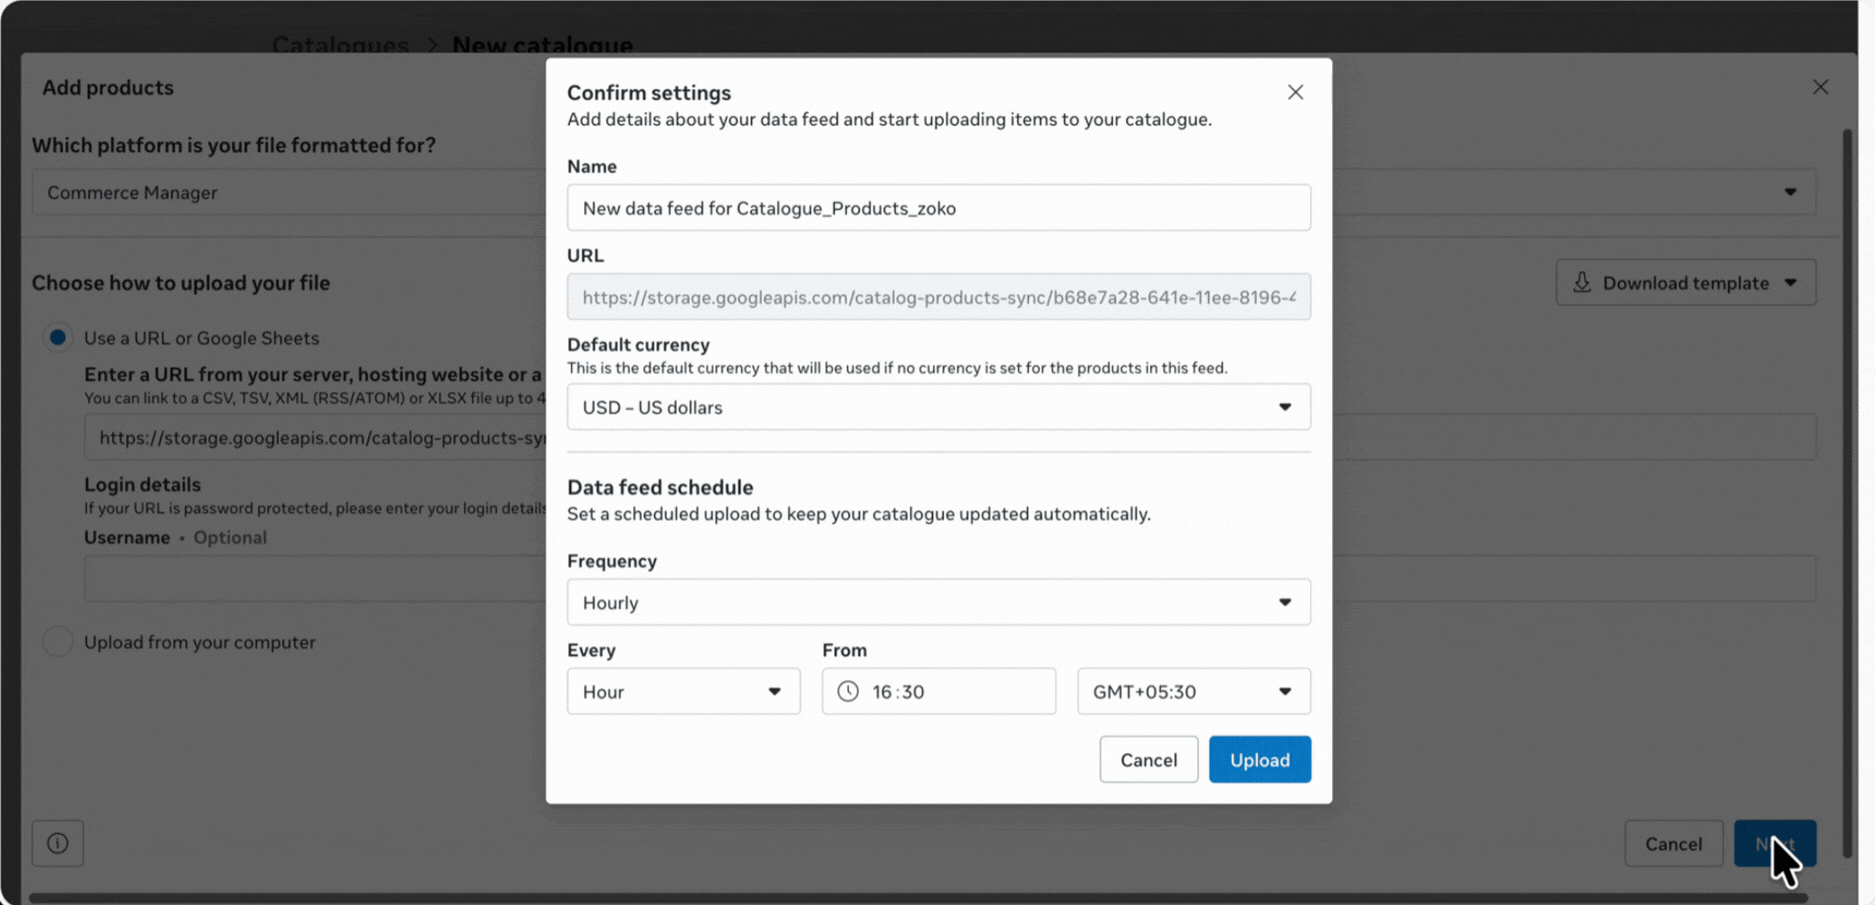
11. Choose the data feed schedule, like hourly, daily, or weekly, so your catalog stays updated automatically.
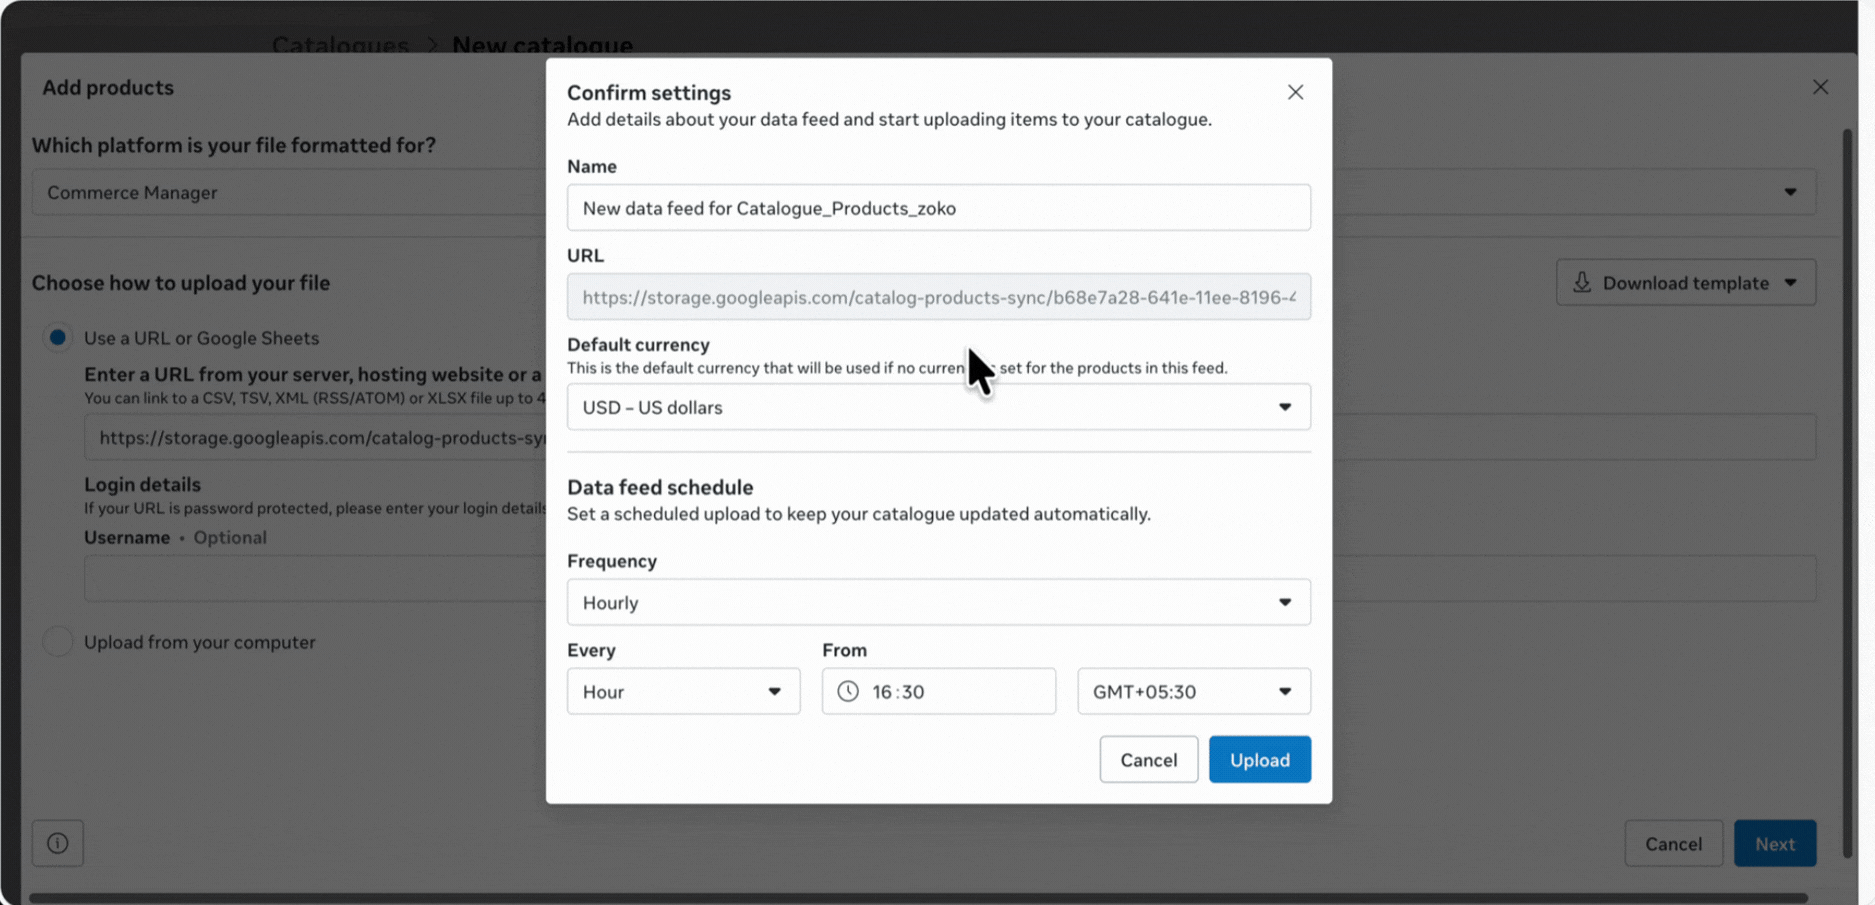
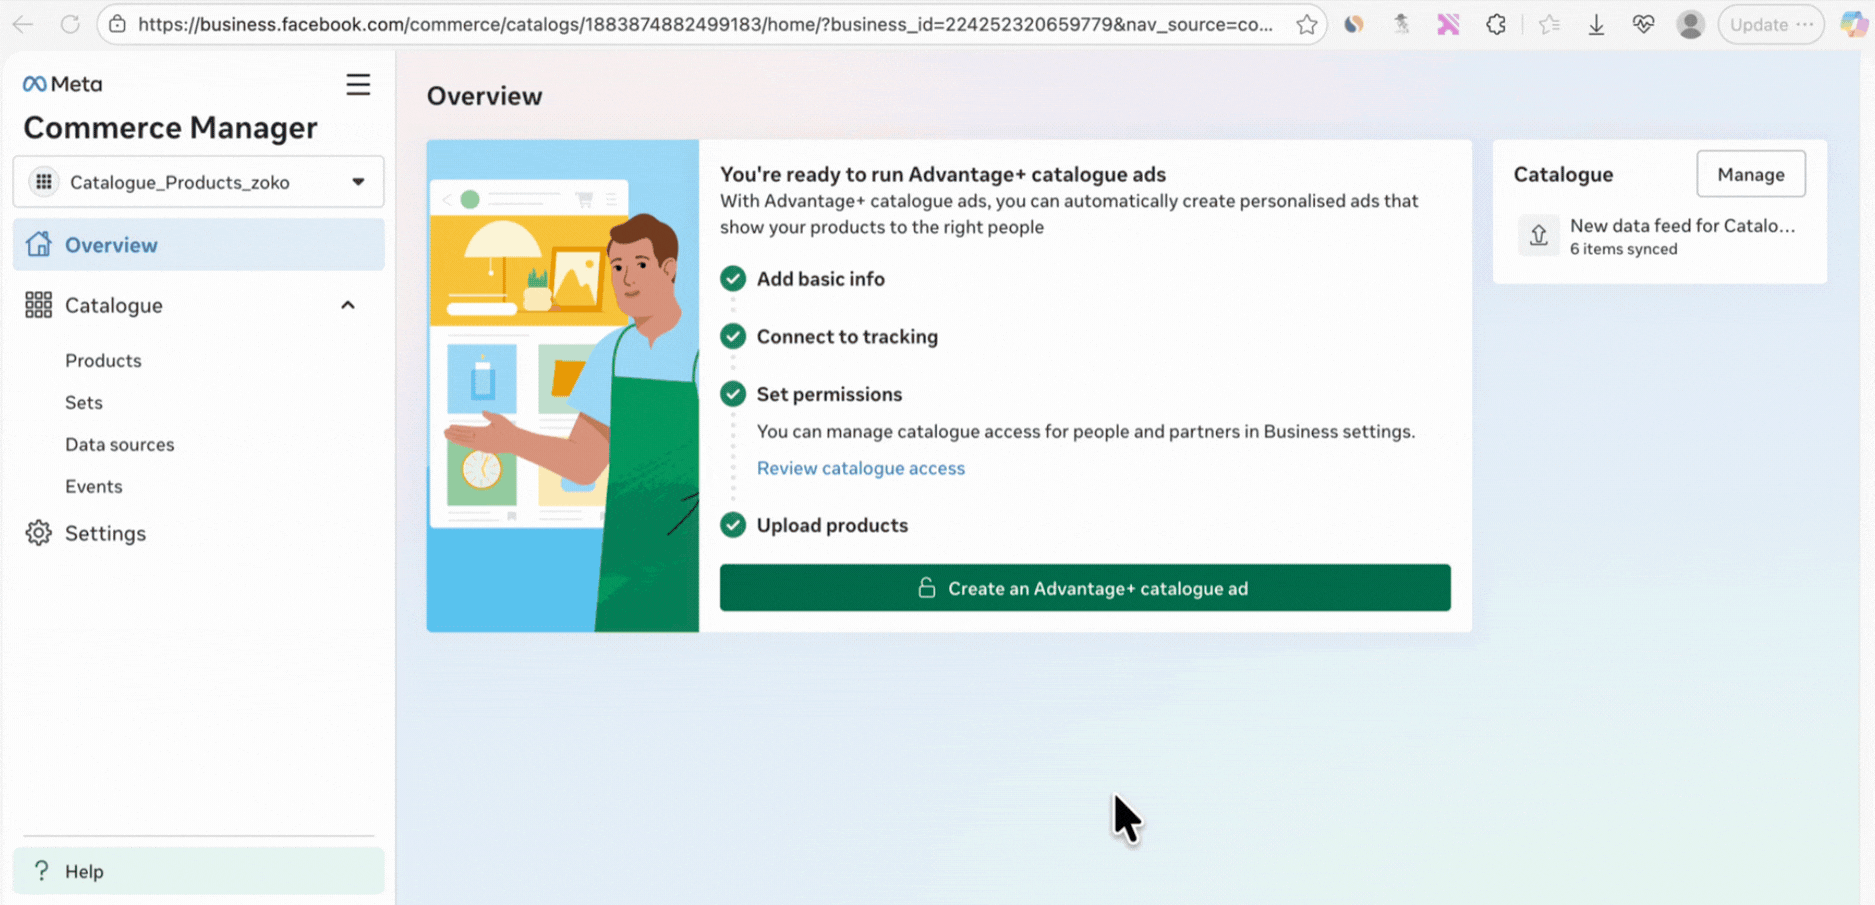
12. Click on Upload.
13. Copy the Catalog ID from the Commerce Manager URL and paste it into Catalog ID under Sync to Meta Business Manager in Zoko.
14. Click Next or Save.
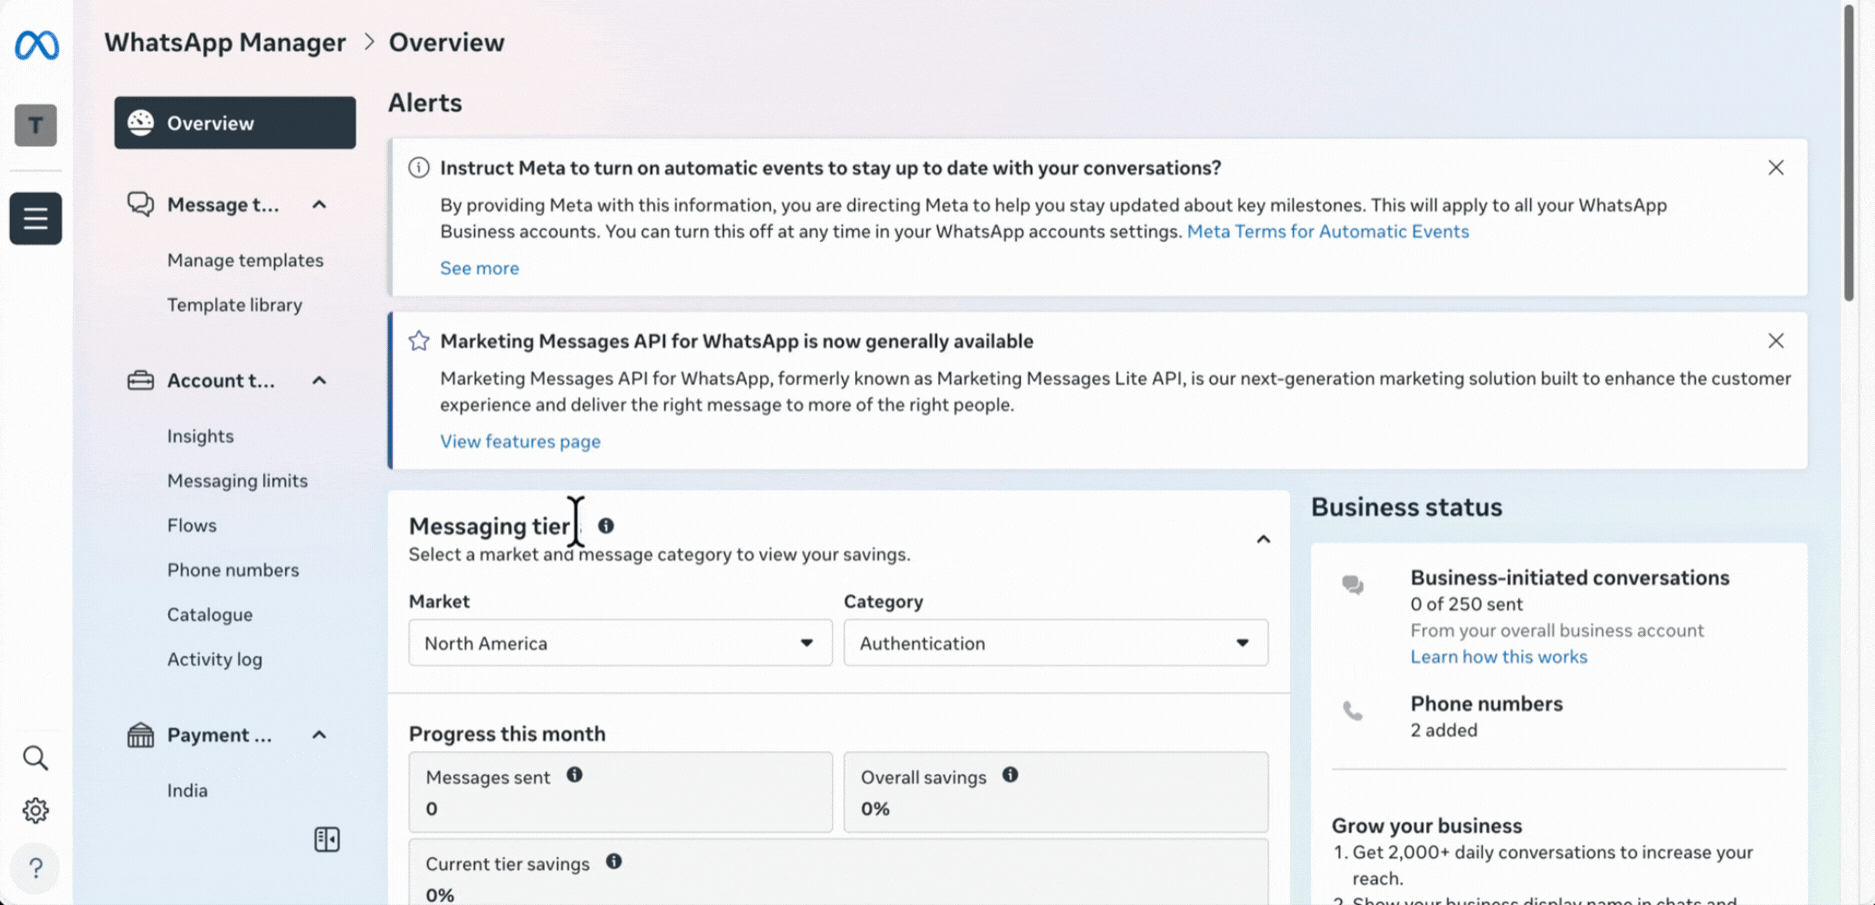
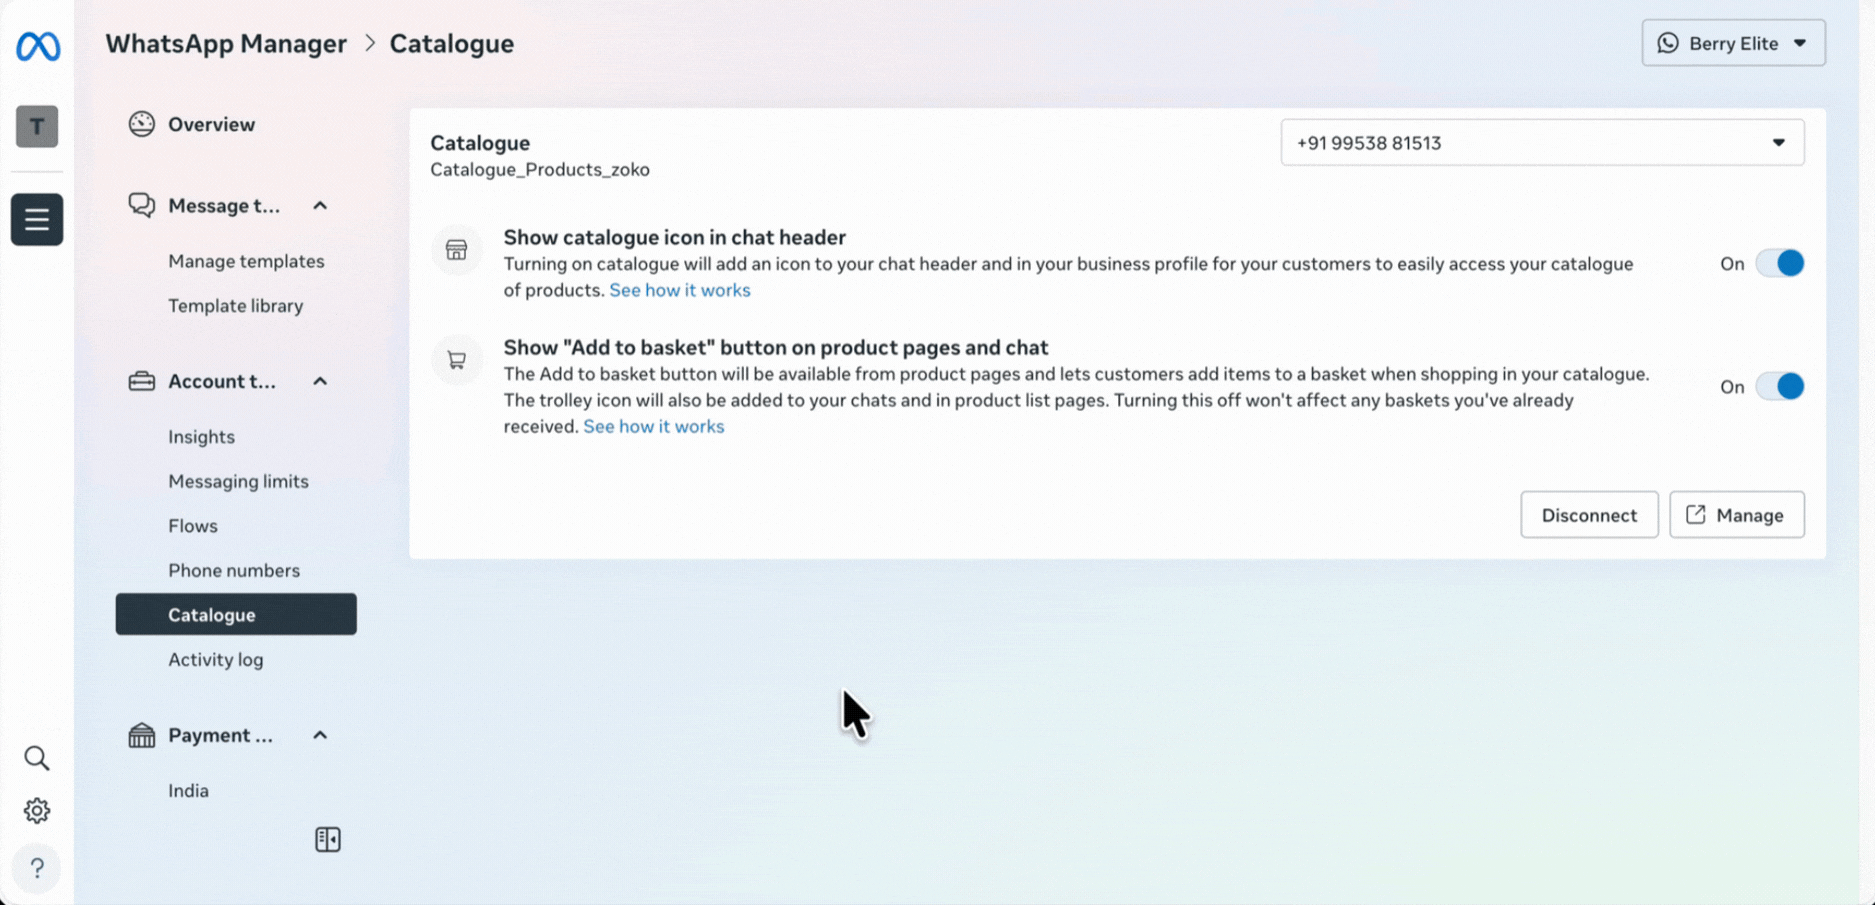
15. Go back to the WhatsApp Manager page by clicking on the three-line menu and selecting WhatsApp Manager.
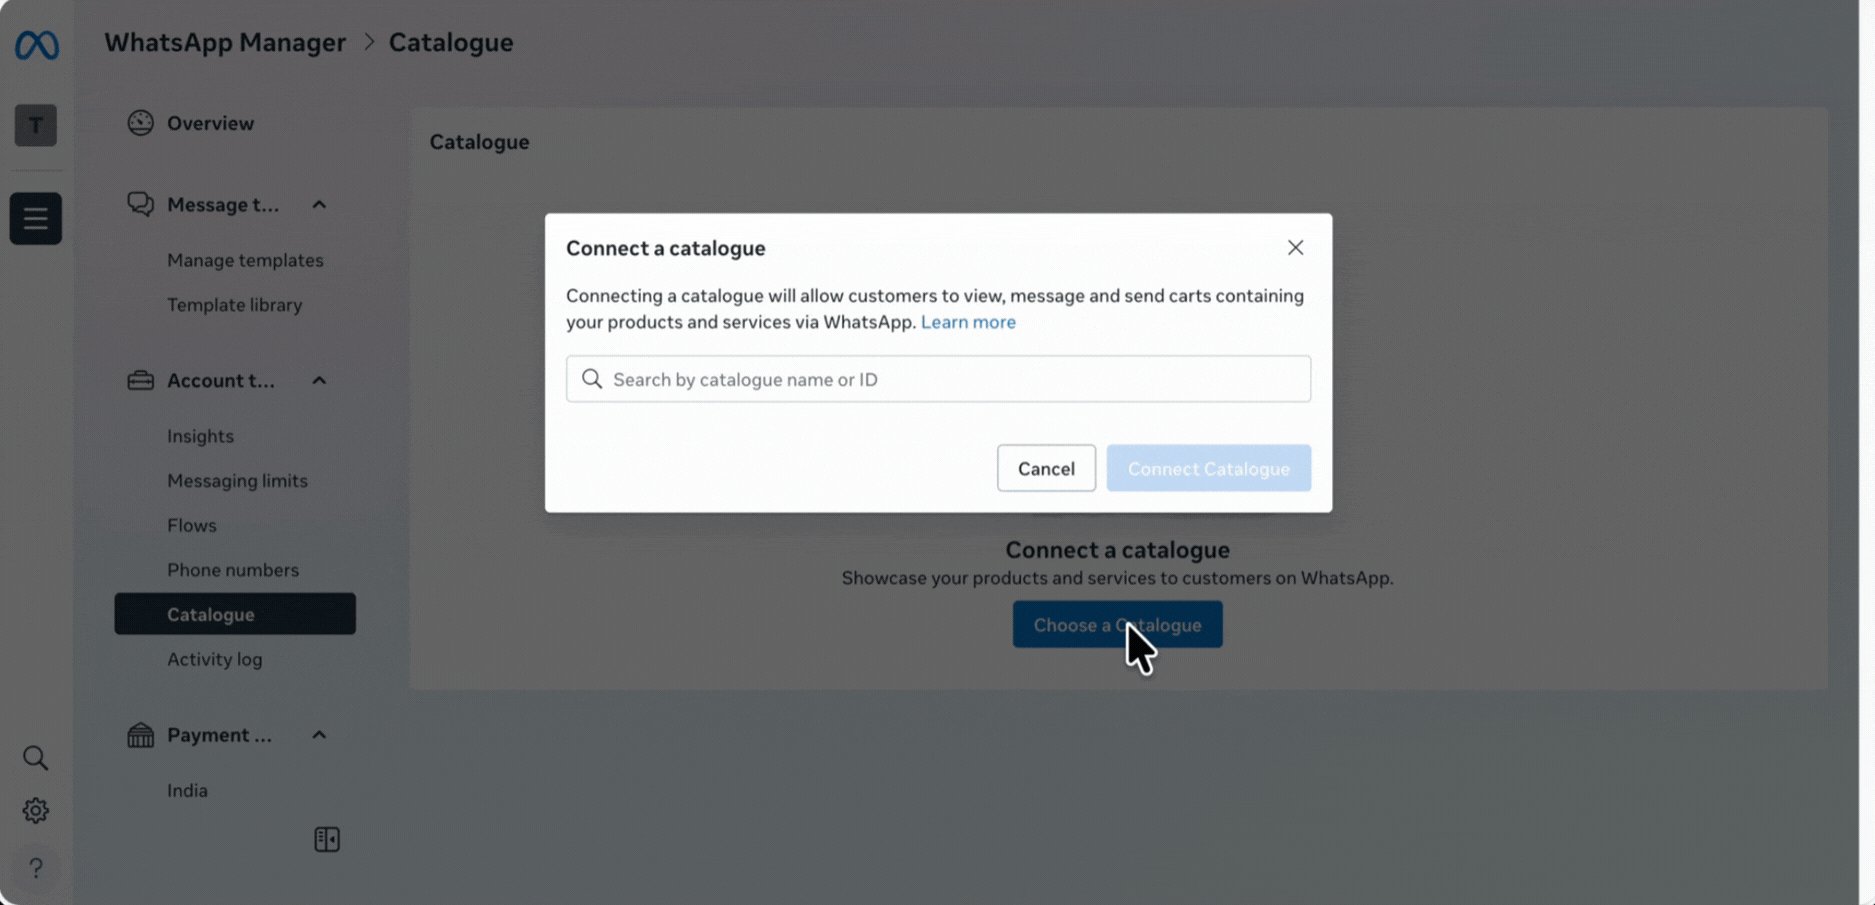
16. Click on Catalogue under Account tools.
17. Choose the catalogue name or ID from the dropdown and click on Connect Catalogue.
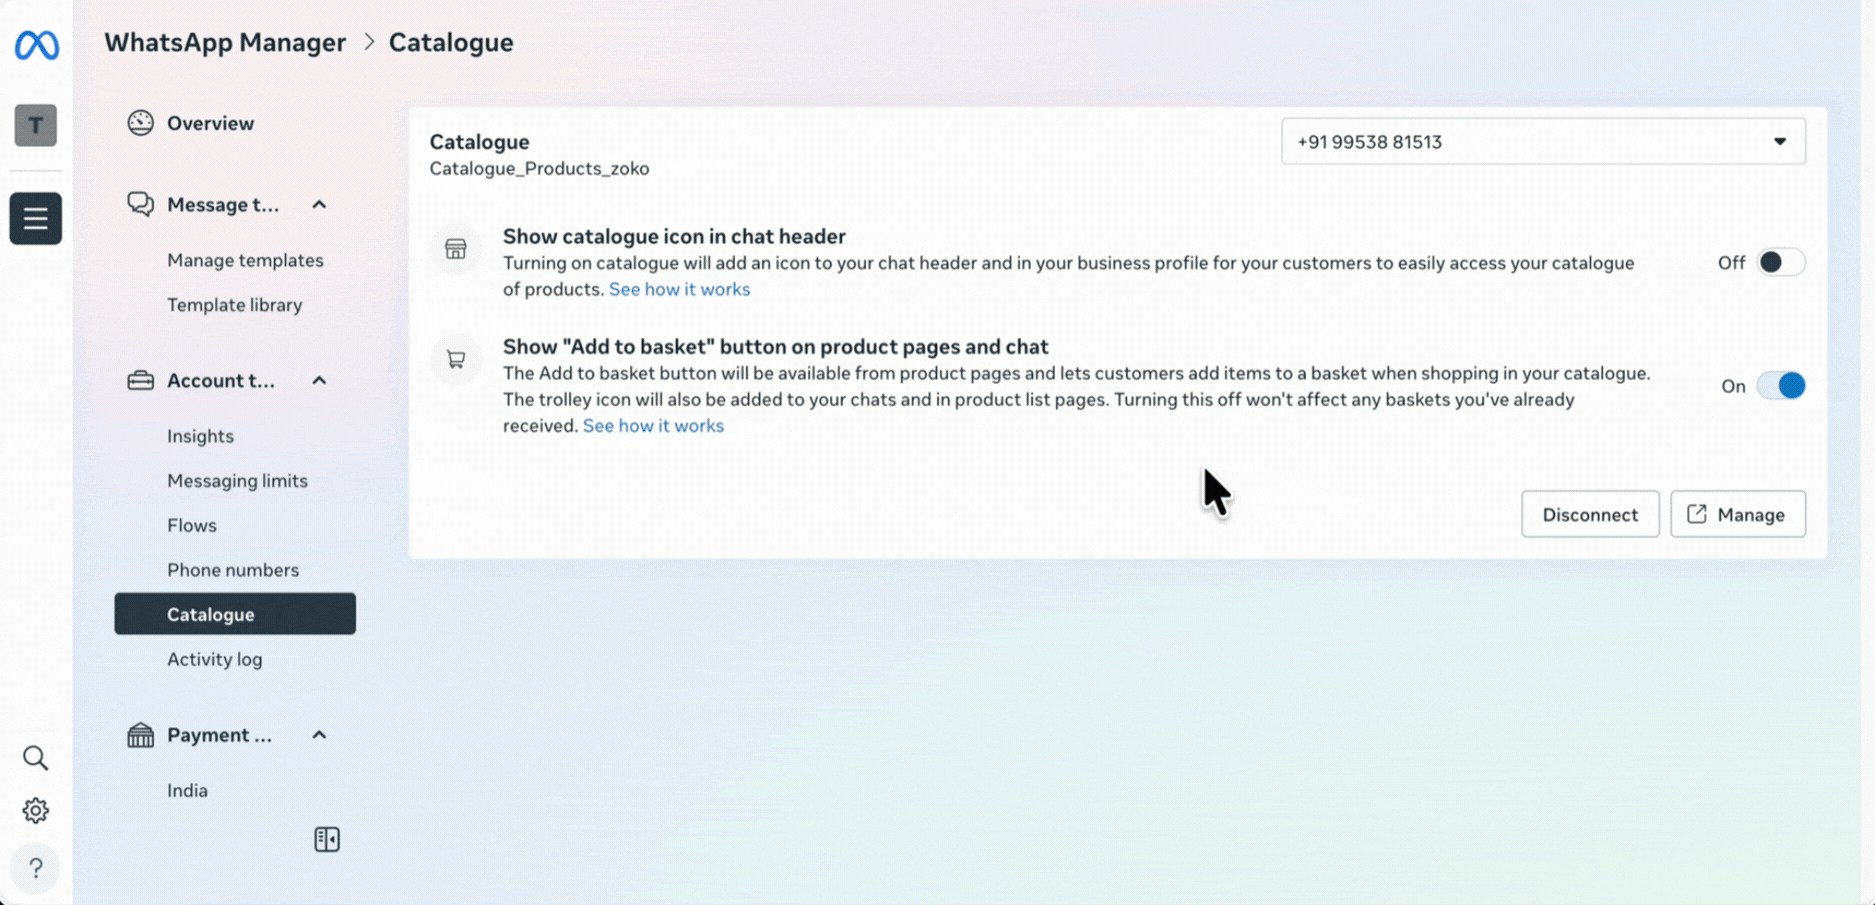
18. Make sure the toggle is enabled so the catalog icon appears in your WhatsApp chat header. If this isn’t turned on, you won’t see the catalog icon at all.
19. Go back to the Business settings page by clicking on the three-line menu and selecting Settings.
20. Click on Catalogues under Data Sources.
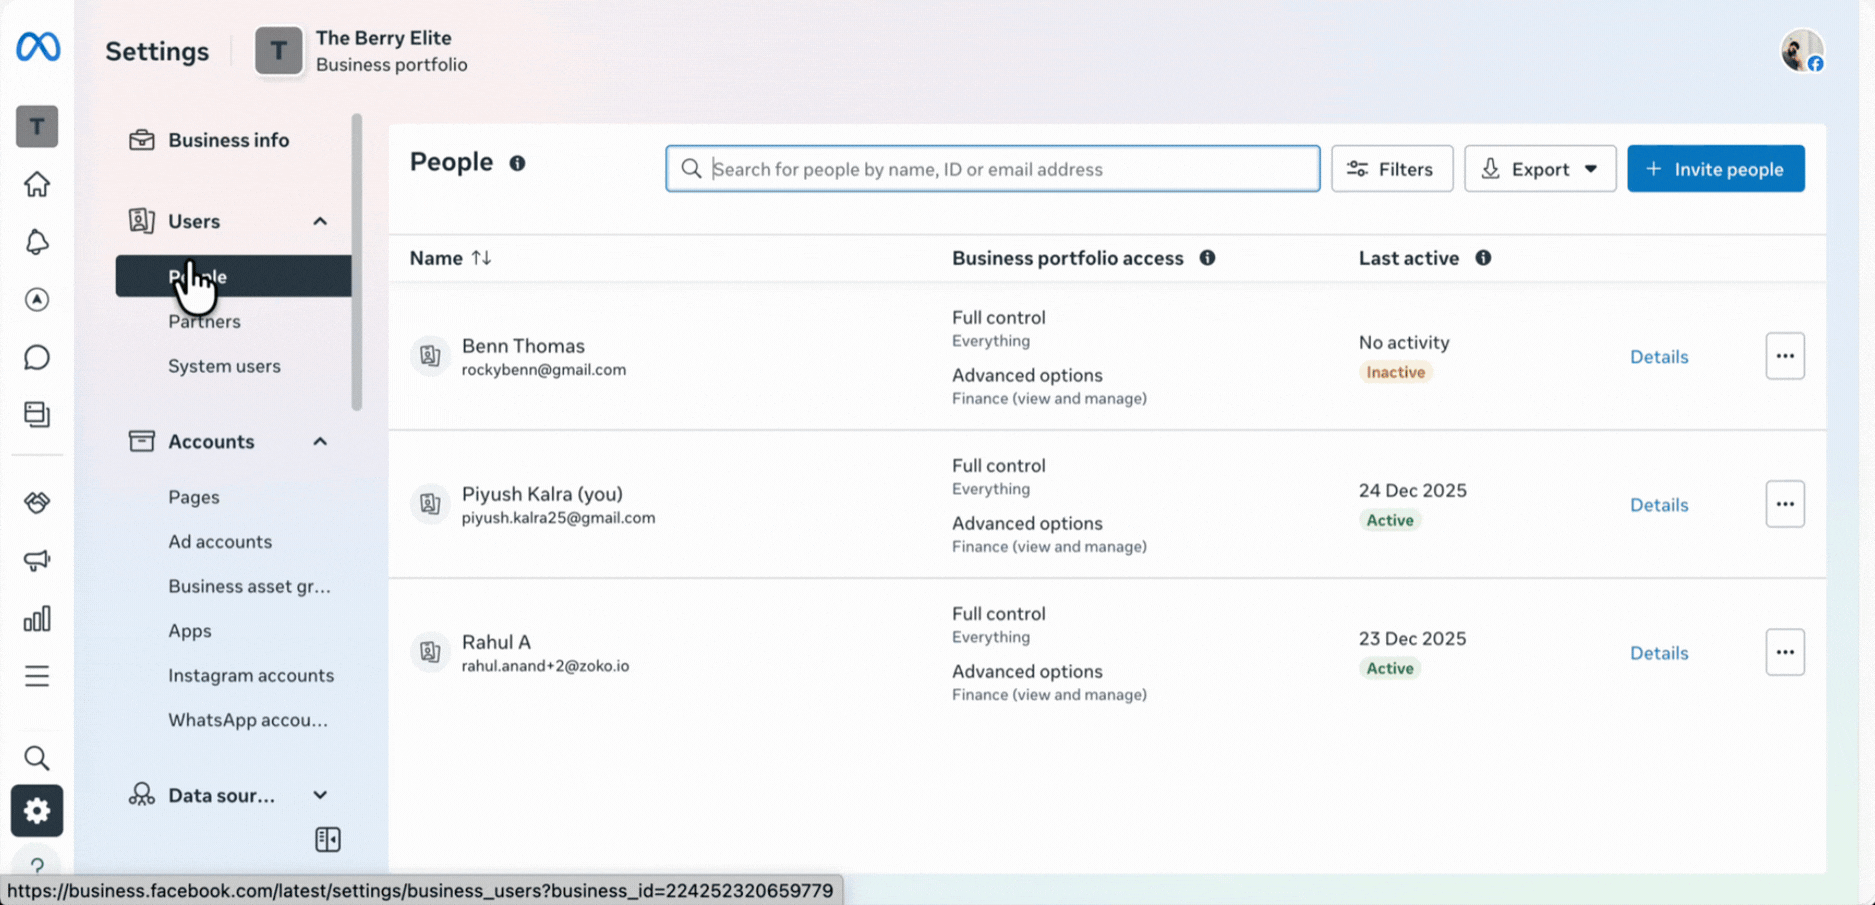
21. Select the connected catalog and click on Partners from the left side view.
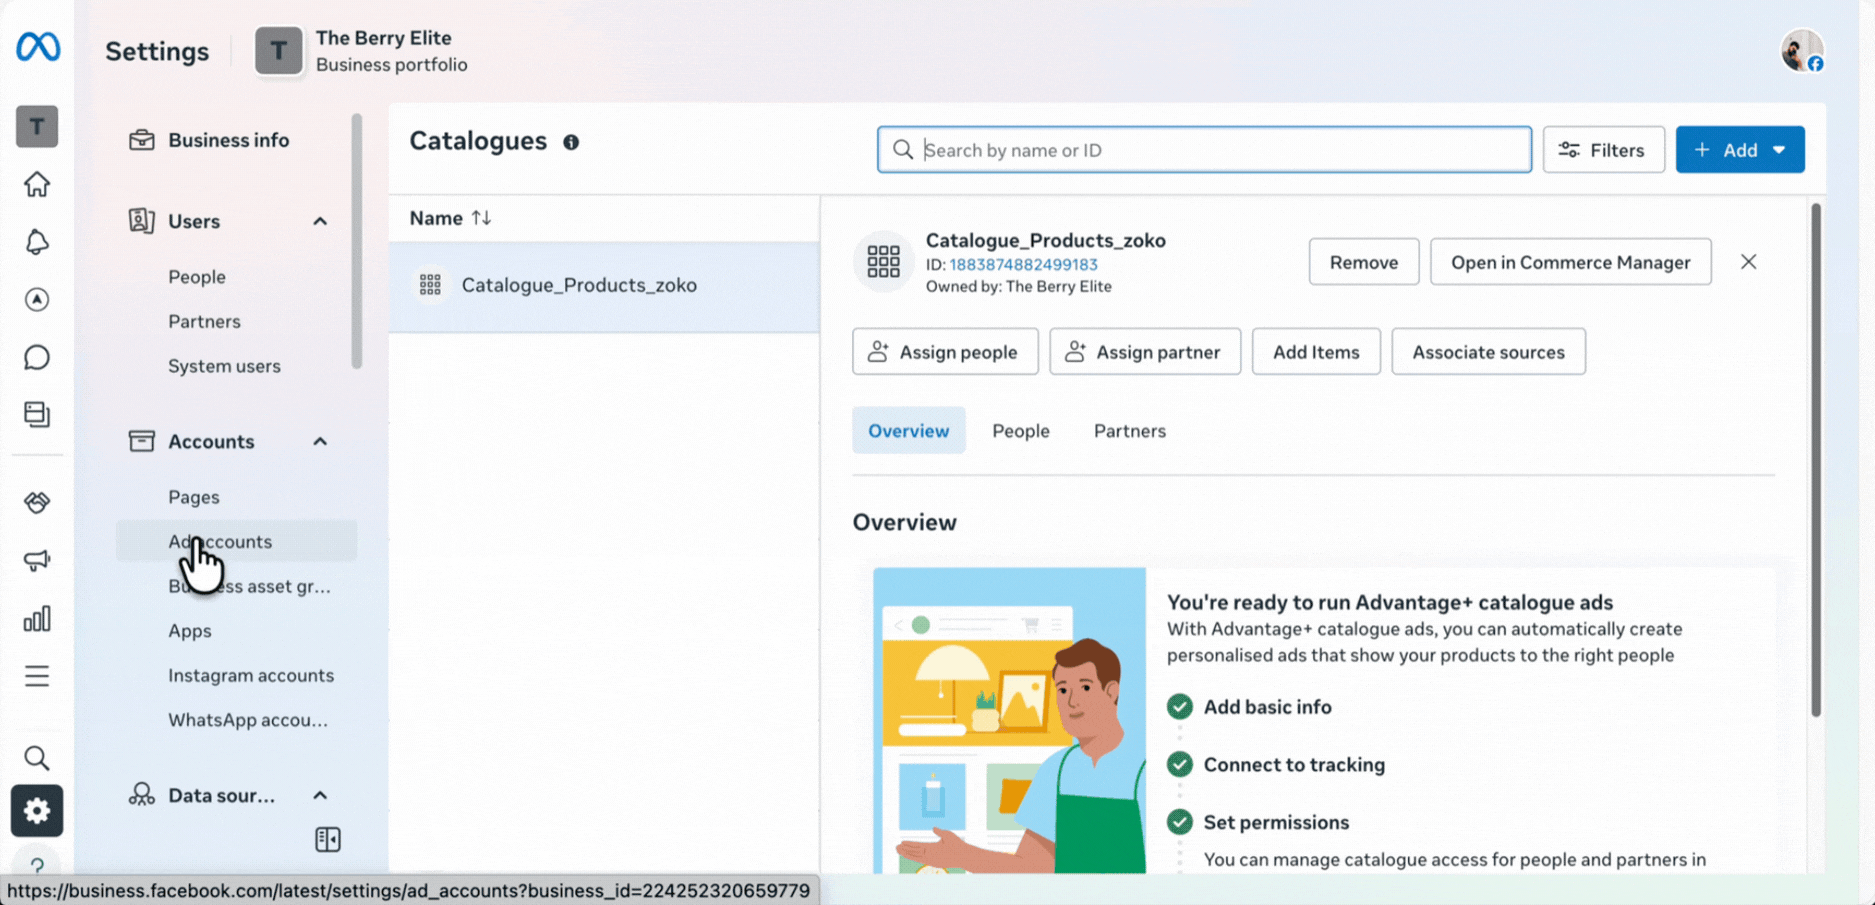
22. Click on Assign Partner and then select Business ID.
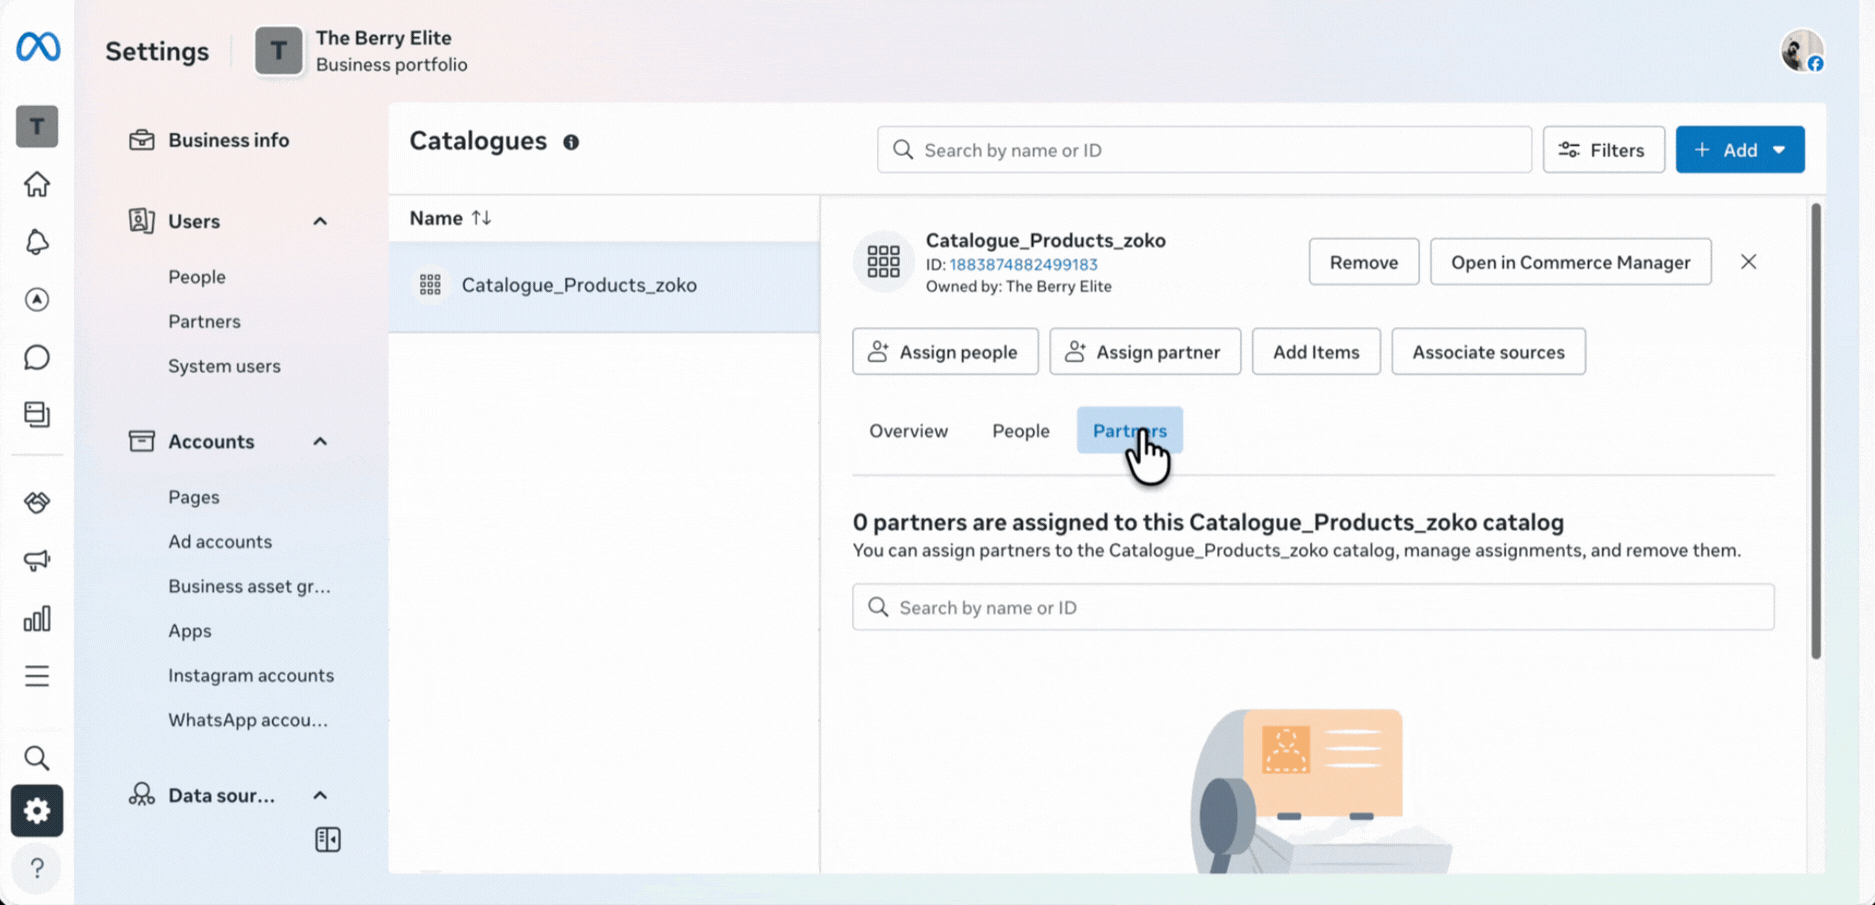
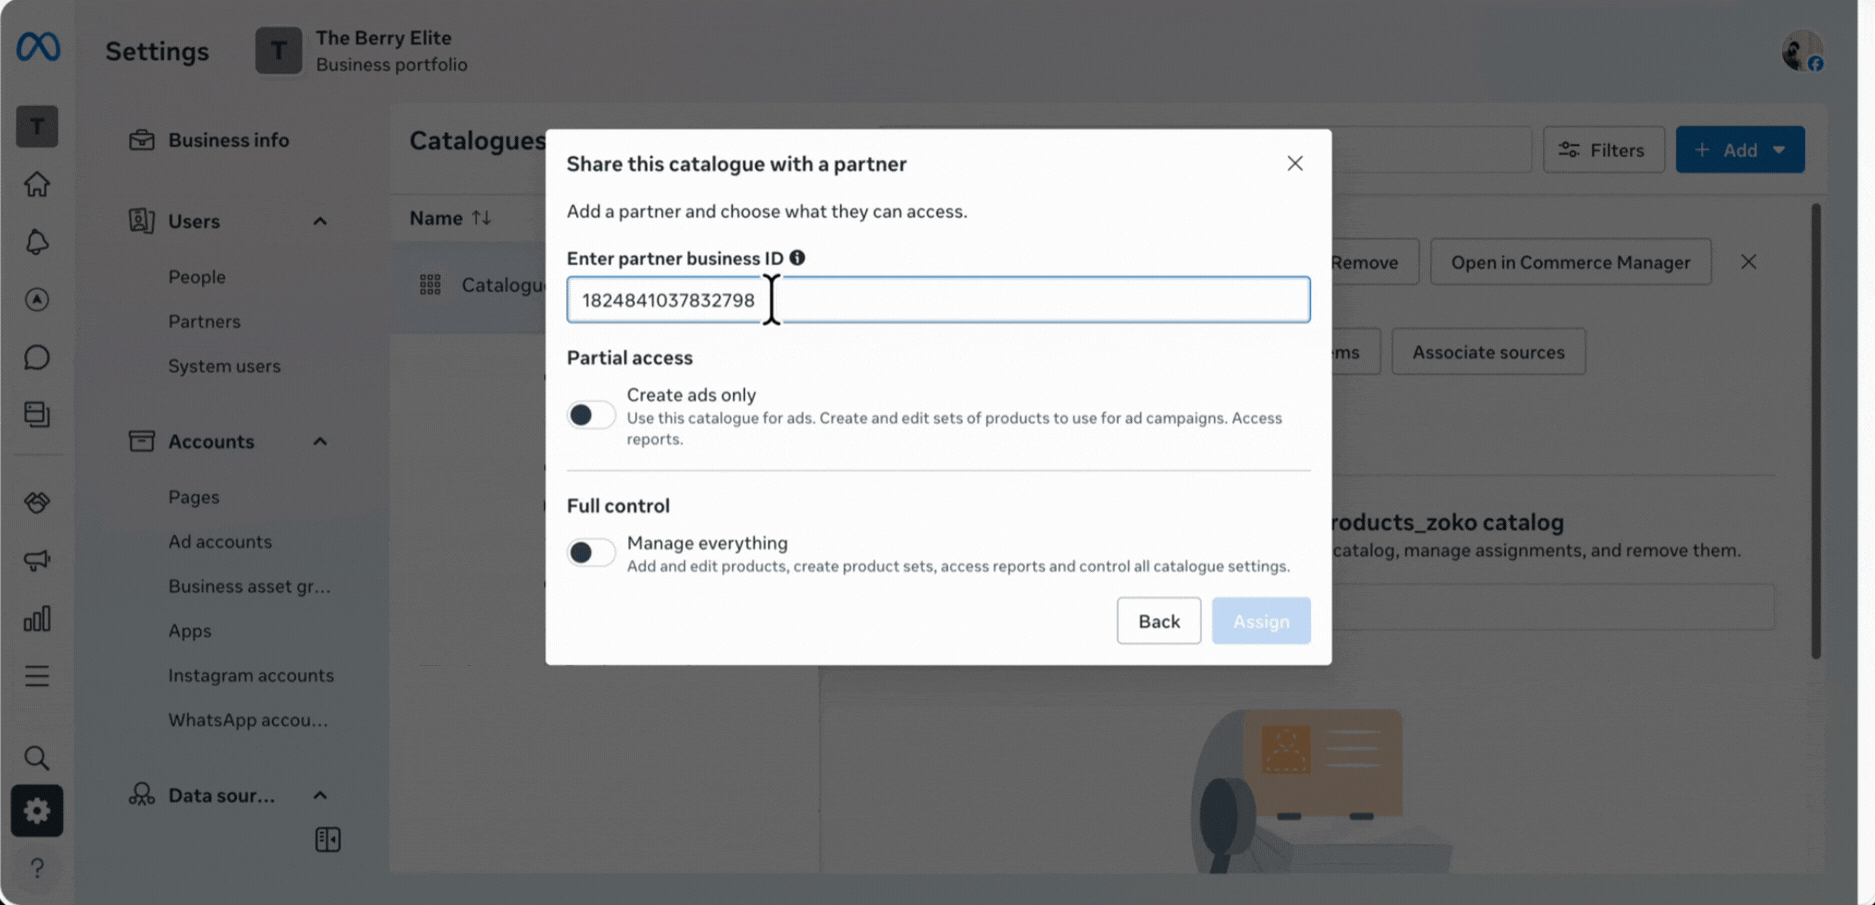
23. Paste this business ID - 1824841037832798 into the field.
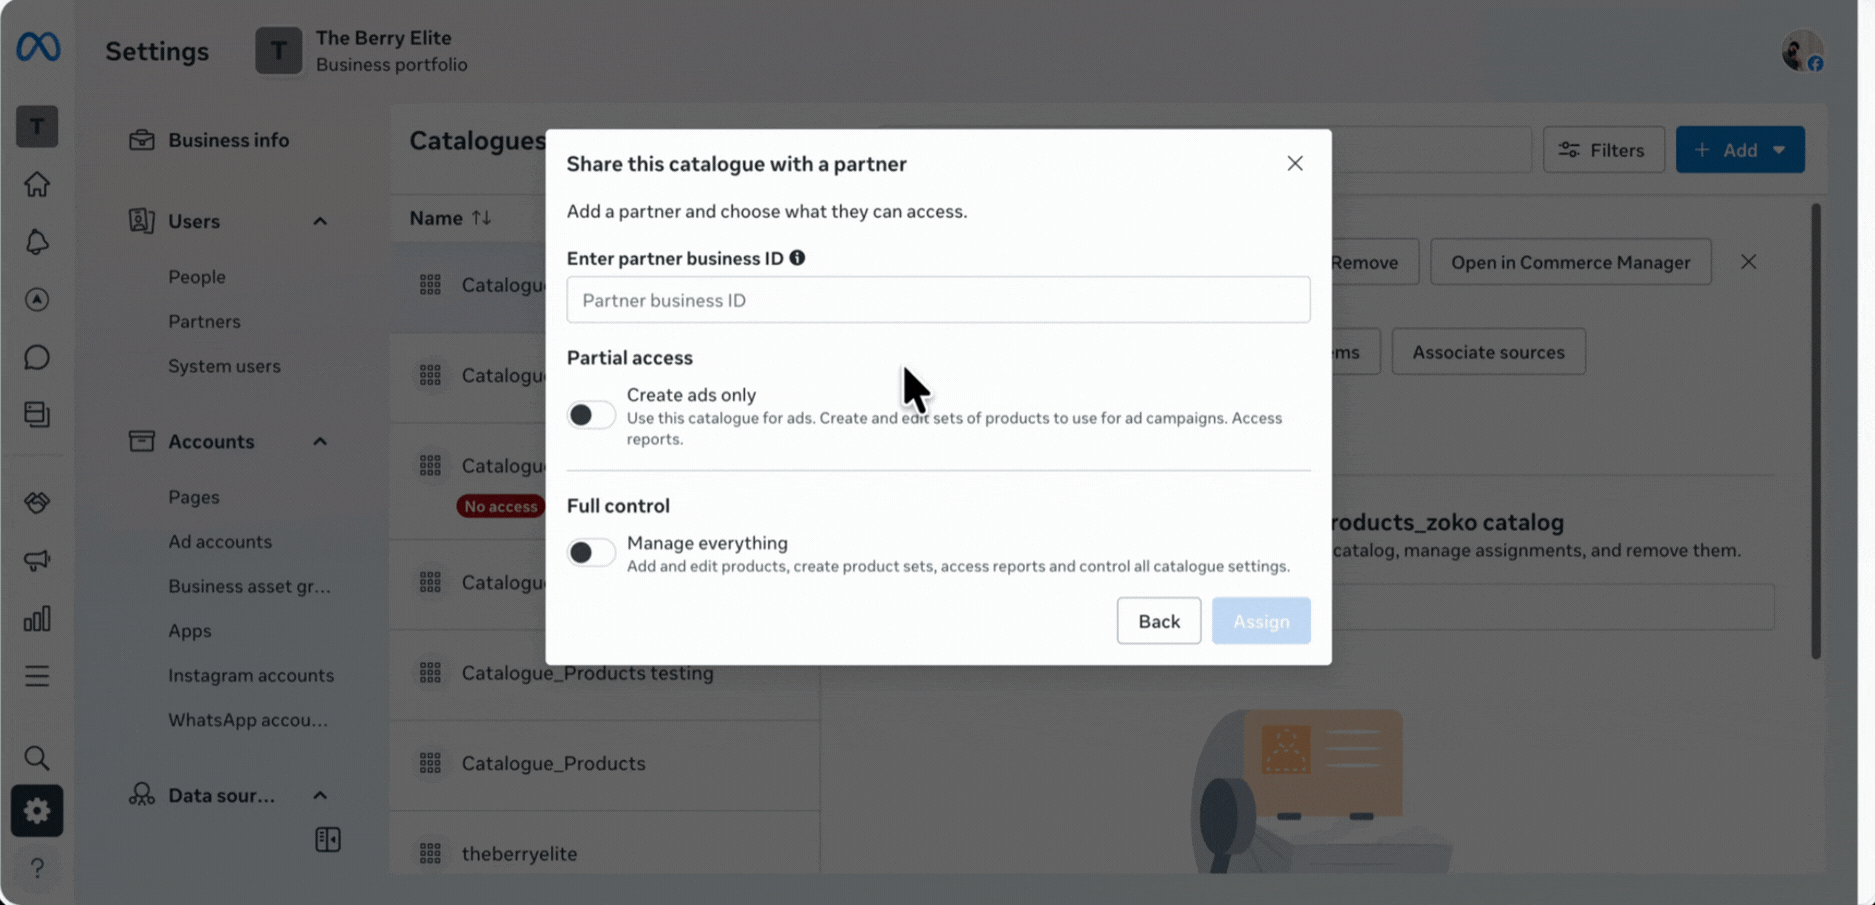
24. Enable the Manage everything toggle and click on Assign.
Step 5: Select Language & Publish Catalog
1. Choose the Catalog language from the dropdown.
Note: The currency is set by your Business Manager and cannot be changed here. To update the currency, you must do so through your Business Manager settings.
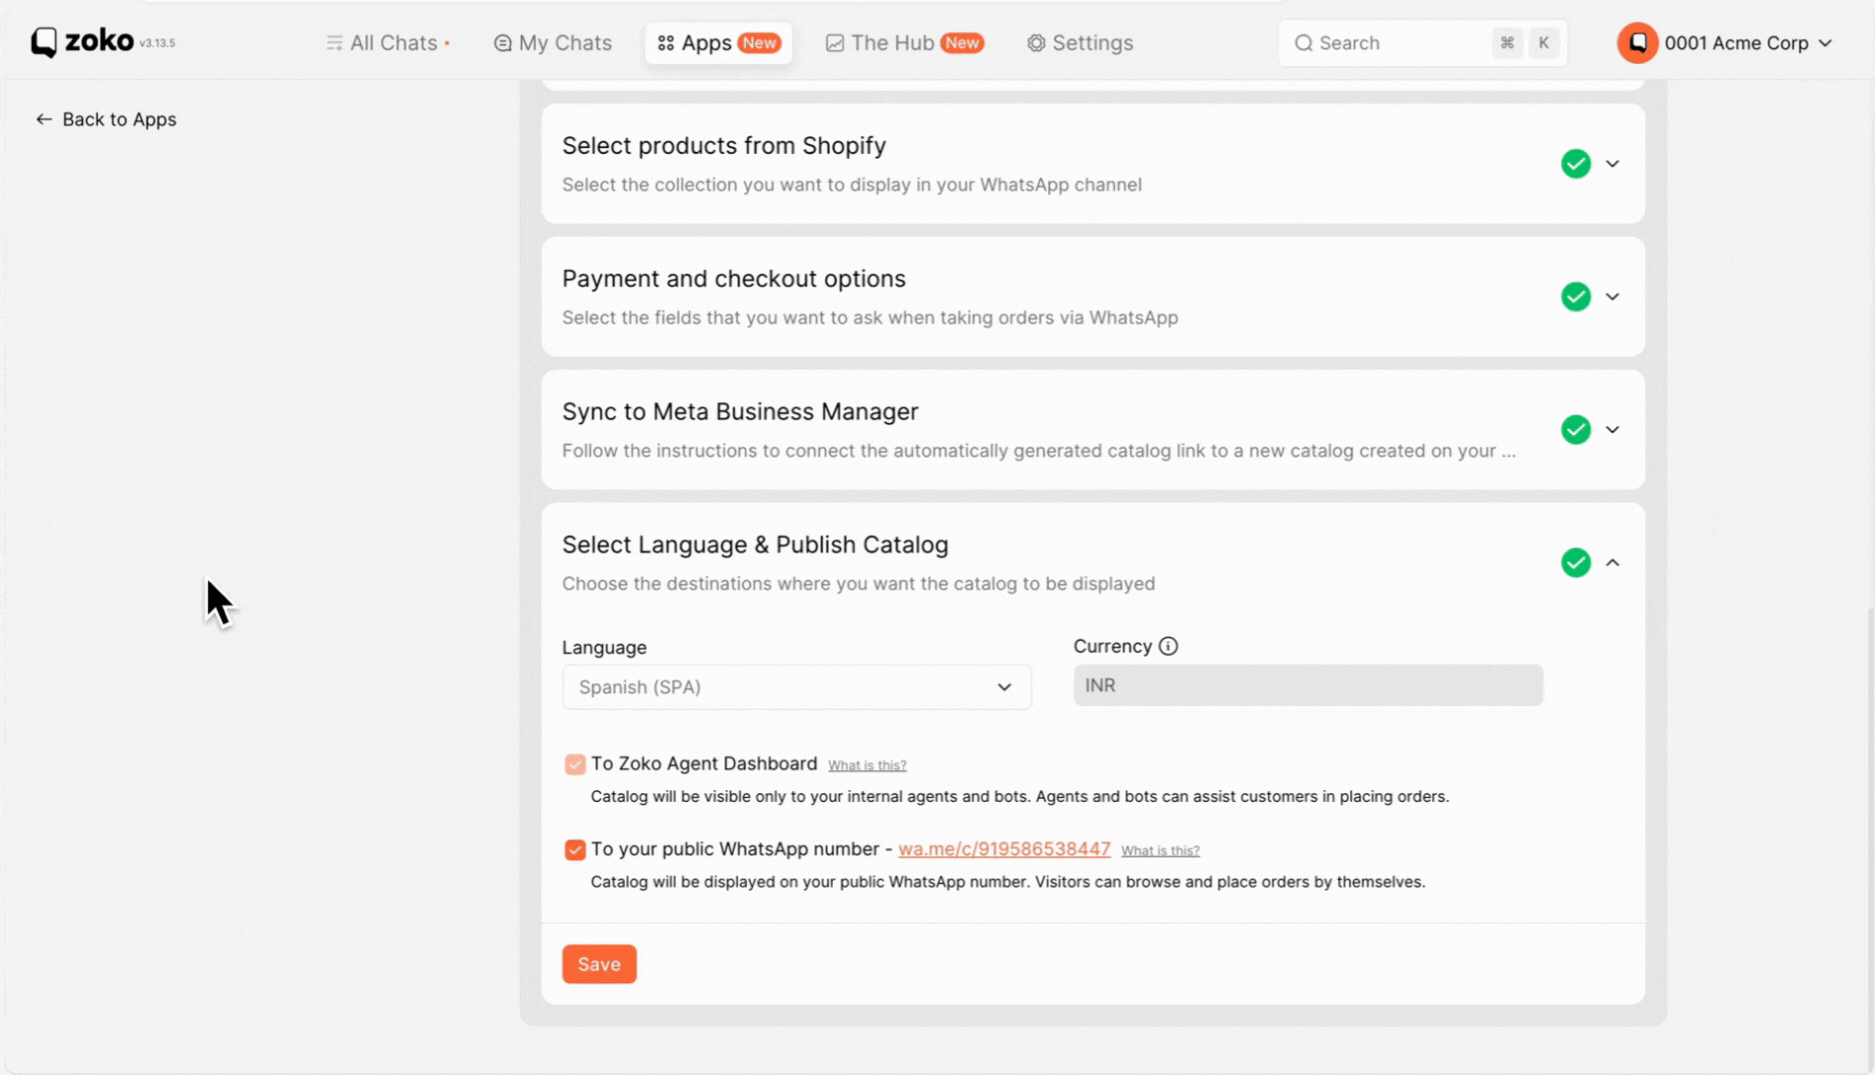
2. Tick all the checkboxes to enable the catalog on your WhatsApp number and click on Save.
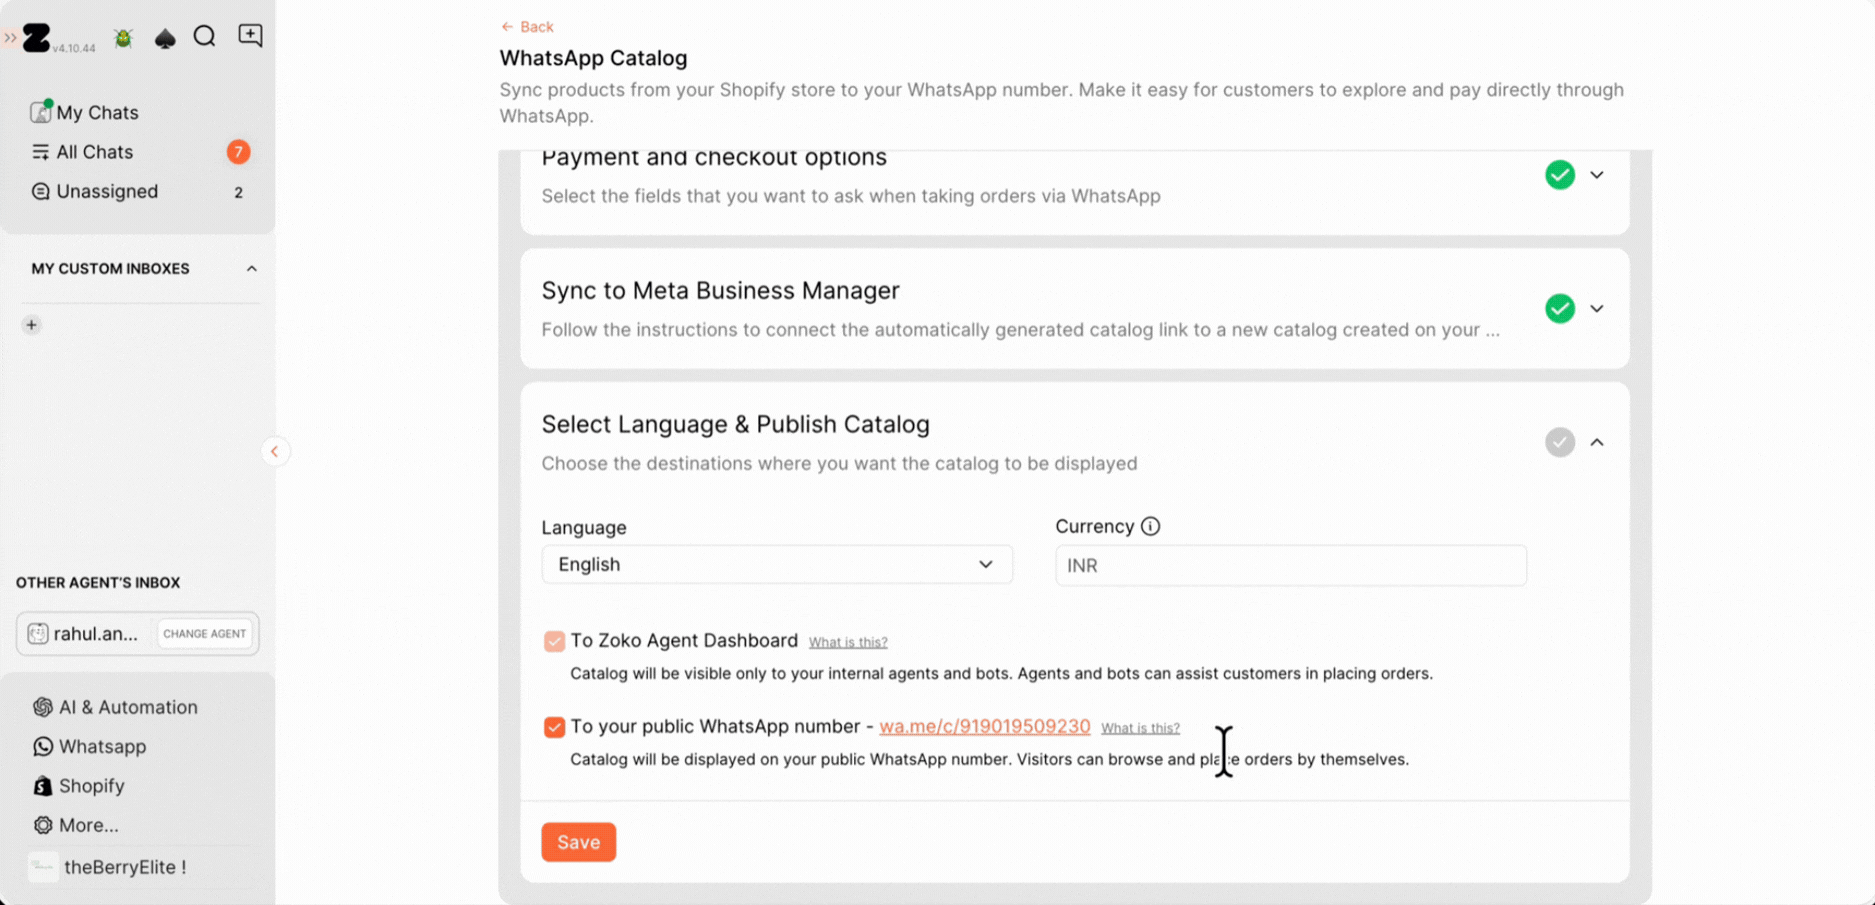
Important: Always click Save after making some changes to the catalog; otherwise, your changes will not be reflected.
Keywords: WhatsApp catalog, Zoko, Meta Business Suite, Shopify store, Business Manager profile, Connect, Integration, Catalog management, WooCommerce store.