

Setting up the Wait Time in the Flow
Understand the Wait Time that you can set up in your workflow.
Share on WhatsApp
.png)
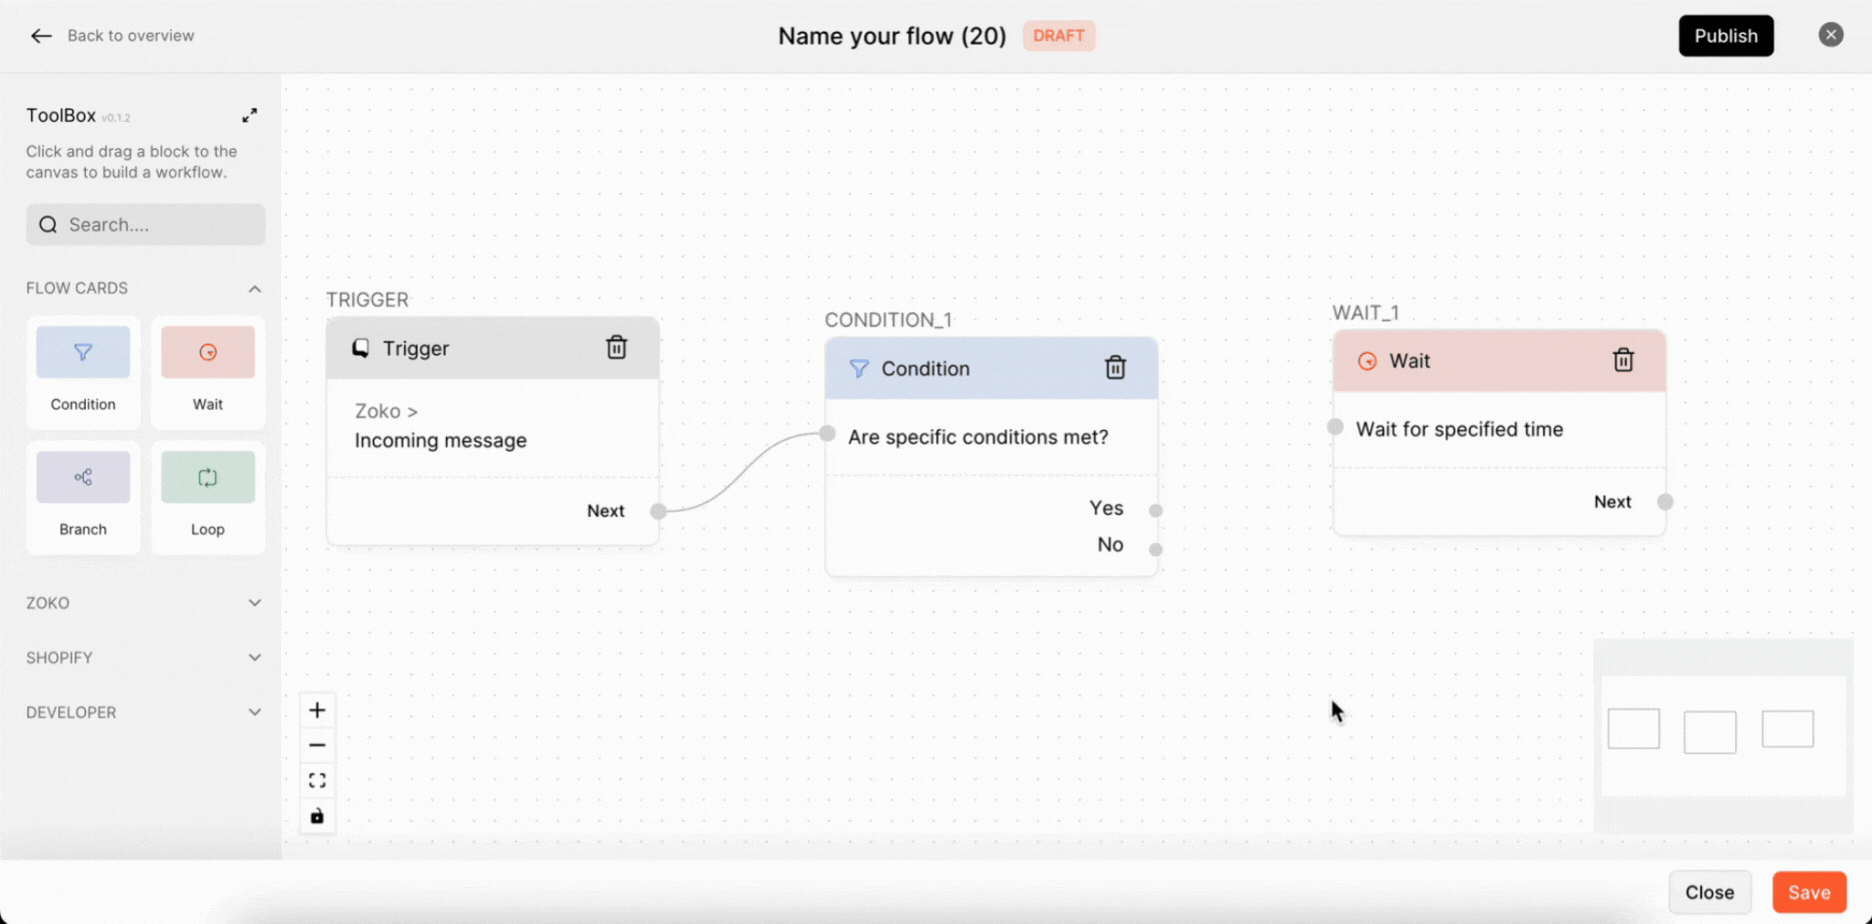
The wait time is used to delay the next action for a certain amount of time. You can place the Wait Flow card before the next action in the flow that you wish to delay. You can configure the time in minutes, hours or days. For example, you can use a wait card to delay the next step in a flow by, say 2 days. However, for customer service-related flows, it is suggested not to set the delay time for too long as this may cause the customer to leave the conversation as they will assume that their issue is not heard.
To do this:
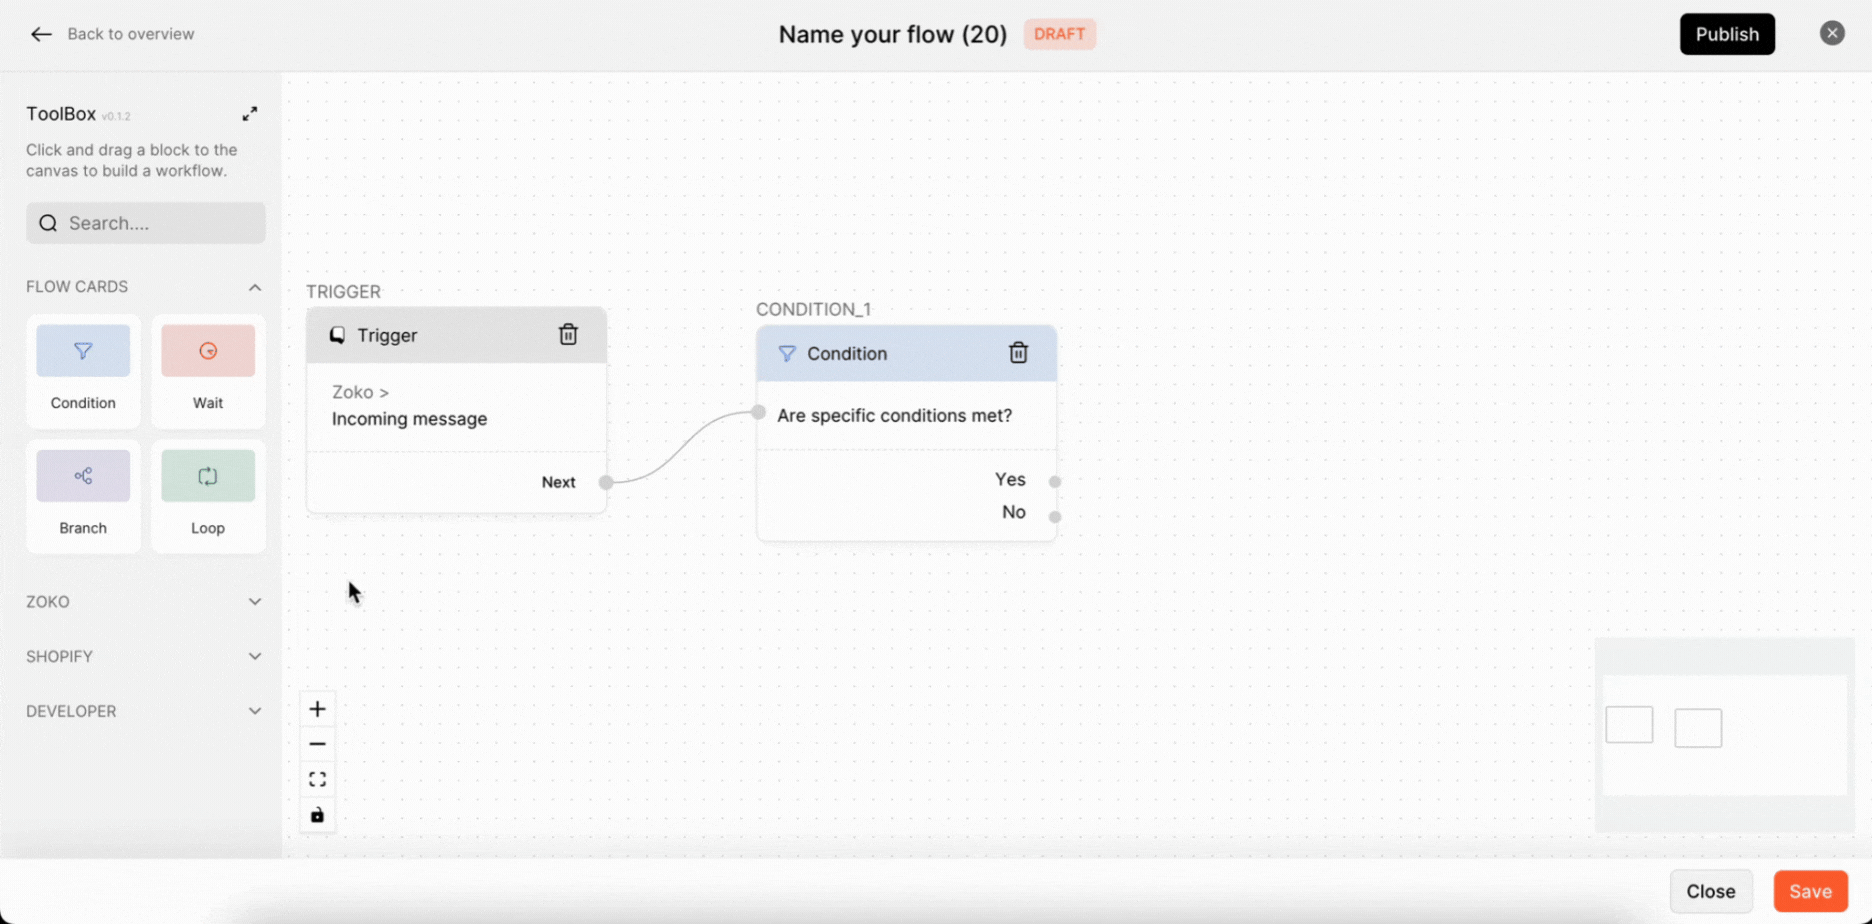
1. Click on Wait to open the configuration setting.
2. Type the description name of the wait time.
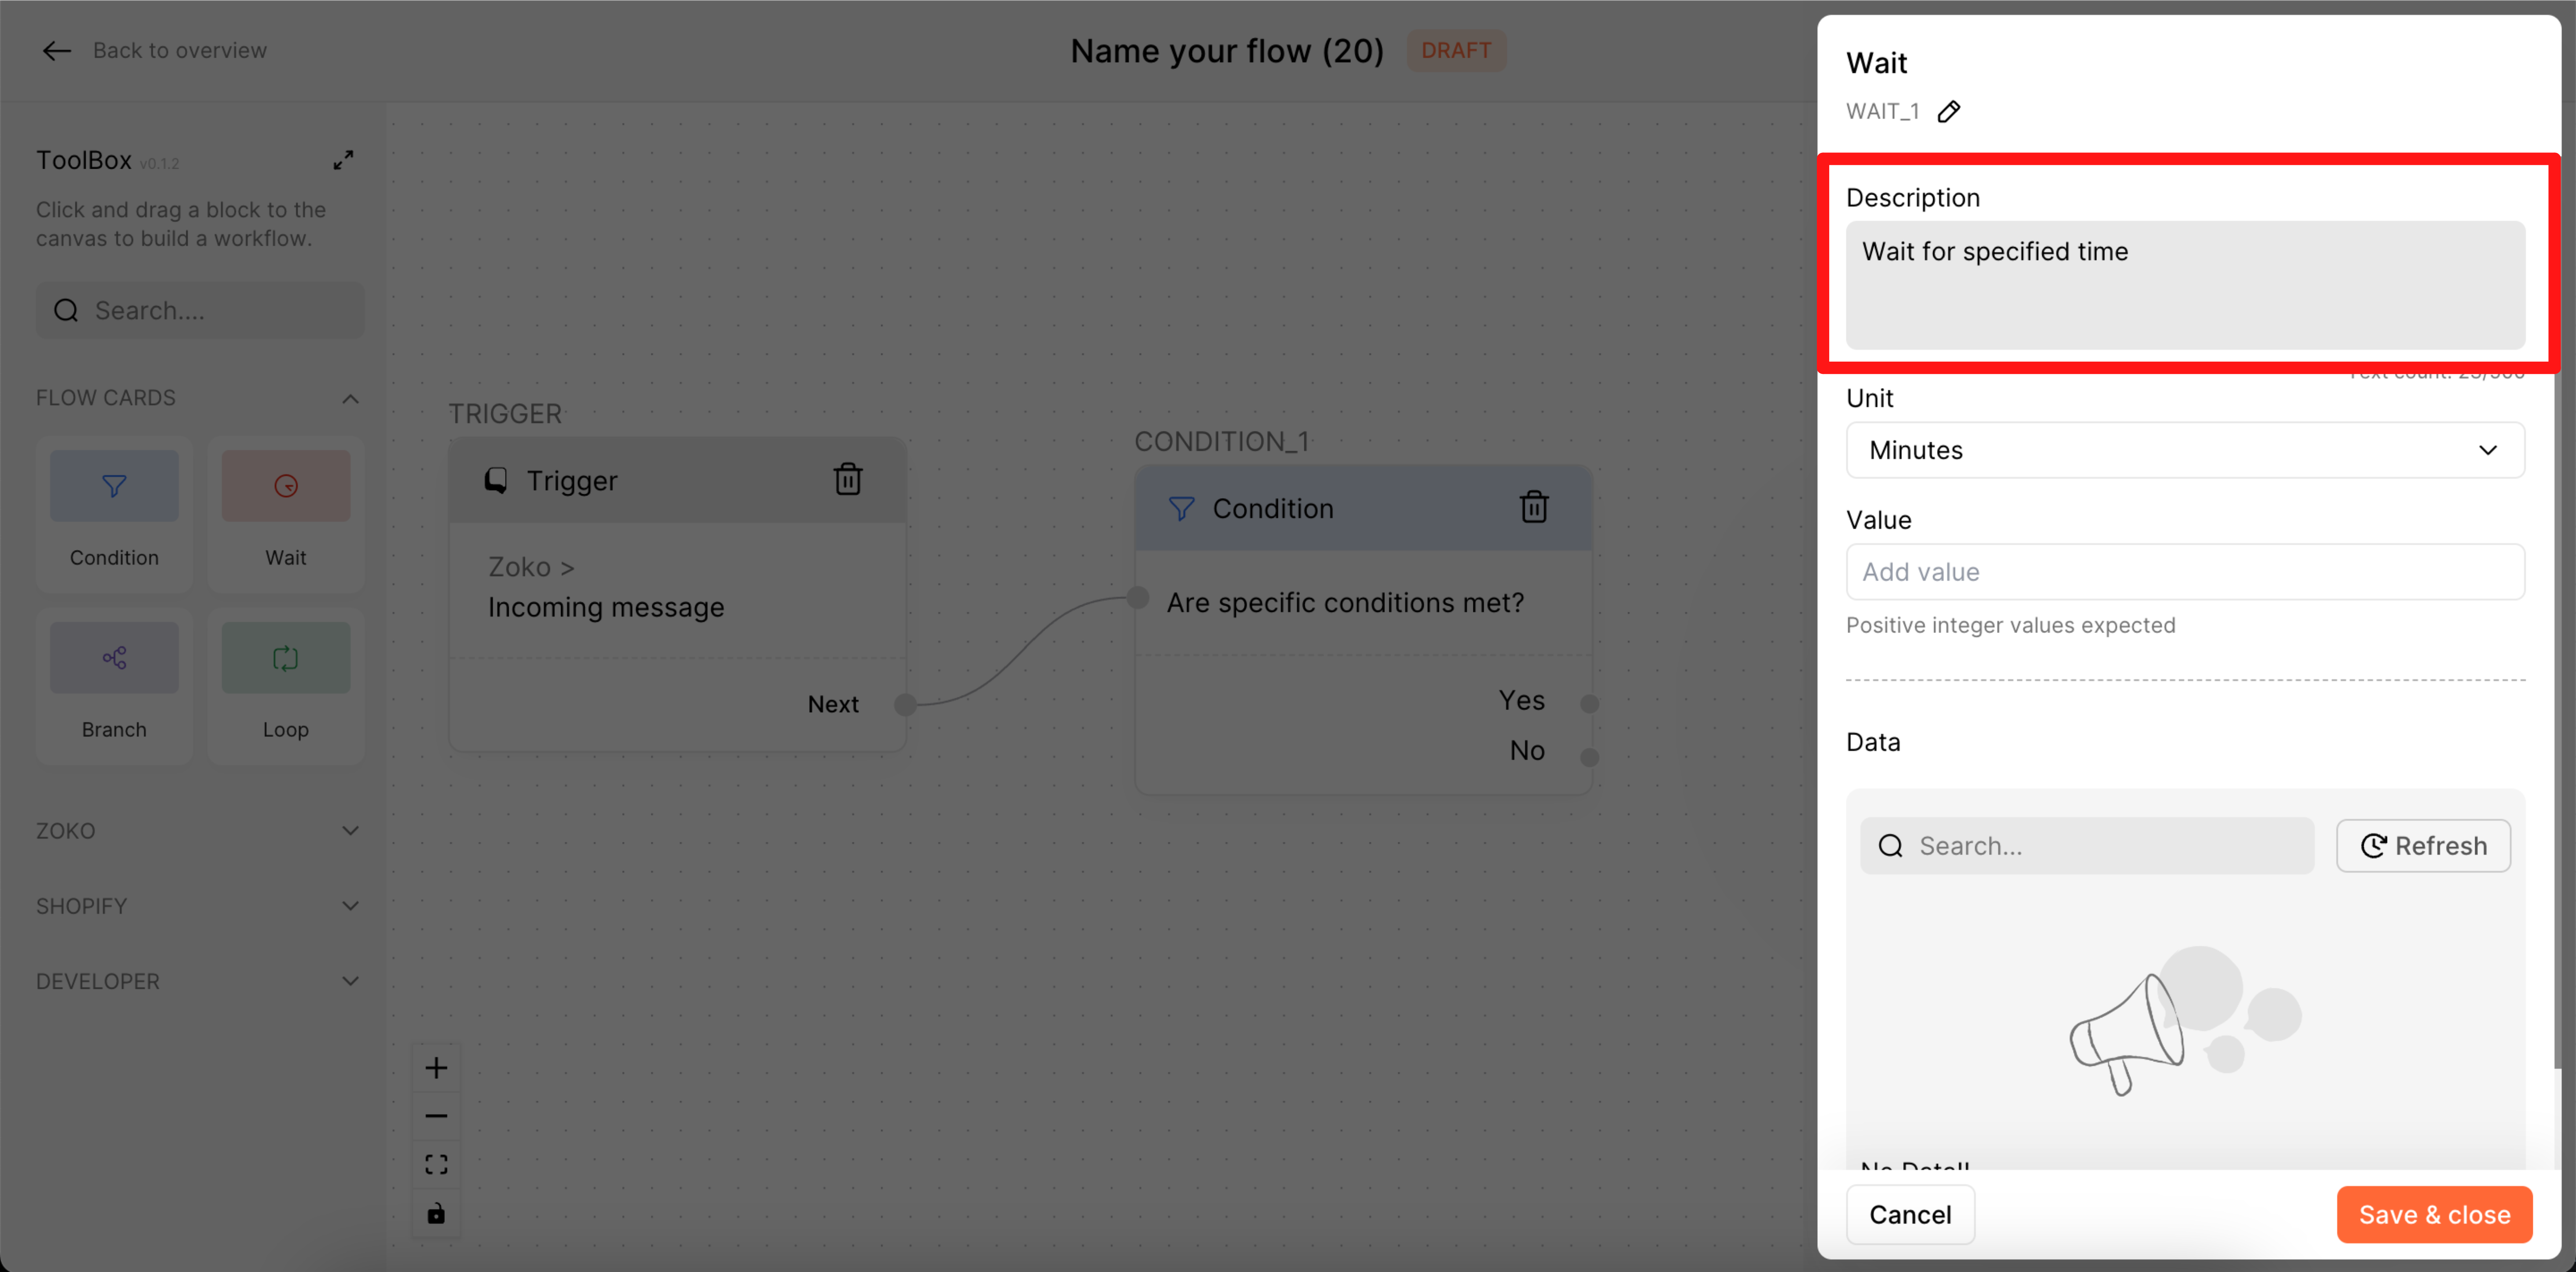
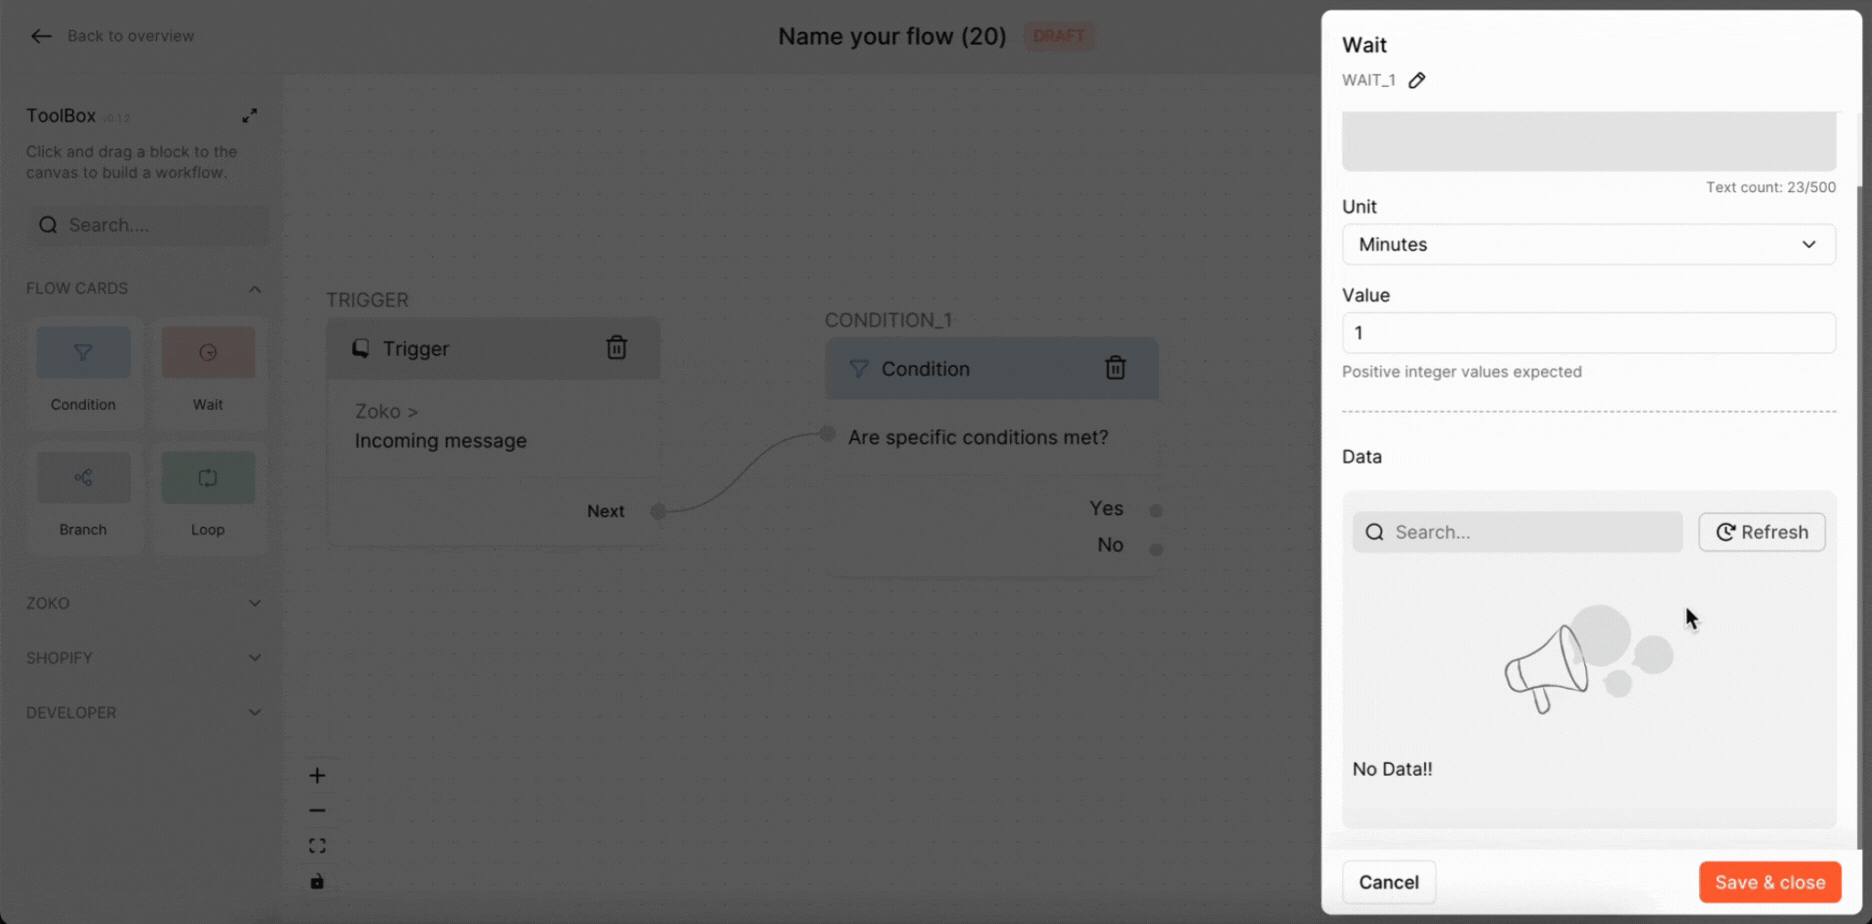
3. Click the Unit bar to open a drop-down menu and select a time unit, such as minutes, hours, or days. In our case, we choose Minutes as the time unit.
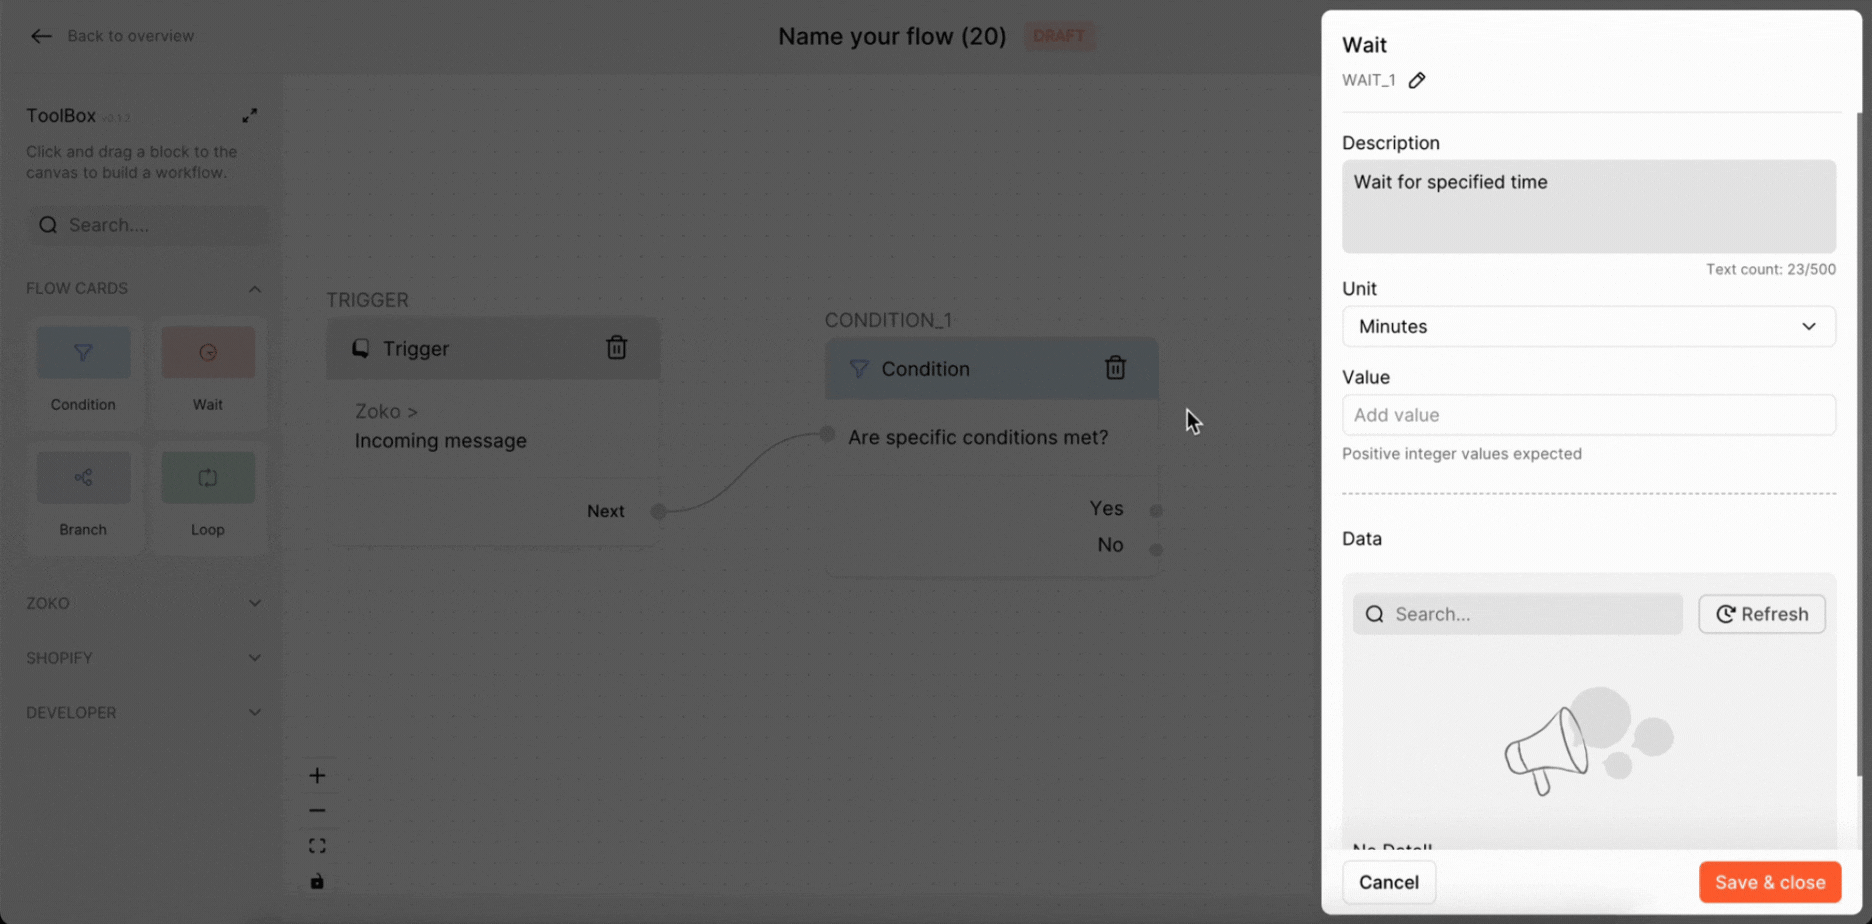
4. Type the wait time in Value box. In our case, we set the wait time value as 1.
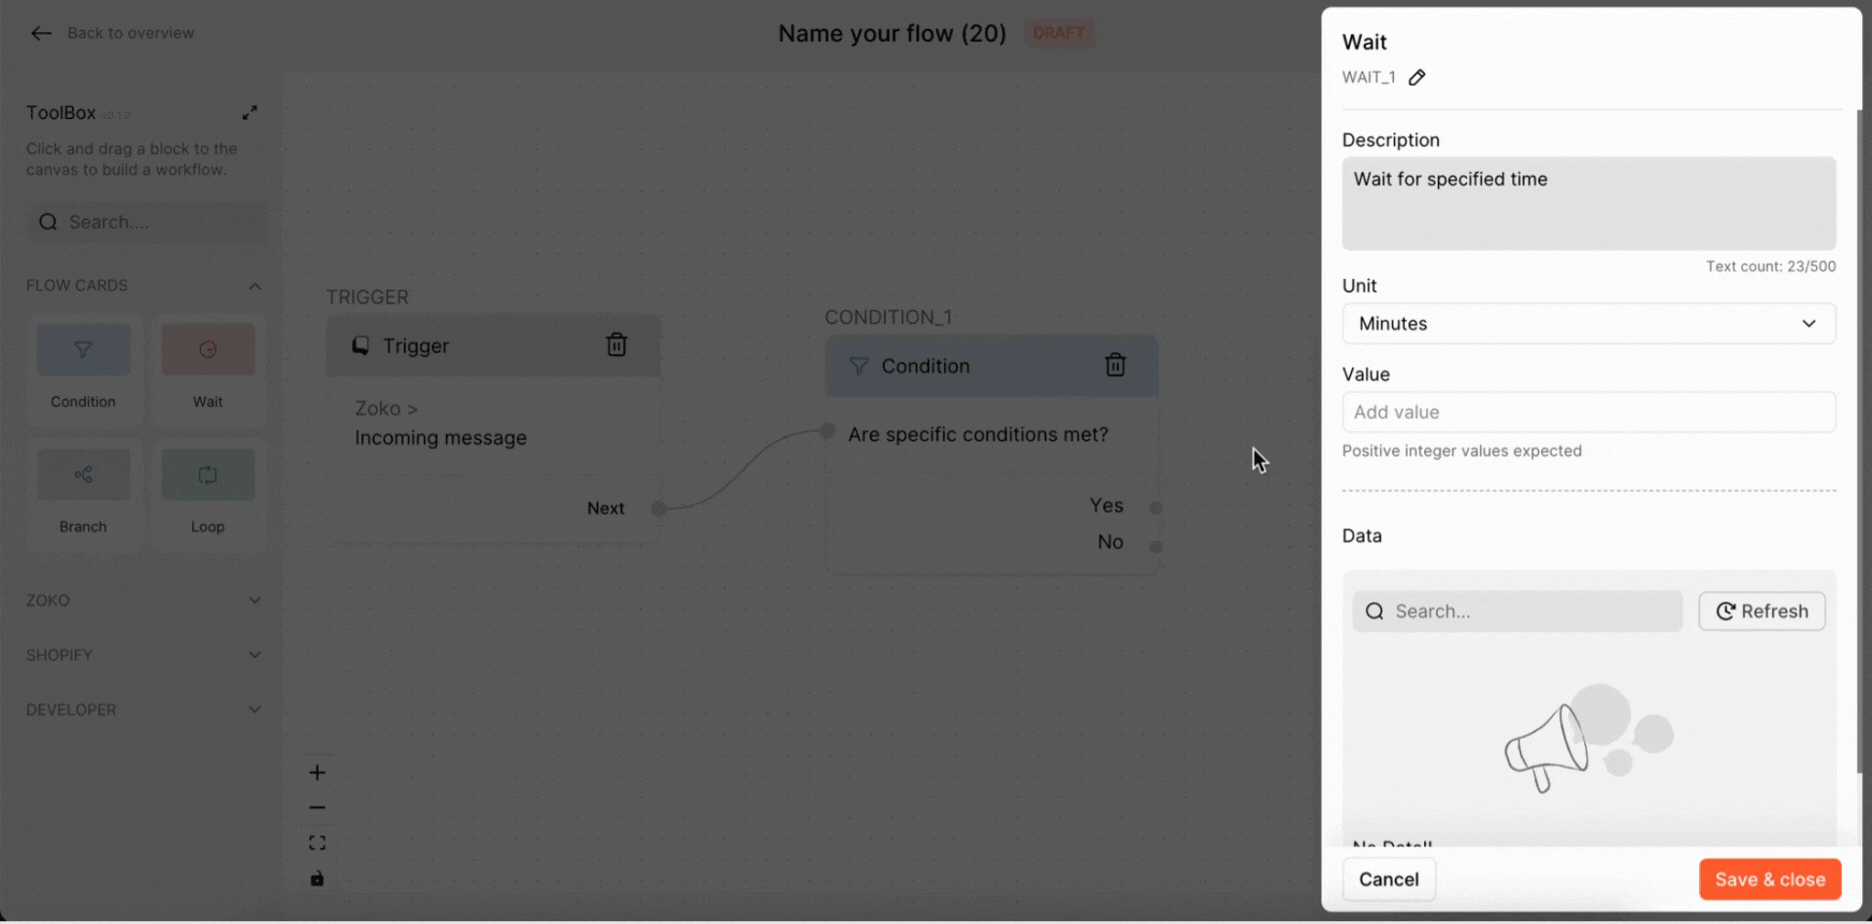
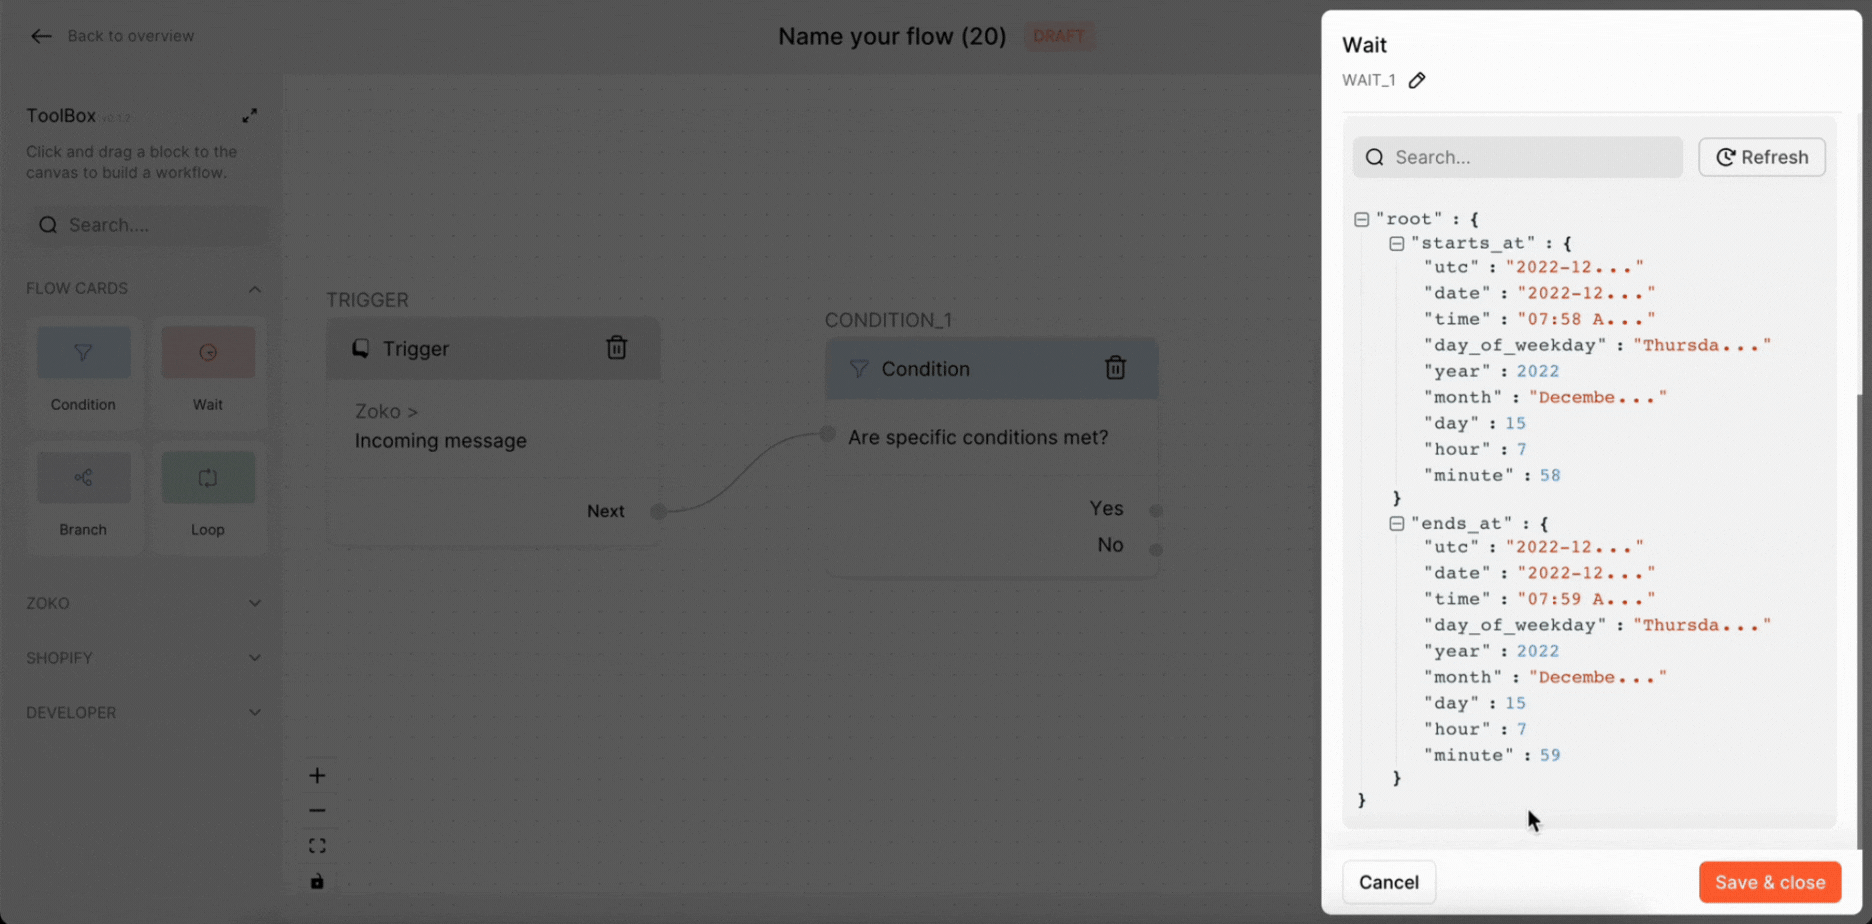
5. Data: When you click on the Refresh button, the data from the beginning to the end of the wait time will be displayed here.
6. Click on Save & Close.
Keywords: Wait time, Chatbot wait, Delay message, Delay time, FlowHippo.