

How to Customize Conditions in a Default Playbook Before Triggering the Message
Here’s a step-by-step guide on customizing conditions in a default playbook flow before triggering the message.
Share on WhatsApp
.png)
Customizing conditions in a default playbook flow before triggering the message is an essential step in ensuring that your messages are targeted and personalized, which can increase customer engagement and ultimately boost sales. With the help of the "Condition" action, you can specify different conditions and then route the conversation to different paths, based on whether those conditions are met or not. This process can be applied to other default playbook flows, such as COD and Reorder flow, and many more.
To do this:
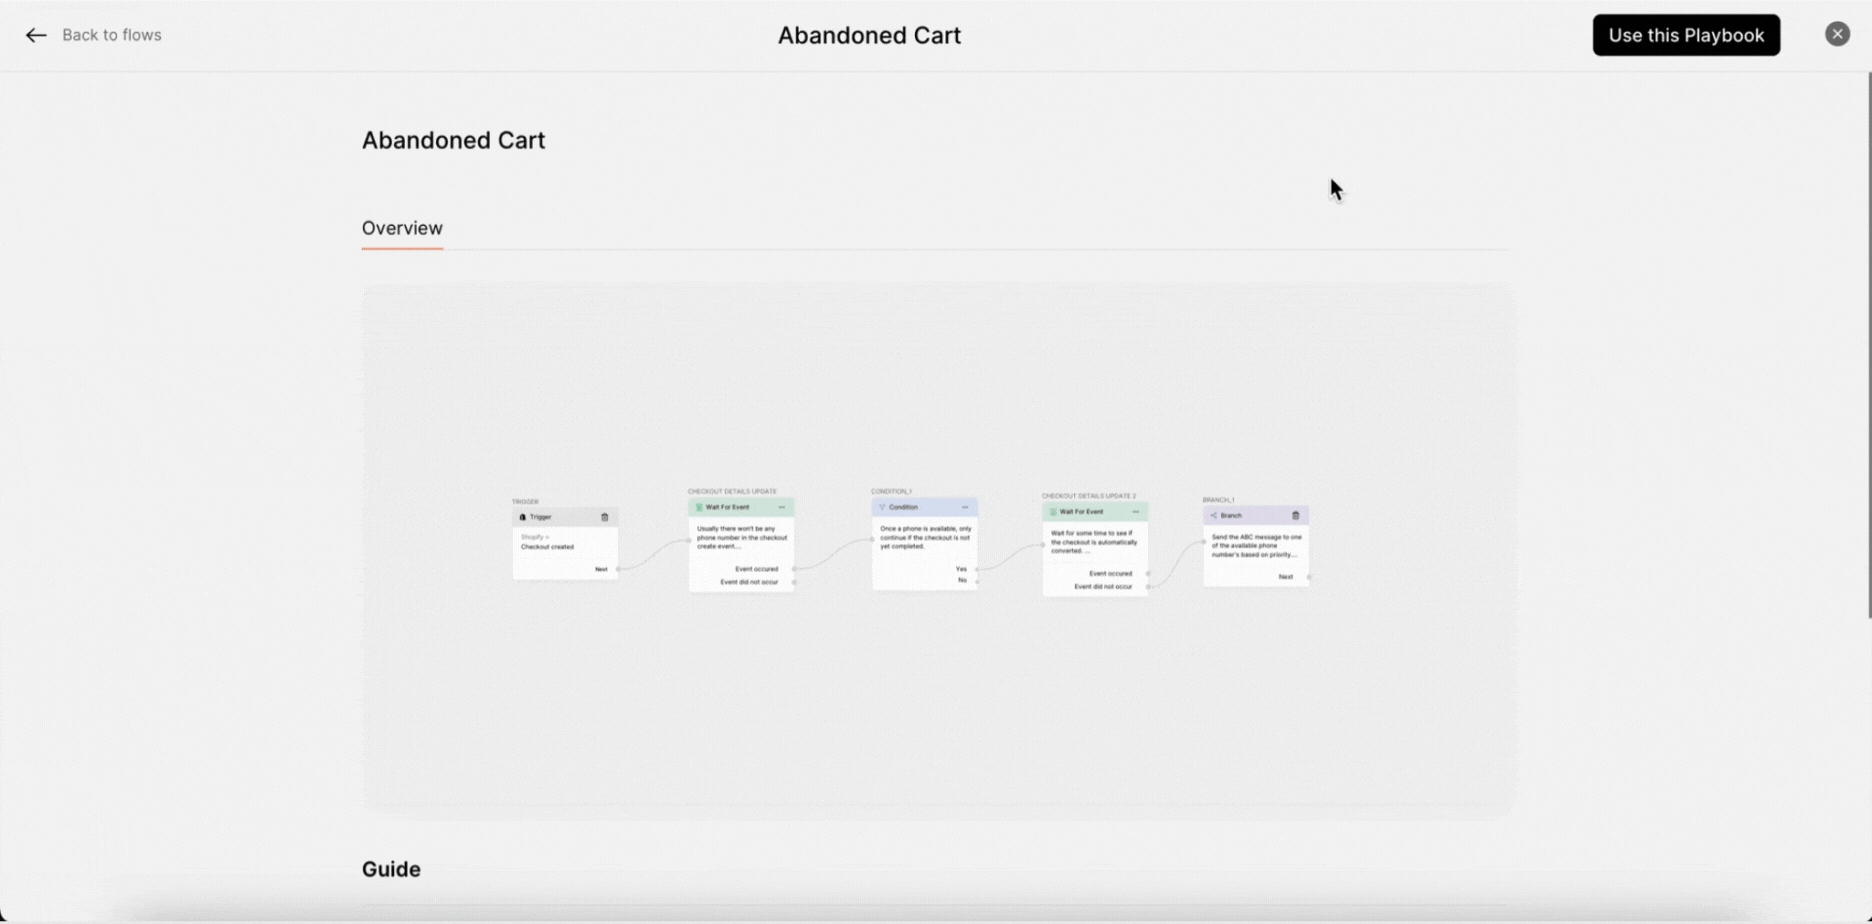
1. Select the Default playbook from the Playbook section. In our example, we have selected Abandoned Cart.

2. Click on Use this Playbook.
3. Hover the mouse over the overview screen and click on Edit.

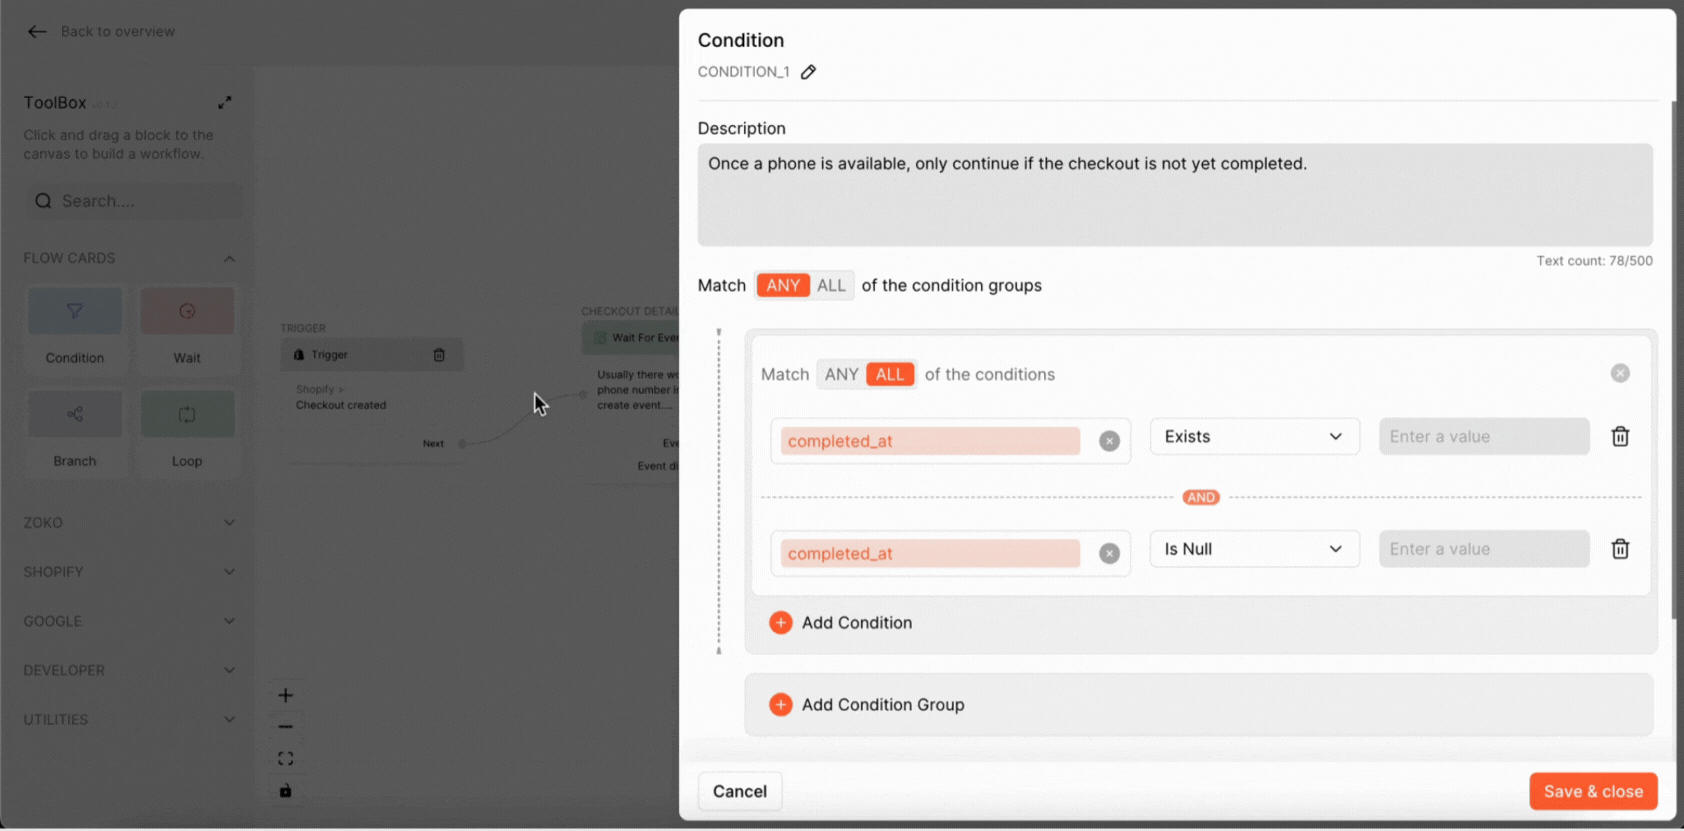
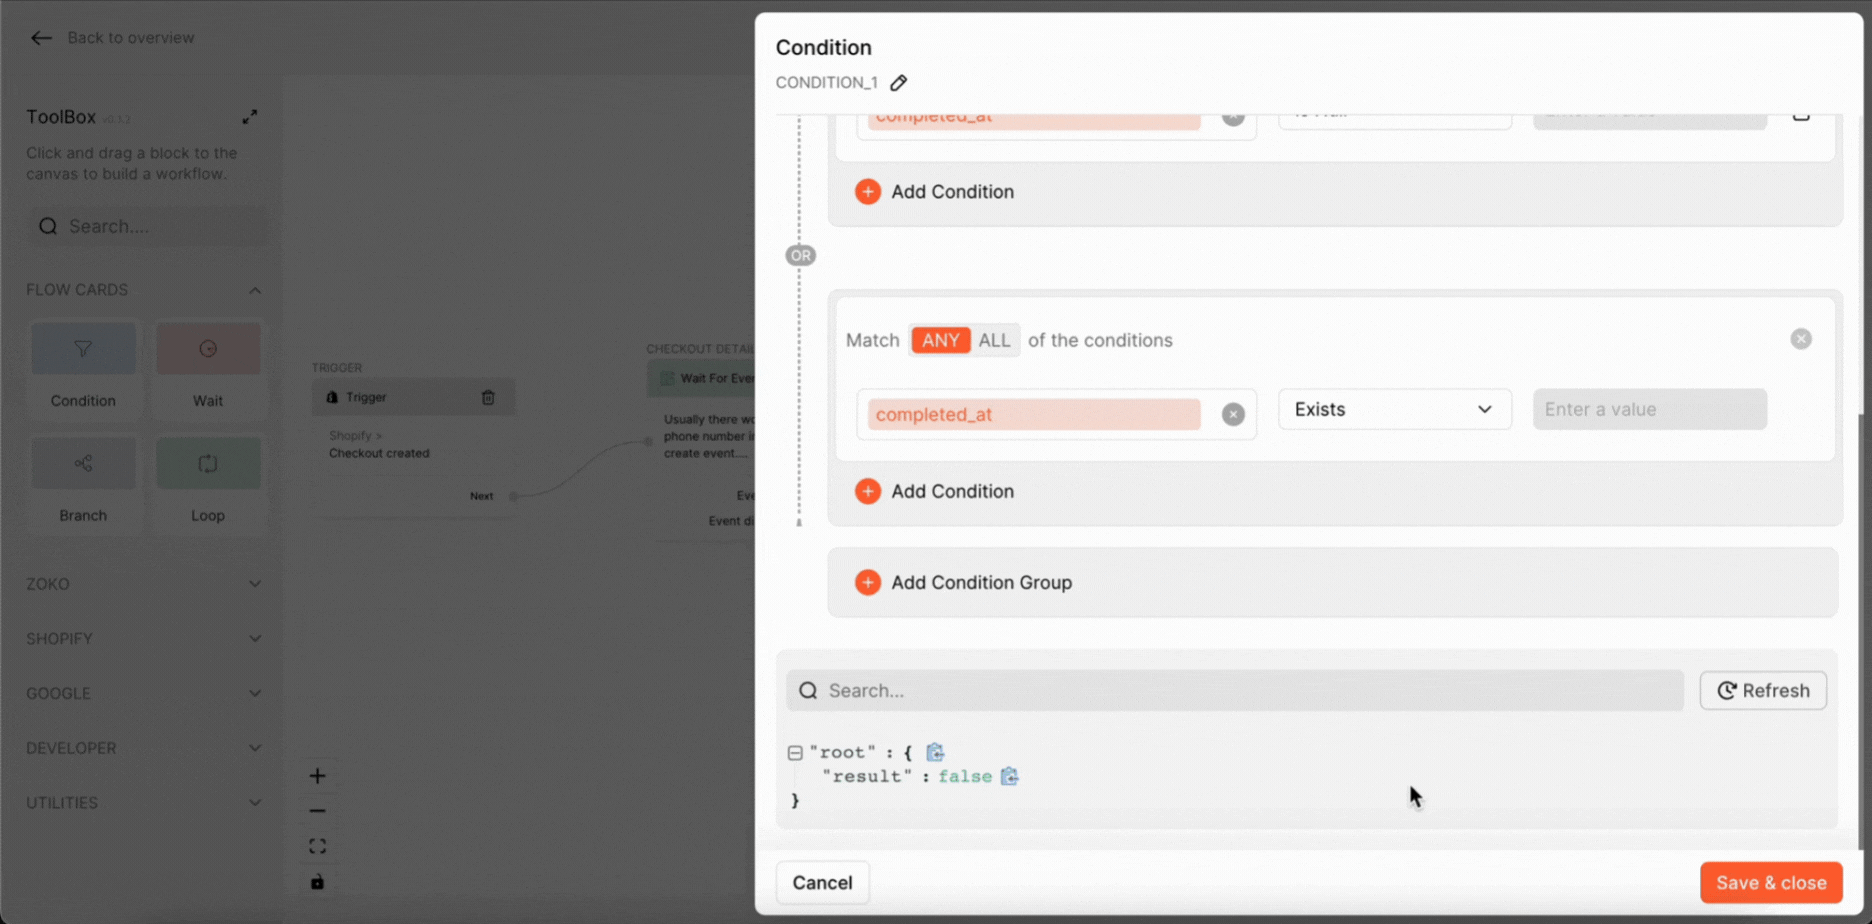
4. As you can see, the default condition is already set. You can customize it by clicking on the Condition node card.

5. In the properties, you can edit the conditions based on your requirements. Refer to our article, Setting up the Condition in the Flow.
6. Click Save & Close.
Once you have finished customizing the condition node, test your flow to ensure that it is working as expected.
Keywords: Customize conditions, Default playbook, Flow conditions, Add conditions.